Peanut Butter Chocolate No-Bake Bars Recipe
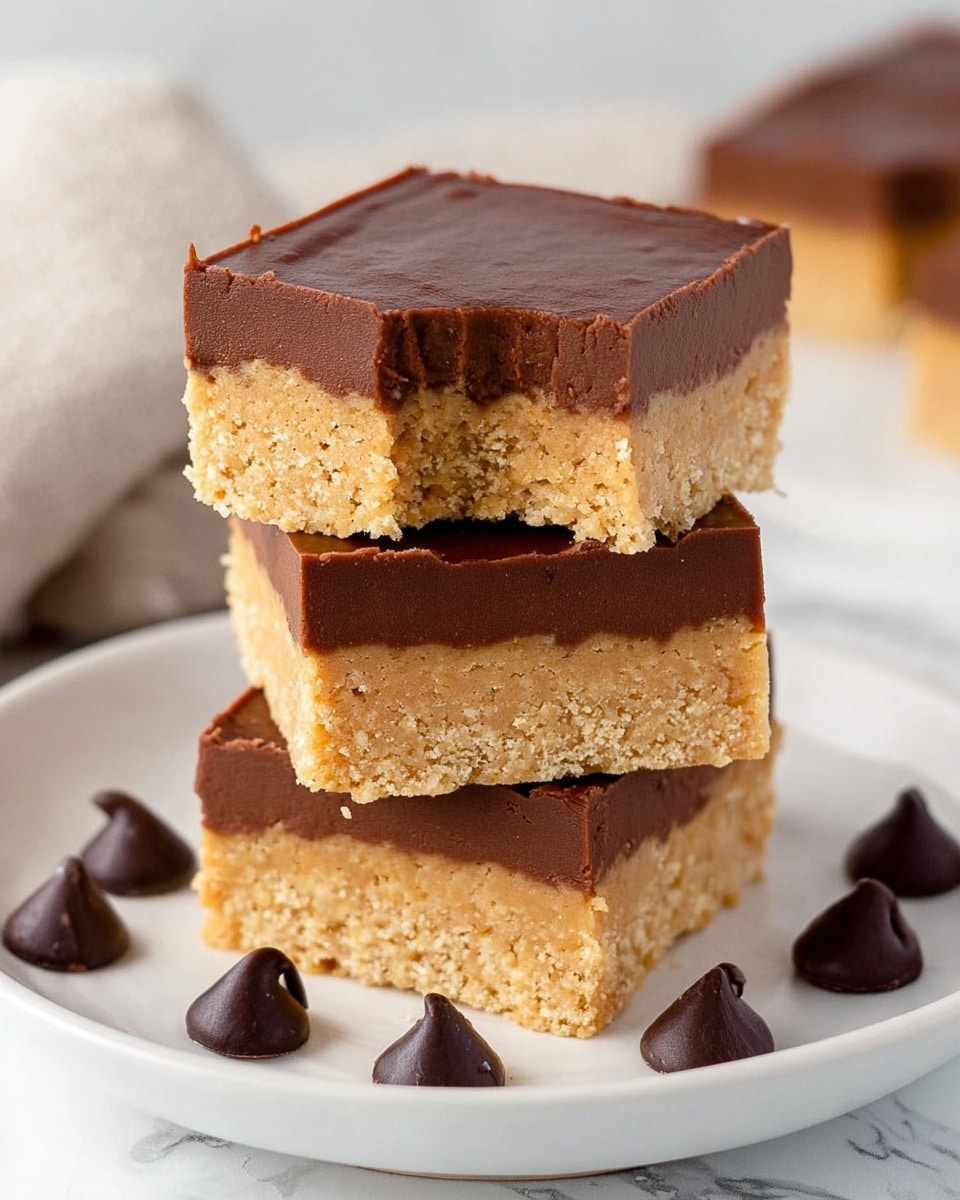
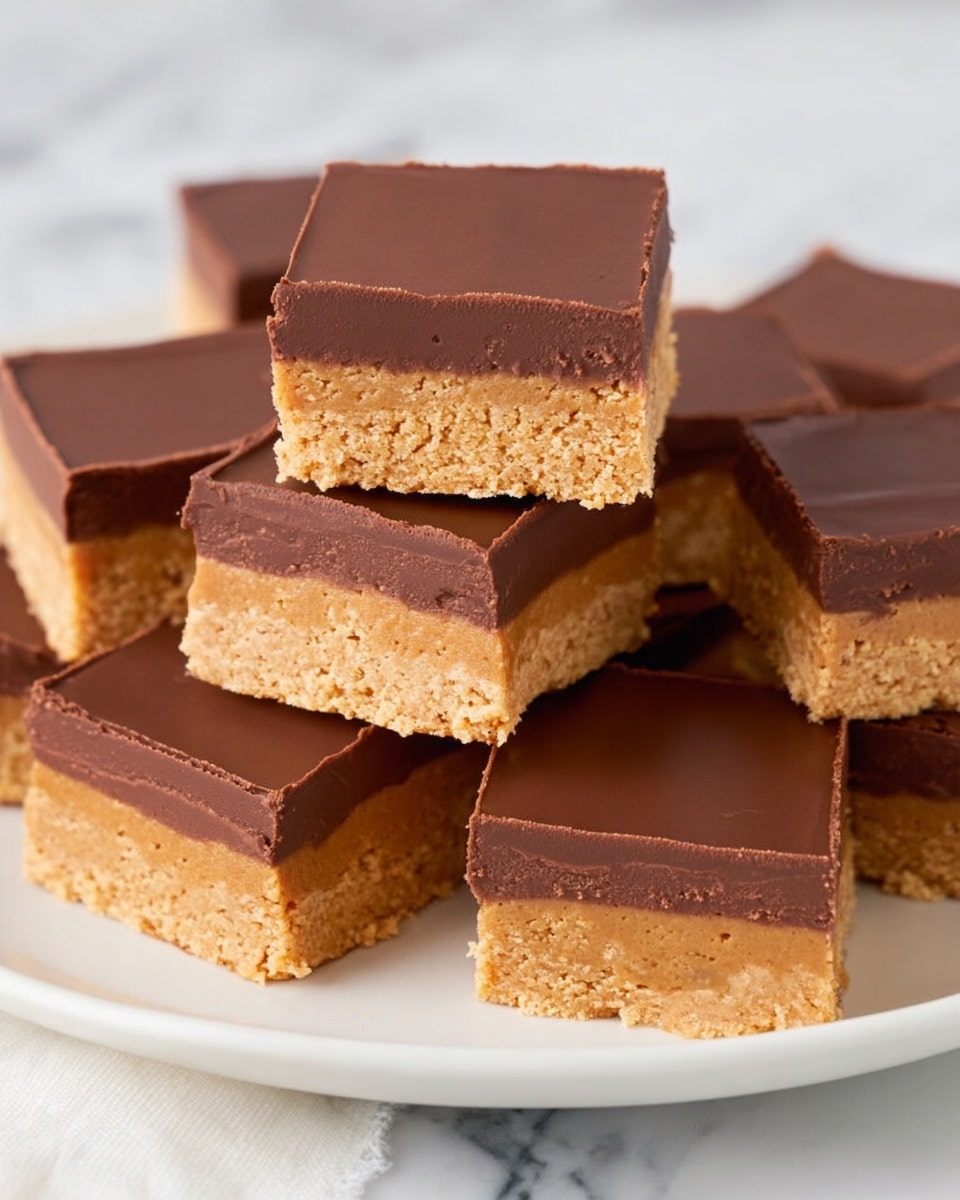
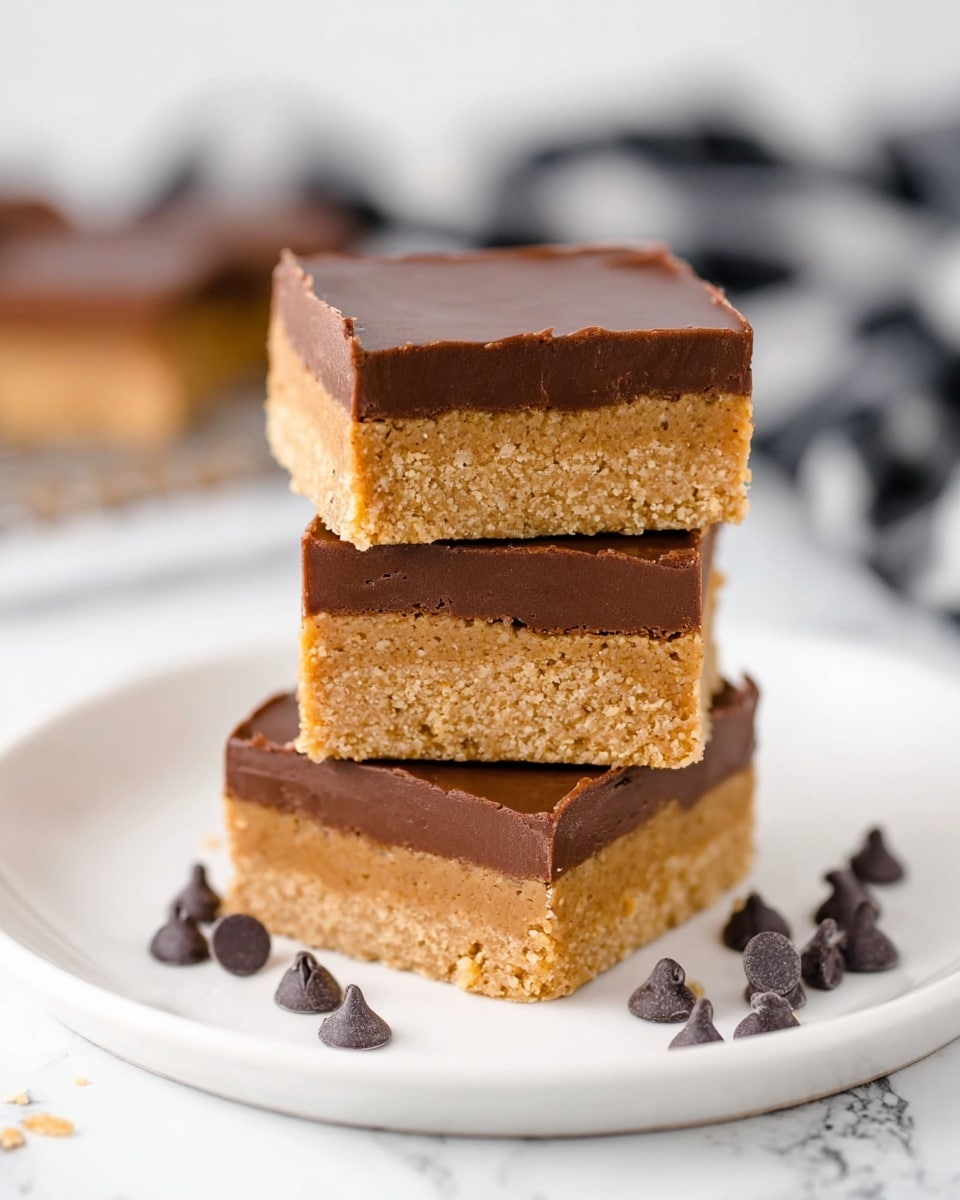
Let me tell you, this Peanut Butter Chocolate No-Bake Bars Recipe is one of those go-to treats that always hits the spot when you want something sweet but don’t feel like turning on the oven. It’s like a peanut butter and chocolate dream team coming together in a soft, chewy bar that’s perfect for afternoon snacks, potlucks, or just keeping in the fridge for whenever that craving strikes. I first made these bars on a whim for a last-minute party and everyone was begging me for the recipe — that’s how good they are.
What makes this Peanut Butter Chocolate No-Bake Bars Recipe truly special is how effortlessly delicious it comes together. You’re basically mixing a buttery peanut buttery base with smooth chocolate topping, then chilling it until it’s set — no baking stress involved. Plus, it’s super kid-friendly and great for when you want to whip up dessert without tons of prep. Trust me, once you try making these bars, you’ll want to keep the ingredients on hand for a quick sweet fix anytime.
Why This Recipe Works
- No-Bake Ease: No oven? No problem! You just mix, chill, and enjoy with minimal effort.
- Perfect Texture: The graham cracker base balances the creamy peanut butter and silky chocolate for a dreamy bite.
- Crowd-Pleasing Flavors: Peanut butter and chocolate is a classic combo that never fails to satisfy sweet tooths.
- Make-Ahead Friendly: You can prepare these bars in advance, making them great for busy days or gatherings.
Ingredients & Why They Work
The ingredients in this Peanut Butter Chocolate No-Bake Bars Recipe work beautifully together to create layers of flavor and texture without any fuss. You’ll find it’s easy to source everything and the simplicity means each element shines—especially the peanut butter and chocolate.
- Butter: Melted butter binds the graham cracker base and adds richness to every bite.
- Graham crackers: Crushed to create a crunchy, sweet foundation that pairs wonderfully with peanut butter.
- Powdered sugar: Adds sweetness and helps hold the bars together smoothly.
- Creamy peanut butter: The star of the show, gives the bars that irresistible nutty flavor and creamy texture.
- Semi-sweet chocolate chips: For the luscious chocolate topping that balances the peanut butter perfectly.
Tweak to Your Taste
I love tweaking this recipe depending on my mood or the crowd. Sometimes I’ll switch up the peanut butter for a different nut butter or sprinkle a little sea salt on top for that salty-sweet magic. Feel free to make it your own — these bars are forgiving and welcome creative touches.
- Crunchy Peanut Butter: I’ve tried using crunchy peanut butter instead of creamy, and it adds a lovely textural contrast in the bars.
- Nut-Free Option: Swap out the peanut butter for sunflower seed butter to accommodate allergies – it still tastes incredible.
- Chocolate Variations: Dark chocolate or bittersweet chips bring a richer, deeper flavor if you prefer less sweetness.
- Add-Ins: Toss in mini marshmallows or chopped peanuts for extra fun and texture.
Step-by-Step: How I Make Peanut Butter Chocolate No-Bake Bars Recipe
Step 1: Prep Your Pan & Mix the Base
Start by lining a 9×9 baking dish with parchment paper so your bars come out cleanly and are easy to slice. Then, melt your butter and, using a mixer (I prefer my handheld one for quick mixing), combine it with the powdered sugar and crushed graham crackers. This base will get a little crumbly but cohesive, setting the perfect stage for the peanut butter flavor.
Step 2: Incorporate the Peanut Butter
Mix in 1 ¼ cups of creamy peanut butter until the whole mixture comes together nicely. You want it just combined — don’t overwork it. Then, spread this peanut butter base evenly into your prepared pan. Give it a little press down with the back of a spatula to make an even layer.
Step 3: Make the Chocolate Topping
In a heat-safe bowl, combine the semi-sweet chocolate chips and remaining 3 tablespoons of peanut butter. Warm in the microwave in 30-second bursts, stirring really well each time to get a smooth and glossy chocolate-peanut butter mixture. Take your time here – this step sets the tone for that luscious top layer.
Step 4: Spread & Chill
Pour and spread the melted chocolate mixture over the peanut butter base in your pan. Once it’s nice and even, pop the whole thing into the fridge for at least one hour so it sets firm. After chilling, let the bars sit at room temperature for 10-15 minutes so they’re easier to cut and bring out the best texture.
Pro Tips for Making Peanut Butter Chocolate No-Bake Bars Recipe
- Even Crumbling: Crush your graham crackers finely but not to powder — a slight texture makes the bars interesting.
- Room Temperature Out: Always let the chilled bars soften slightly before cutting to avoid cracking.
- Chocolate Melting: Microwave in short bursts to prevent burning and keep chocolate silky smooth.
- Storage Tip: Keep bars refrigerated for best texture and to prevent melting, especially on warm days.
How to Serve Peanut Butter Chocolate No-Bake Bars Recipe
Garnishes
I often sprinkle a tiny pinch of flaky sea salt on top right after spreading the chocolate to give a subtle contrast that makes every bite pop. Sometimes, I toss on some chopped roasted peanuts for extra crunch and visual appeal — it’s a simple step but adds a nice touch.
Side Dishes
These bars are sweet and rich enough to stand alone, but they pair wonderfully with a cold glass of milk or a cup of freshly brewed coffee. If you’re serving at a get-together, some fresh fruit like sliced apples or berries balance the richness nicely.
Creative Ways to Present
For special occasions, I like to cut the bars into bite-sized squares and place them on a decorative platter with colorful liners. Another fun idea is layering them in a clear trifle bowl with whipped cream and layers of crushed nuts for an eye-catching dessert station.
Make Ahead and Storage
Storing Leftovers
I store leftover no-bake bars in an airtight container in the fridge, where they stay perfect for up to a week. Keeping them chilled not only helps maintain their shape but also preserves that fresh peanut butter flavor you want in each bite.
Freezing
Freezing works great too! I wrap the bars tightly in plastic wrap, then place them in a sealed freezer bag. They’re good for up to 2 months this way. When I want one, I thaw the bars in the fridge overnight for the best texture.
Reheating
Since they’re no-bake bars, reheating isn’t really necessary — but if you want a softer texture, you can let them sit at room temperature for 15 minutes or warm a single piece gently in the microwave for about 10 seconds. Just watch closely so you don’t melt the chocolate topping.
FAQs
-
Can I use crunchy peanut butter for this Peanut Butter Chocolate No-Bake Bars Recipe?
Absolutely! Crunchy peanut butter adds extra texture to your bars. It changes the smoothness slightly but gives a delightful crunch, which many people actually prefer. Just swap it in at the same quantity.
-
How long do these no-bake bars last?
When stored in an airtight container in the fridge, these bars stay fresh and delicious for up to one week. If you want to keep them longer, freezing is a great option and they’ll last a couple of months that way.
-
Can I substitute the graham crackers for something else?
Yes! If you don’t have graham crackers, you can use digestive biscuits, vanilla wafers, or even crushed pretzels for a salty twist. Just keep the quantity the same and crush them finely for the best texture.
-
Is it necessary to chill the bars for a full hour?
Chilling for about an hour lets the bars set properly, making them easier to slice and enhancing the texture. You can chill longer if needed, but less than 30 minutes may make the bars too soft to handle.
-
Can I make these bars vegan?
To make these bars vegan, use a plant-based butter substitute, vegan chocolate chips, and a nut butter that fits your diet. The texture will be similar, and you’ll still get that fantastic peanut butter chocolate combo.
Final Thoughts
This Peanut Butter Chocolate No-Bake Bars Recipe holds a special spot in my snack repertoire because it’s so simple yet always impressive. Whether I’m sharing with friends or just indulging a late-night craving, I know these bars won’t let me down. You’ll enjoy how quickly it comes together and how satisfying every bite is — give it a try next time you want something sweet without the fuss, and I’m pretty sure it’ll become one of your favorites too!
Print
Peanut Butter Chocolate No-Bake Bars Recipe
- Prep Time: 10 minutes
- Cook Time: 0 minutes
- Total Time: 1 hour 10 minutes
- Yield: 16 servings
- Category: Dessert
- Method: No-Cook
- Cuisine: American
Description
Delicious and easy-to-make Peanut Butter Bars with a crunchy graham cracker and powdered sugar base, topped with a smooth chocolate and peanut butter layer. Perfect for a sweet snack or dessert.
Ingredients
Base
- 3/4 cup butter melted
- 2 cups graham crackers crushed
- 2 cups powdered sugar
- 1 1/4 cup creamy peanut butter
Topping
- 2 1/2 cups semi sweet chocolate chips
- 3 tablespoons creamy peanut butter
Instructions
- Prepare Baking Dish, Line a 9×9 inch baking dish with parchment paper and set aside to prevent sticking.
- Mix Base Ingredients, Using a stand mixer or hand-held mixer, combine melted butter, powdered sugar, and crushed graham crackers until well blended.
- Add Peanut Butter, Mix in 1 ¼ cup creamy peanut butter just until fully incorporated into the base mixture.
- Spread Base, Evenly press the peanut butter mixture into the bottom of the prepared baking dish to form the base layer.
- Melt Chocolate Topping, In a heat-safe bowl, combine semi sweet chocolate chips with remaining 3 tablespoons creamy peanut butter. Heat in 30-second intervals, stirring thoroughly after each, until the mixture is smooth and melted.
- Apply Chocolate Layer, Spread the melted chocolate and peanut butter mixture evenly over the peanut butter base layer.
- Chill Bars, Refrigerate the bars for 1 hour to allow them to set firmly.
- Serve, Remove from fridge and let bars sit at room temperature for 10 to 15 minutes before slicing and serving for best texture.
Notes
- For easier slicing, let bars sit at room temperature before cutting.
- Use creamy peanut butter for smooth consistency; crunchy peanut butter may affect texture.
- Substitute semi sweet chocolate chips with milk or dark chocolate according to preference.
- Store bars in an airtight container in the refrigerator for up to one week.
- Can be cut into squares or bars as desired.
Nutrition
- Serving Size: 1 bar
- Calories: 280 kcal
- Sugar: 20 g
- Sodium: 120 mg
- Fat: 18 g
- Saturated Fat: 6 g
- Unsaturated Fat: 10 g
- Trans Fat: 0 g
- Carbohydrates: 25 g
- Fiber: 2 g
- Protein: 6 g
- Cholesterol: 30 mg

