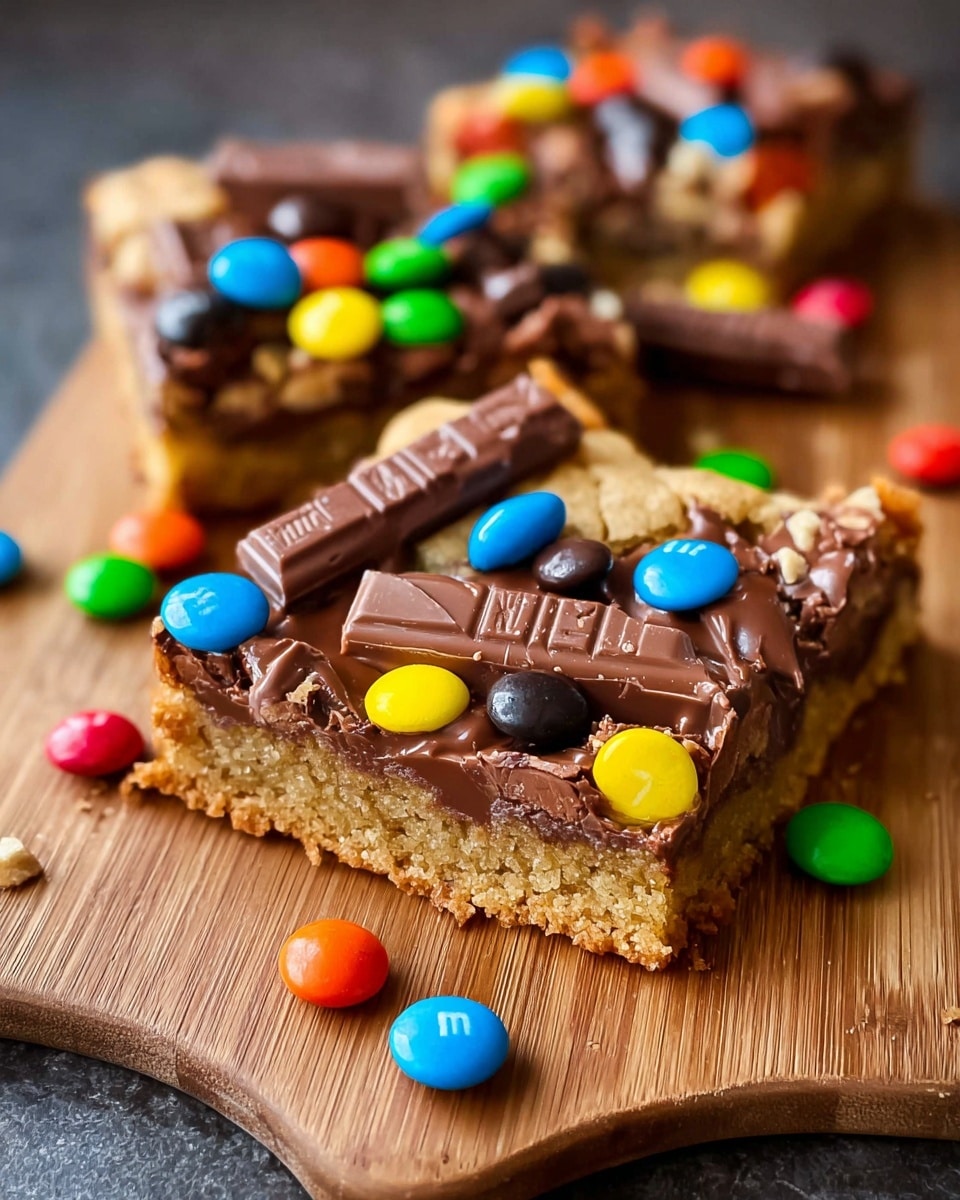
Candy Bar Cookie Bars Recipe
If you’re anything like me and have a borderline obsession with all things chocolate and cookie-dough-y, you’re going to LOVE this Candy Bar Cookie Bars Recipe. Think rich, buttery blondie-like cookie bars studded with your favorite chocolate candy bars inside and piled on top for an irresistible crunchy, melty, sweet experience. This recipe is one of those kitchen gems that never fails to deliver—perfect for a cozy afternoon treat, bake sales, or impressing friends without much fuss. Stick around, and I’ll walk you through all my favorite tips and tricks to get it just right!
Why This Recipe Works
- Perfectly Balanced Sweetness: The blend of brown and white sugar adds chewiness while keeping the bars just sweet enough without overpowering the chocolate chunks.
- Chunky Candy Bar Goodness: Mixing chopped candy bars inside and on top creates pockets of melty, crunchy delight in every bite.
- Simple, Foolproof Technique: Melting the butter and whisking the sugars together streamlines mixing and gives the bars a tender crumb that’s easy to cut.
- Versatility: Customizable with your favorite chocolate candy bars and easy to tweak for your own taste preferences.

Ingredients & Why They Work
When it comes to my Candy Bar Cookie Bars Recipe, each ingredient plays its role in making the texture chewy, flavorful, and totally delicious. Using both brown and white sugar might seem simple, but it brings out the perfect cookie bar flavor and texture every time. Plus, choosing the right candy bars can elevate this from good to unforgettable.

- Butter: Melted butter gives the cookie bars a tender, rich base with a slight caramelized flavor; melting it helps with quick mixing.
- Brown Sugar: Adds moisture and chewiness thanks to its molasses content, giving the bars a deep sweetness.
- White Sugar: Balances sweetness and contributes to a slight crispness around the edges.
- Egg: Binds everything together and adds moisture for a nice chewy texture.
- Vanilla Extract: Elevates the flavor with warm, sweet notes that complement the chocolate and sugars.
- Flour: Provides structure; I recommend all-purpose flour for the right balance.
- Baking Soda: Helps the bars rise slightly and maintain a perfect crumb without puffing up too much.
- Salt: Balances the sweetness and enhances all the flavors.
- Chocolate Candy Bars (chopped plus extra): The star of the show! Choose a mix of your favorites to add melt-in-your-mouth chocolatey pockets and crunchy topping.
Tweak to Your Taste
One of the best things about this Candy Bar Cookie Bars Recipe is how easy it is to make your own. I like to switch up the candy bars depending on the season or who I’m baking for—you really can’t go wrong. Don’t be shy about experimenting; it’s your sweet creation after all!
- Candy Bar Mixup: I once swapped out half the chopped candy bars for mini Reese’s peanut butter cups for a fun peanut-butter chocolate combo—so good!
- Healthier Swaps: If you want a slightly less sweet version, try using dark chocolate bars or caramel-free options.
- Nutty Additions: Toss in some chopped nuts like pecans or walnuts for crunch and added texture.
- Seasonal Flavors: Add a sprinkle of cinnamon or orange zest to complement holiday-themed candy bars.
Step-by-Step: How I Make Candy Bar Cookie Bars Recipe
Step 1: Melting Butter and Mixing Sugars
First, I melt the butter gently—microwave on low power or use a saucepan—to avoid splattering and burning. Once melted, whisk in both the brown sugar and white sugar vigorously for 2-3 minutes until totally smooth and glossy. This not only dissolves the sugars but also creates a silky base that makes these bars amazingly chewy.
Step 2: Adding Egg and Vanilla
Next, I crack in the egg and pour the vanilla extract, whisking until the mixture looks smooth again. This step is key—if you rush and don’t whisk well, the texture might feel uneven once baked.
Step 3: Adding Dry Ingredients
I gently stir in the flour, baking soda, and salt just until combined—overmixing here can toughen the bars. This light touch gives you a tender crumb without sacrificing structure.
Step 4: Folding in Chopped Candy Bars
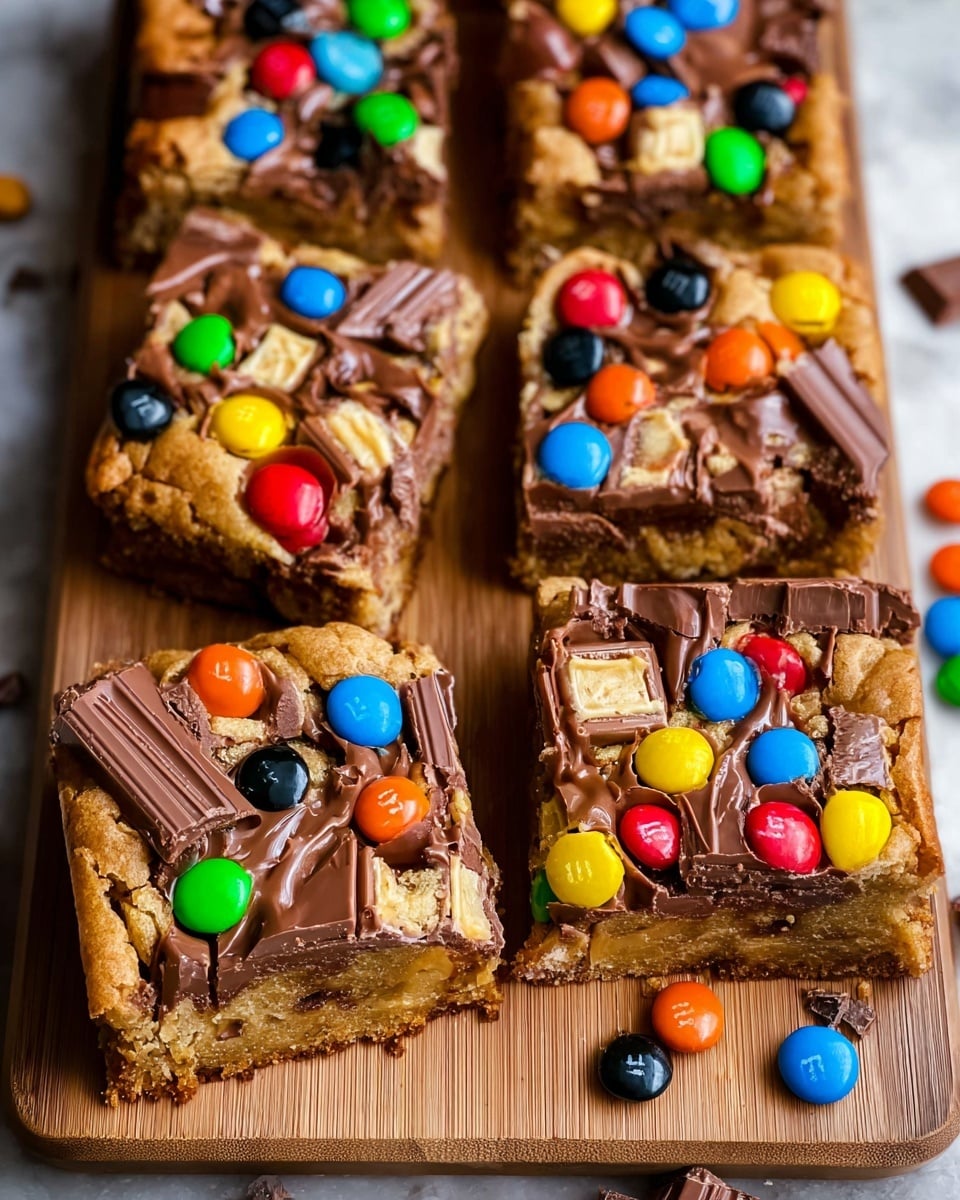
Now for the fun part! Fold in about a cup of your chopped candy bars, saving most for topping. This ensures every bite is bursting with chocolatey goodness. Be generous here because that candy chunk surprise is what makes this recipe stand out.
Step 5: Baking and Adding Toppings
I line an 8×8-inch pan with parchment paper—trust me, it makes removing and cutting these bars so much easier. Spread the batter evenly, then bake at 350°F (175°C) for 20-28 minutes until just lightly golden on top. Be careful not to overbake—you want that perfect chewy center! As soon as they’re out, I arrange the leftover candy bars on top. If you don’t want them to melt too much, wait 5 minutes before adding and pop the pan in the freezer right after.
Step 6: Cooling and Cutting
Once chilled, cut into squares using my go-to trick: pop the pan in the freezer for 20-25 minutes and slice the bars with a plastic knife. I know it sounds funny, but the plastic knife actually gives the cleanest cuts with the least crumb mess. It works wonders!
Pro Tips for Making Candy Bar Cookie Bars Recipe
- Gentle Melting: Melt your butter slowly at reduced microwave power or on low stovetop heat to avoid burning or splattering.
- Don’t Overbake: Pull the bars out right when the edges are golden but the center is still slightly soft—they firm up as they cool.
- Parchment Paper Magic: Line your pan! This simple step makes removing bars from the pan quick and saves the fragile edges from breaking.
- Use a Plastic Knife for Cutting: It glides smoothly without crumbling the bars, giving you picture-perfect slices every time.
How to Serve Candy Bar Cookie Bars Recipe
Garnishes
I usually keep garnishes simple for this recipe because the candy bars on top say it all. Occasionally, a light dusting of powdered sugar or a drizzle of melted chocolate adds a pretty finishing touch. I’ve also added a sprinkle of flaky sea salt for a salty-sweet contrast that’s unbeatable.
Side Dishes
These bars are pretty much dessert in themselves, but pairing them with a scoop of vanilla ice cream or a cup of strong coffee or milk really elevates the treat. For parties, I like serving them alongside fresh fruit to cut through the sweetness.
Creative Ways to Present
For special occasions or gift-giving, I arrange the Candy Bar Cookie Bars on decorative trays stacked in layers with parchment paper between. I’ve also wrapped individual bars in colorful wax paper tied with twine—always a crowd-pleaser at bake sales or as hostess gifts!
Make Ahead and Storage
Storing Leftovers
I store leftover Candy Bar Cookie Bars in an airtight container at room temperature for up to 4 days. If it’s warm or humid, I prefer the fridge to keep the candy bars nice and firm. Just bring them back to room temp before serving for the best flavor.
Freezing
Frozen Candy Bar Cookie Bars are a lifesaver! I freeze them in individual layers separated by parchment paper inside a sturdy container or freezer bag—ready to thaw for quick indulgence later. They freeze beautifully for up to 2 months without losing flavor or texture.
Reheating
I like to warm up leftover bars in the microwave for about 10-15 seconds to soften the chocolate and bring back that fresh-baked feel. Just be careful not to overheat or the candy bars might get too melty and sticky.
FAQs
-
Can I use any candy bars for this recipe?
Absolutely! One of the best parts of this Candy Bar Cookie Bars Recipe is how versatile it is with candy bar choices. Whether you prefer classics like Snickers or have a soft spot for Almond Joy or Kit Kat, just chop them up and toss them in. Mixing several types adds fun texture and flavor variety.
-
How do I prevent the candy bars on top from melting too much in the oven?
I’ve found the best way is to bake the cookie bars first, then add the candy bar pieces on top while the bars are still warm—not hot—and pop the whole pan into the freezer for a few minutes. This chills the candy and prevents them from completely melting, giving a perfect candy-cake hybrid texture.
-
Can I make these bars gluten-free?
Yes! Swap the all-purpose flour for a gluten-free blend that measures cup for cup the same, like Bob’s Red Mill 1-to-1 GF Flour. Just make sure your candy bars don’t have any gluten ingredients. The texture might be slightly different but still delicious.
-
What’s the secret to cutting clean bars?
Chilling is key. Pop the entire pan into the freezer for 20-25 minutes, then slice with a plastic knife. This simple hack prevents crumbling and gives you neat, Instagram-worthy squares every time.
Final Thoughts
This Candy Bar Cookie Bars Recipe holds a special place in my heart because it’s my go-to when I need a quick yet impressive dessert. Whether it’s a casual family snack or a last-minute party addition, it never disappoints with its gooey texture and chocolate bar surprises. I can’t wait for you to try it—you’ll be hearing ‘Can you make these again?’ nonstop!
Print
Candy Bar Cookie Bars Recipe
- Prep Time: 10 minutes
- Cook Time: 28 minutes
- Total Time: 38 minutes
- Yield: 16 servings
- Category: Dessert
- Method: Baking
- Cuisine: American
Description
Delicious and easy Candy Bar Cookie Bars made with melted butter, brown and white sugars, vanilla, and your favorite chopped chocolate candy bars, baked to a perfect golden brown and topped with more candy for an irresistible treat.
Ingredients
Cookie Base
- 1/2 cup Butter
- 1/2 cup Brown Sugar (packed)
- 1/2 cup Sugar
- 1 large Egg
- 2 teaspoons Vanilla Extract
- 1 1/4 cups Flour
- 1/2 teaspoon Baking Soda
- 1/4 teaspoon Salt
- 1 cup Chocolate Candy Bars (chopped plus more for the top)
Topping
- 1 to 1 1/2 cups Chocolate Candy Bars
Instructions
- Preheat Oven: Preheat your oven to 350 degrees Fahrenheit, preparing it for baking the cookie bars.
- Melt Butter: In a microwave-safe bowl, melt the butter carefully, reducing microwave power to avoid splatter. Alternatively, melt butter in a saucepan over low heat.
- Mix Sugars and Butter: Add brown sugar and sugar to the melted butter. Whisk or stir vigorously for 2-3 minutes until the mixture is smooth.
- Add Egg and Vanilla: Whisk in the egg and vanilla extract until the batter is smooth and homogenous.
- Combine Dry Ingredients: Stir in the flour, baking soda, and salt until just incorporated into the wet ingredients.
- Fold in Candy Bars: Gently fold in 1 cup of chopped chocolate candy bars, reserving extra pieces for topping later.
- Prepare Baking Pan: Line an 8 x 8-inch baking pan with parchment paper for easy removal and spreading, then spread the cookie dough evenly in the pan.
- Bake: Bake in the preheated oven for 28 minutes or until the cookie bars turn a light golden brown. Avoid overbaking to keep them moist.
- Prepare Topping: While baking, chop or slice your remaining chocolate candy bars into bite-size pieces or keep some whole based on preference.
- Add Toppings: After baking, place the candy pieces on top of the warm cookie bars. To prevent melting, wait 5 minutes after removing from oven before adding candy and immediately place bars in the freezer.
- Cool and Serve: Cut the bars into pieces once cooled and enjoy.
Notes
- You can use any chocolate candy bars you love like Twix, Kit Kat, Mini M&Ms, Reese’s Peanut Butter Cups, Milky Way, Snickers, Hershey Bars, and many others.
- For easier cutting, chill the cookie bars in the freezer for 20-25 minutes before slicing.
- A plastic knife works best for cutting clean bars that don’t crumble.
- Lining the pan with parchment paper allows easy removal and cleaner edges.
- Be careful not to overbake to keep cookie bars soft and chewy.
Nutrition
- Serving Size: 1 bar
- Calories: 250 kcal
- Sugar: 20 g
- Sodium: 150 mg
- Fat: 12 g
- Saturated Fat: 7 g
- Unsaturated Fat: 4 g
- Trans Fat: 0 g
- Carbohydrates: 30 g
- Fiber: 1 g
- Protein: 3 g
- Cholesterol: 35 mg


