Cauldron Cookie Cups Recipe
If you’re looking for a fun, festive treat that’s as delicious as it is adorable, you’ve got to try my Cauldron Cookie Cups Recipe. These little bites are perfect for Halloween parties, cozy movie nights, or anytime you want to add a bit of magic to your baking. Trust me, once you make these, they’ll quickly become a beloved favorite around your kitchen, just like they have in mine!
Why This Recipe Works
- Convenience: Using devil’s food cake mix simplifies the cookie dough, saving you time without sacrificing flavor.
- Fun Presentation: The mini muffin pan shapes the cups perfectly to hold luscious buttercream “potions.”
- Customizable Decorations: Sprinkles, eyeballs, and pretzel sticks add personality, making it a great interactive dessert.
- Balanced Texture: Crispy edges with soft centers paired with creamy frosting makes every bite heavenly.

Ingredients & Why They Work
This Cauldron Cookie Cups Recipe masterfully combines convenient store-bought cake mix with simple pantry staples, resulting in a rich, chocolatey cup that tastes homemade. The buttercream frosting adds the perfect creamy contrast and green food coloring brings the Halloween vibe to life.
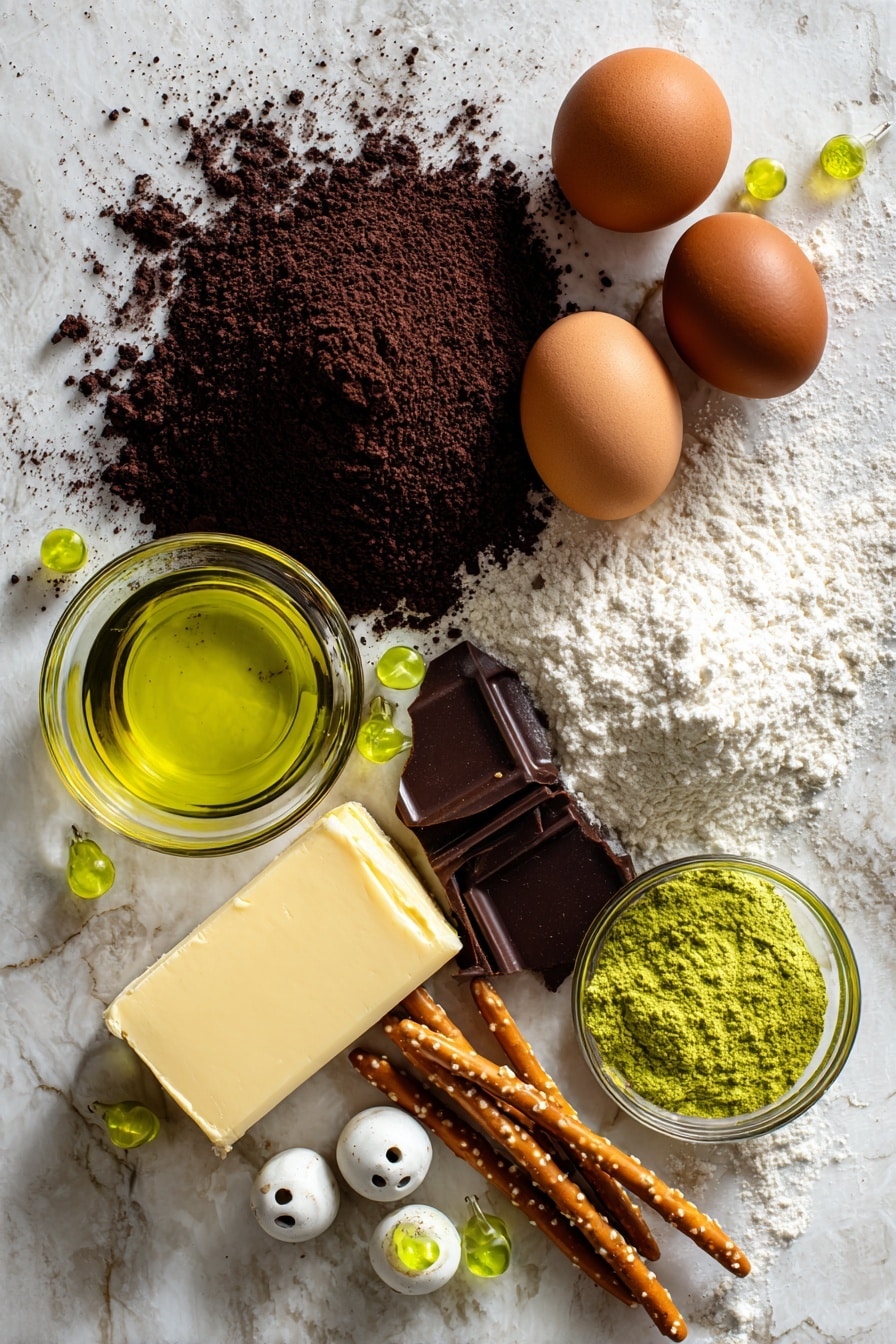
- Devil’s Food Cake Mix: Provides a deeply chocolate flavor that’s fudgy and moist; it’s an effortless way to build your cookie base without fuss.
- Eggs: Act as a binder and give structure to the cookie dough.
- Canola or Vegetable Oil: Keeps the cookies tender and adds moisture so they don’t dry out.
- Black Food Coloring (Optional): Adds a spooky, dark tone that’s perfect for the cauldron effect but you can skip it if you prefer a more traditional chocolate look.
- Unsalted Butter: The richness here is essential for that creamy, dreamy buttercream.
- Powdered Sugar: Sweetens and thickens the frosting without grittiness.
- Vanilla Extract: Brings warmth and depth to the frosting flavor.
- Salt: Balances the sweetness and enhances all the flavors.
- Milk: Adjusts the frosting consistency to be perfectly pipeable.
- Green Food Coloring: Gives the frosting that eye-catching witchy vibe.
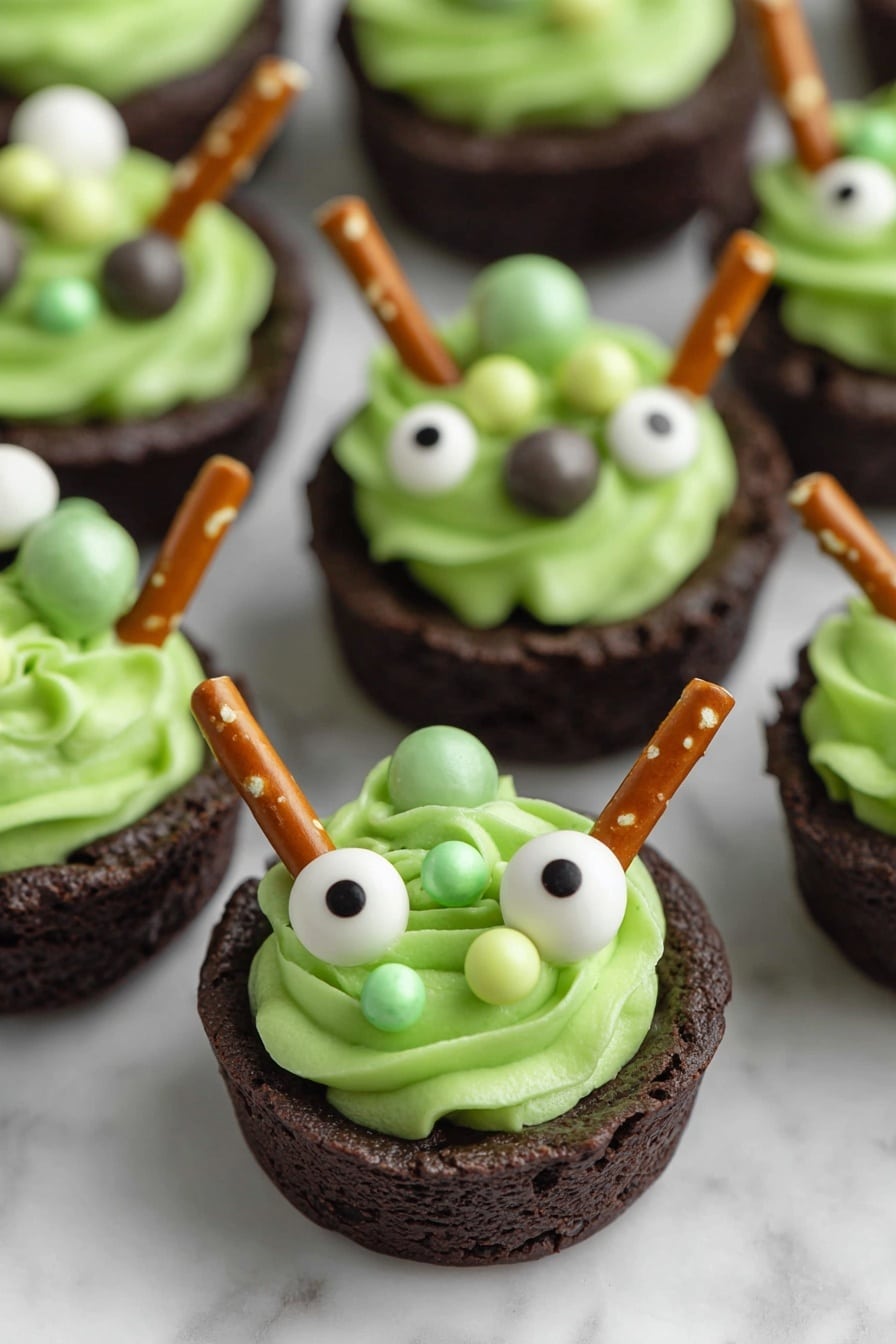
- Decorations (Sprinkles, Candy Eyeballs, Pretzel Sticks): The fun extras that make your cauldron cookie cups pop and bring out your creative side.
Tweak to Your Taste
I love how flexible this Cauldron Cookie Cups Recipe is. You can tweak the frosting color, swap sprinkles, or even use different cake mixes to match your mood or holiday theme. It’s all about having fun and making it your own!
- Variation: Once, I made a pumpkin spice version by using spice cake mix instead of devil’s food—so comforting and delicious, especially during fall!
- Dietary Modifications: You can try dairy-free butter and milk substitutes in the frosting for a vegan-friendly option; just be sure to check your decorating candies too.
- Seasonal Twists: Swap out green frosting for orange or purple to fit other holidays or birthday themes.
Step-by-Step: How I Make Cauldron Cookie Cups Recipe
Step 1: Prep Your Pans and Dough
First things first, preheat your oven to 350°F and lightly grease three 12-count mini muffin pans. This helps the cookie cups release easily after baking. Then, in a large bowl, combine your devil’s food cake mix, eggs, oil, and if you’re feeling festive, black food coloring. Mix until everything is beautifully blended with no dry pockets remaining.
Step 2: Form the Cookie Cups
Scoop about 1/2 tablespoon of dough into each mini muffin cup, then flatten it with your fingers to cover the bottom evenly but not too thin. This prevents holes while still leaving enough dough to form a nice cup shape. Bake for 8-10 minutes — you’re looking for edges to set, not fully crisp yet.
Step 3: Shape the Cauldrons
As soon as your cookies come out of the oven, press the back of a tablespoon measuring spoon gently into the center of each cookie. This indentation creates room for your frosting “potion.” It’s key to do this while cookies are warm to avoid cracking. Then let them cool completely before frosting.
Step 4: Whip Up the Frosting
While the cookie cups cool, beat your softened butter until creamy, then gradually add powdered sugar, vanilla, and salt. Add milk one tablespoon at a time until the frosting is smooth and pipeable. Mix in green food coloring until you get that perfect witchy shade. I like to use a piping bag for neat “bubbling” effects inside each cup.
Step 5: Decorate and Serve
Fill each cooled cookie cup with your green frosting potion. Then it’s time for the fun part: decorating! Sprinkle on round green sprinkles, candy eyeballs, and any spooky Halloween sprinkles you have on hand. Break pretzel sticks in half and insert one into each cup as a little stirring stick. Your cauldron cookie cups are ready to cast their delicious spell!
Pro Tips for Making Cauldron Cookie Cups Recipe
- Warm Indentation: Always press the cookie cup centers immediately after baking to avoid cracks and ensure easy filling.
- Don’t Overfill: Pipe your frosting just to the top to prevent spills that make your cups messy to handle.
- Use Parchment Paper for Cleanup: Line your baking sheets under the muffin pans to catch any drips for an easier cleanup.
- Check Bake Time Closely: Slightly underbaked cookie cups have softer, chewier centers—perfect for this recipe’s texture.
How to Serve Cauldron Cookie Cups Recipe
Garnishes
I usually top mine with green round sprinkles to mimic bubbling potion bubbles, candy eyeballs for that spooky vibe, and pretzel sticks as “stirring rods.” The sprinkles add texture and a burst of color that kids and adults both love. Honestly, I keep a small stash of Halloween-themed sprinkles for occasions like this—it’s so worth it!
Side Dishes
These cauldron cookie cups are a treat all on their own, but I like serving them alongside a big cup of warm cider or a rich hot chocolate. For a full spooky spread, add some pumpkin-shaped sugar cookies or your favorite caramel popcorn to round out the party vibe.
Creative Ways to Present
For Halloween parties, I’ve arranged these cookie cups on black slate platters with faux spider webs and mini candles. Another time, I lined them up on tiered dessert stands with small cauldron props for an enchanting display. If you’re making these for kids, consider adding tiny witch hats or paper flags as fun toppers.
Make Ahead and Storage
Storing Leftovers
If you have leftovers (and trust me, you might), store the cookie cups in an airtight container at room temperature for up to 3-4 days. This keeps the cookie crispiness intact while preserving the frosting texture. Avoid refrigerating if you want to keep them soft instead of hard.
Freezing
I’ve frozen undecorated cookie cups successfully for up to three months. Just freeze them flat on a baking sheet, then transfer to a freezer bag. When you’re ready, thaw completely before piping on your frosting and decorations so everything stays fresh and vibrant.
Reheating
These aren’t the kind of treats I usually reheat, but if you want the cookie softer, a few seconds in the microwave can help. Just be careful not to melt the frosting—remove decorations or frost after warming if needed. They’re lovely served at room temperature, anyway.
FAQs
-
Can I use a different cake mix for the Cauldron Cookie Cups Recipe?
Absolutely! While I love the rich flavor of devil’s food cake mix for this recipe, the fun part is you can experiment with spice, yellow, or even funfetti cake mixes to personalize the flavor and color of your cookie cups.
-
How do I prevent the cookie cups from cracking when making the indentation?
The secret is to press the indentation right after they come out of the oven while they’re still warm and pliable. Using the back of a tablespoon spoon, gently press—not too hard—to create the perfect divot without breaking the cup.
-
Can I make the frosting in advance?
Yes! You can make the buttercream frosting a day ahead and keep it covered in the fridge. Just bring it back to room temperature and give it a quick whip with a mixer before piping it into your cookie cups.
-
Are these cookie cups kid-friendly?
Definitely! Kids love decorating their own cauldron cookie cups with sprinkles and candy eyes, making this recipe a fun activity and treat rolled into one.
Final Thoughts
What I truly adore about this Cauldron Cookie Cups Recipe is how it brings a bit of whimsical magic to the everyday cookie. Baking these feels like a fun little ritual that turns any occasion into something special. Whether you’re baking with kids or surprising guests, these cookie cups are guaranteed to bring smiles around your table. So go ahead, whip up a batch, and make your treats delightfully spellbinding!
Print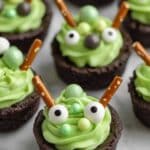
Cauldron Cookie Cups Recipe
- Prep Time: 20 minutes
- Cook Time: 10 minutes
- Total Time: 30 minutes
- Yield: 36 cookies
- Category: Dessert
- Method: Baking
- Cuisine: American
- Diet: Vegetarian
Description
Cauldron Cookie Cups are festive Halloween treats featuring rich Devil’s Food cake mix cookie cups filled with green buttercream frosting and decorated with spooky sprinkles, candy eyeballs, and pretzel stick stirrers. Perfect for Halloween parties or themed celebrations, these easy-to-make cookie cups combine soft cake-like texture with creamy, colorful frosting for a fun and delicious dessert.
Ingredients
Cookies
- 1 (15.25 ounce) box Devil’s Food cake mix
- 2 large eggs
- 1/2 cup canola or vegetable oil
- Black food coloring (optional)
Frosting
- 1 cup unsalted butter, softened
- 3 cups powdered sugar
- 1 teaspoon vanilla extract
- 1/2 teaspoon salt
- 1-3 tablespoons milk
- Green food coloring
Decorations
- Round green sprinkles
- Halloween sprinkles
- Candy eyeballs
- Pretzel sticks
Instructions
- Preheat the oven: Preheat your oven to 350 degrees Fahrenheit and lightly grease three 12-count mini muffin pans to prevent sticking.
- Make the cookie dough: In a large bowl, combine the Devil’s Food cake mix, eggs, canola or vegetable oil, and black food coloring if using. Mix until well combined to form a smooth dough.
- Form cookie cups: Scoop about 1/2 tablespoon of dough for each cookie and place it into each mini muffin cup. Flatten the dough slightly with your fingers to shape the cookie cups.
- Bake the cookies: Bake in the preheated oven for 10 minutes or until the edges are set. Immediately after removing from the oven, press an indentation into each warm cookie using the back of a 1 tablespoon measuring spoon to create a cup shape. Let the cookies cool completely in the pans.
- Prepare the buttercream frosting: While the cookies cool, beat the softened butter in a medium bowl until creamy. Gradually add powdered sugar, vanilla extract, and salt while continuing to beat until smooth. Add milk one tablespoon at a time until the frosting reaches a smooth and pipeable consistency. Mix in green food coloring until you achieve the desired shade.
- Fill the cookie cups: Using a piping bag or spoon, fill each cooled cookie cup with the green buttercream frosting, creating a bubbling potion effect.
- Decorate: Add round green sprinkles, Halloween-themed sprinkles, candy eyeballs, and broken pretzel sticks inserted into each cookie cup as a stir stick to complete the decoration.
- Serve: Serve the cauldron cookie cups immediately and enjoy your spooky treat!
Notes
- Store the cookie cups in an airtight container at room temperature for 3-4 days or refrigerate for up to one week.
- Undecorated cookie cups can be frozen for up to three months; thaw completely before frosting and decorating.
- Use black food coloring to intensify the spooky look of the cookie cups, but it is optional.
- If you prefer a thicker or thinner frosting, adjust the milk quantity accordingly for easier piping.
- Substitute pretzel sticks with thin licorice for a different stir stick option.
Nutrition
- Serving Size: 1 cookie
- Calories: 150 kcal
- Sugar: 15 g
- Sodium: 100 mg
- Fat: 8 g
- Saturated Fat: 4 g
- Unsaturated Fat: 3 g
- Trans Fat: 0 g
- Carbohydrates: 20 g
- Fiber: 1 g
- Protein: 1 g
- Cholesterol: 25 mg


