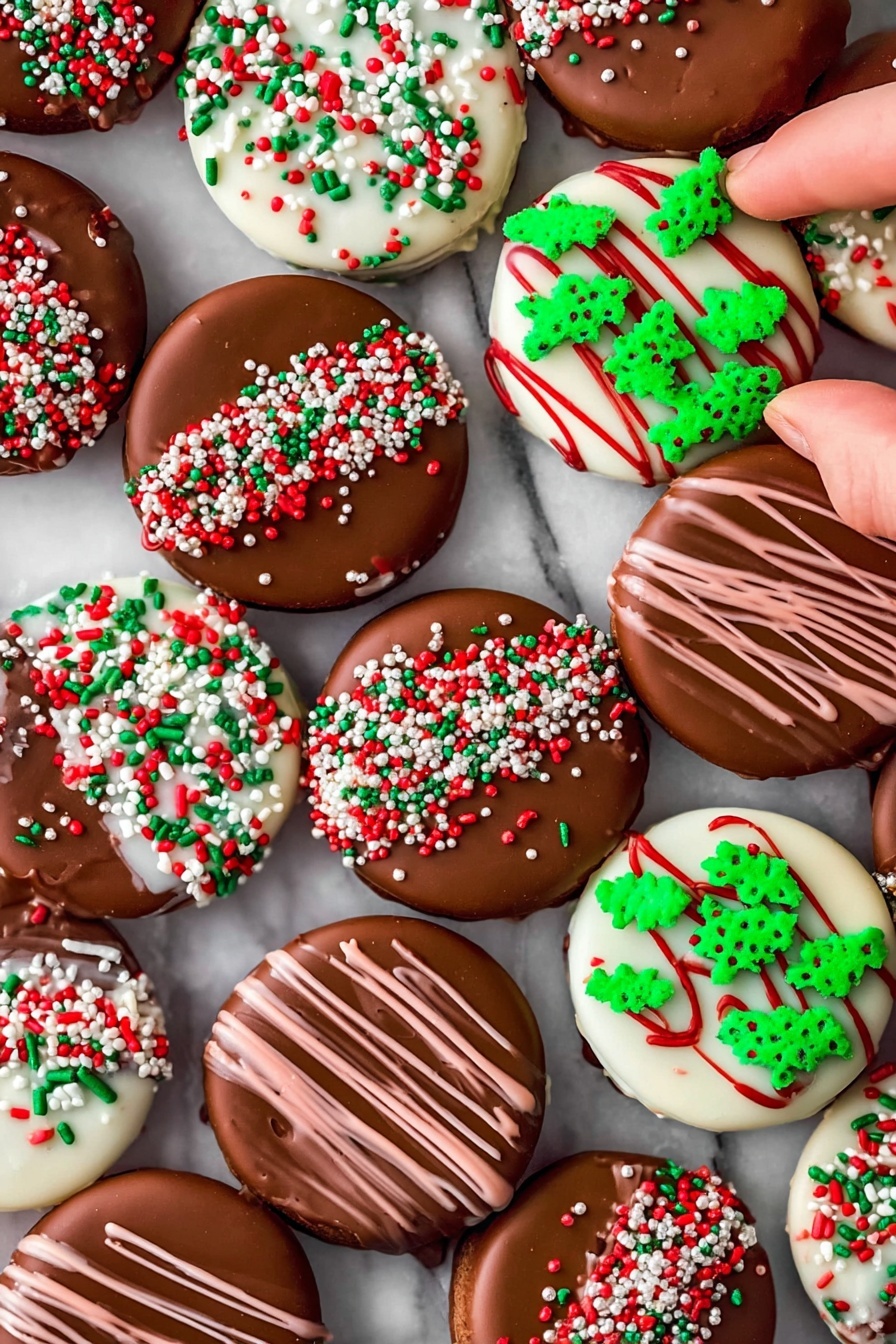
Christmas Chocolate Covered Oreos Recipe
If you’re looking for an easy, festive treat that’s sure to wow your friends and family this holiday season, you’ve got to try my Christmas Chocolate Covered Oreos Recipe. Imagine biting into that perfectly crunchy Oreo cookie, smothered in creamy, glossy chocolate, and decorated with the prettiest holiday sprinkles — it’s downright addictive. Seriously, making these is as fun as eating them, and I promise, if I can do it in my busy kitchen, you can too!
Why This Recipe Works
- Simple Ingredients, Stunning Results: Just a few pantry staples turn into beautiful, delicious treats anyone can make.
- Versatility in Flavor and Design: You choose your Oreos, chocolates, and sprinkles to make these uniquely yours.
- Perfect for Gifting and Parties: They look professional but take less than 90 minutes total.
- Chocolate Melting Tips Included: No guesswork needed to get that glossy, smooth finish every time.

Ingredients & Why They Work
The magic here is the combination of crunchy Oreos and rich, smooth chocolate melts that set just right — firm with a shine. Adding seasonal sprinkles makes them perfect for Christmas, while the option to double-dip in white chocolate adds that extra wow factor.
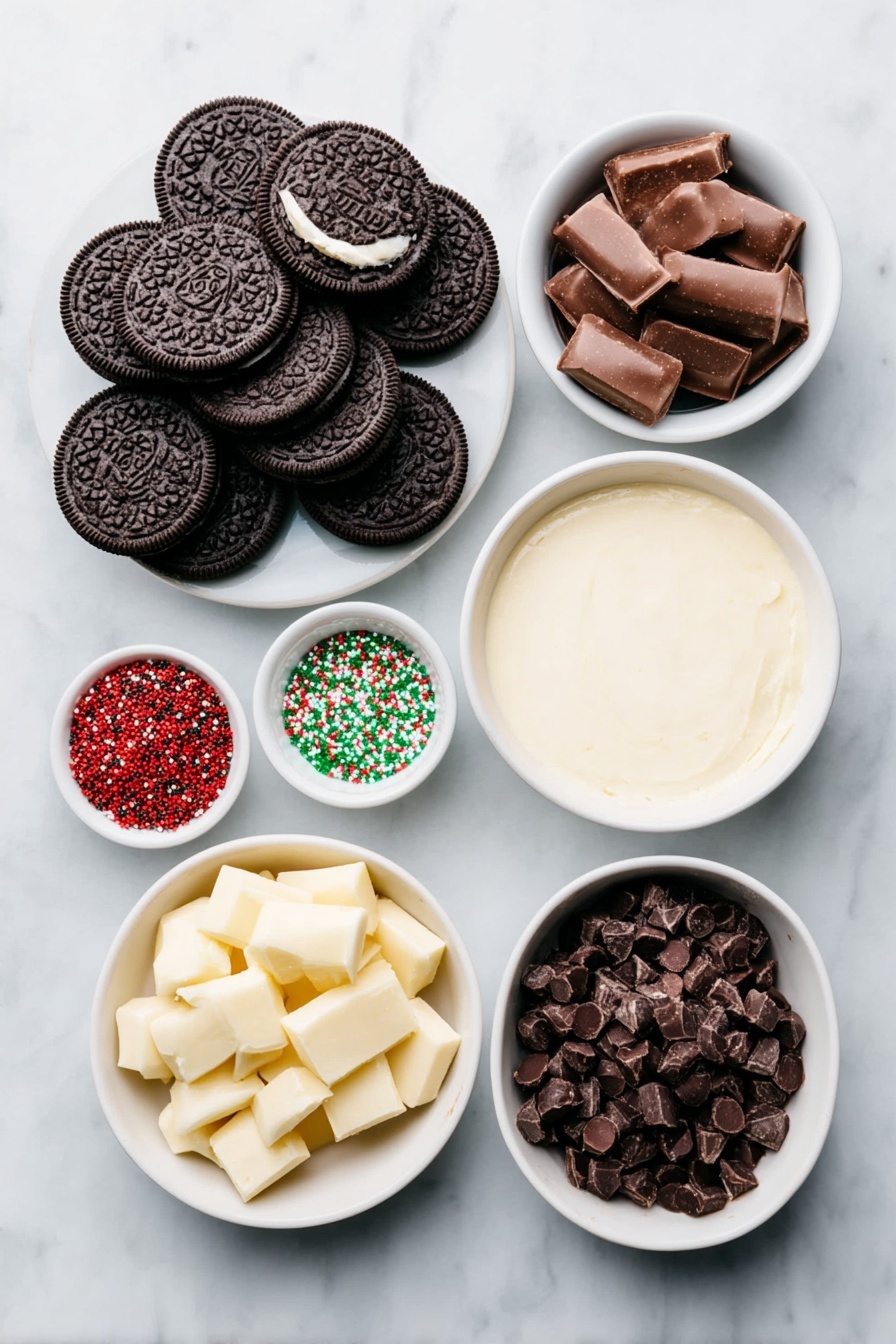
- Oreos: I love using mint Oreos at Christmas—it feels festive and kind of fresh, but classic or Double Stuf works just as well.
- Milk chocolate melts: These melt evenly and stay fluid longer than regular chocolate chips, making dipping a breeze.
- White chocolate melts (optional): Great for double-dipping or drizzling, adding festive colors and contrast.
- Christmas sprinkles: Adds texture and instant holiday cheer.
- Red and green food coloring (optional): Easy way to tint white chocolate for personalized, colorful details.
Tweak to Your Taste
I always encourage you to have fun with this recipe! Maybe you want extra mint flavor, use peppermint candy bits, or swap sprinkles for elegant edible gold dust. Play around with the chocolate combos too — I’m all for double-dipping half the cookies and leaving the others classic milk chocolate.
- Double Dipping: I love how the white chocolate layered with milk chocolate adds depth in taste and a festive look.
- Dietary Swaps: You can use dairy-free melts or vegan Oreos to fit special diets.
- Colorful Drizzles: Adding food coloring to white chocolate to pipe red and green swirls always scores compliments!
Step-by-Step: How I Make Christmas Chocolate Covered Oreos Recipe
Step 1: Melt the Chocolate Perfectly
Start by melting your milk chocolate in a microwave-safe bowl. I zap it for about 30 seconds, stir, then repeat in 15-second increments until silky smooth. Remember to stir after every burst to prevent scorching. If you’re going double-dip, melt the white chocolate separately, same approach. Using Ghirardelli melting wafers is a game-changer — they melt evenly and stay fluid long enough to do all the dipping and drizzling.
Step 2: Dip the Oreos and Decorate
Place a sheet of wax paper under a wire rack to catch drips. Using a fork, dip each Oreo into the milk chocolate, letting the excess drip off between the fork tines before gently placing it on the rack. If you’re double-dipping, let the milk chocolate side set fully, about 15-20 minutes at room temp, before dipping half of the cookie in white chocolate. While the chocolate’s still wet, sprinkle on your Christmas sprinkles to make each cookie unique and festive.
Step 3: Add Colorful Drizzles
If you want to jazz them up, mix a few drops of red or green food coloring into your melted white chocolate. Pop the colored chocolate into small plastic bags, snip a tiny hole at the corner, and drizzle over the cookies. This part is where your artistic side shines and kids especially love helping out!
Step 4: Let Them Set Just Right
Let your cookies cool at room temperature for about an hour until the chocolate is firm and glossy. I skip the fridge because chilling can dull the chocolate’s shine, and trust me, the beautiful glossy finish makes these irresistible. But if you’re short on time, a quick chill works too — just expect a bit less sparkle.
Pro Tips for Making Christmas Chocolate Covered Oreos Recipe
- Choose Quality Melting Wafers: Ghirardelli melting wafers give you a smooth finish and prevent the chocolate from becoming grainy.
- Patience Is Key: Let the milk chocolate fully set before double-dipping to avoid smudging your design.
- Use a Fork for Drips: It helps control the amount of chocolate and creates less mess on your wax paper.
- Avoid Refrigeration When Possible: Room temp drying keeps your chocolate shiny and keeps the taste vibrant.
How to Serve Christmas Chocolate Covered Oreos Recipe

Garnishes
I love topping mine with a mix of classic red and green sugar crystals plus tiny silver pearls for some sparkle. Sometimes, I toss in crushed candy canes for a refreshing crunch and peppermint pop — nothing screams Christmas quite like it!
Side Dishes
These Oreos pair wonderfully with a cozy cup of hot cocoa or peppermint mocha. For holiday parties, I serve them alongside a cheese and charcuterie board to balance sweet and savory flavors.
Creative Ways to Present
Try arranging them in festive shapes on platters — a Christmas tree made out of cookies stands out beautifully! Wrapping them individually in cellophane bags with a cute ribbon makes for instant grab-and-go gifts or party favors.
Make Ahead and Storage
Storing Leftovers
I store leftovers in an airtight container at room temperature — they stay delicious for up to two weeks. If you want to keep them longer, refrigeration is fine but expect the chocolate to lose a bit of its shine.
Freezing
I’ve frozen batches before, wrapping each cookie individually in plastic wrap and storing in a freezer-safe container. They last up to six months. Frozen cookies still taste great, but chocolate may look a little dull once thawed — no big deal if you’re saving them for a special occasion.
Reheating
No real reheating needed here, but if you prefer softer chocolate, just let frozen cookies thaw at room temperature for about 15 minutes. That’s it — no microwave or oven necessary!
FAQs
-
Can I use regular chocolate chips instead of melting wafers?
You can, but melting wafers like Ghirardelli’s are much easier to work with for dipping. Regular chocolate chips can seize or become grainy, especially white chocolate chips, which are more prone to clumping. For best results, stick with melting wafers.
-
How long do Christmas Chocolate Covered Oreos last?
Stored in an airtight container at room temperature, they last about two weeks. Refrigerated, they keep for a month, and frozen, up to six months. Just note that refrigeration and freezing can dull the chocolate’s shine but won’t affect taste much.
-
What’s the best way to get the chocolate shiny and smooth?
Using high-quality melting wafers and avoiding rapid chilling helps keep the chocolate glossy. Let your dipped Oreos set at room temperature rather than the fridge. Also, avoid over-stirring or overheating the chocolate to prevent graininess.
-
Can I decorate without sprinkles?
Absolutely! You can keep it simple with just the double-dip look or drizzle colored chocolate over the cookies for elegant swirls. Other fun toppings are crushed peppermint candy, edible glitter, or chopped nuts if you like texture.
Final Thoughts
I really hope you give this Christmas Chocolate Covered Oreos Recipe a try because it’s just so much fun — and quite honestly, a little show-stopping. Whether baking for a party, gift, or just because you need a chocolate fix, these treats deliver that perfect holiday feeling and taste. Plus, it’s such a joyful project to do with kids or friends over a cup of cocoa. Trust me, once you start dipping those Oreos and sprinkling colorful bits on top, you’ll be hooked. Happy baking and happy holidays!
Print
Christmas Chocolate Covered Oreos Recipe
- Prep Time: 15 minutes
- Cook Time: 0 minutes
- Total Time: 1 hour 15 minutes
- Yield: 36 servings
- Category: Dessert
- Method: No-Cook
- Cuisine: American
Description
Delight in festive Christmas Chocolate Covered Oreos, featuring mint or classic Oreos dipped in smooth Ghirardelli milk and white chocolate melts. Decorated with assorted Christmas sprinkles and optional colorful drizzles, these treats are perfect for holiday gatherings and gifting.
Ingredients
Main Ingredients
- 1 (15-ounce) package Oreos (mint, regular, or Double Stuf)
- 1 (10-ounce) package Ghirardelli milk chocolate melts
- 1 (10-ounce) package Ghirardelli white chocolate melts (optional for double-dipped cookies)
- Assorted Christmas sprinkles, as desired
- Red food coloring, optional
- Green food coloring, optional
Instructions
- Melt Milk Chocolate: In a medium microwave-safe bowl, melt the Ghirardelli Milk Chocolate Melting Wafers according to package directions until smooth.
- Melt White Chocolate (Optional): If planning to double dip, melt the Ghirardelli White Chocolate Melting Wafers separately in another medium microwave-safe bowl.
- Dip Oreos in Milk Chocolate: Place wax paper under a wire rack. Using a fork, dip each Oreo into the melted milk chocolate, letting excess drip through the fork tines, then place gently on the wire rack.
- Double Dip with White Chocolate (Optional): After the milk chocolate sets completely, pick up the cookie and dip half of it into the melted white chocolate for a double-dipped effect.
- Add Sprinkles: Sprinkle the cookies with assorted Christmas sprinkles immediately before the chocolate sets to ensure they stick.
- Decorate with Colored Drizzle (Optional): Tint the melted white chocolate with red and/or green food coloring to desired shades, transfer to small plastic baggies, snip the corners, and carefully pipe or drizzle over the cookies.
- Set the Chocolate: Allow the coated cookies to set at room temperature for about 1 hour until chocolate hardens. Avoid refrigerating to keep a glossy finish.
- Storage: Store cookies airtight at room temperature (up to 2 weeks), in the fridge (up to 1 month), or freezer (up to 6 months). Note that refrigeration or freezing may dull the chocolate’s shine.
Notes
- Milk chocolate melts are recommended over semi-sweet for a classic taste, but semi-sweet can be used if preferred.
- Double dipping options include full milk chocolate then half white, fully white chocolate, or white chocolate followed by half milk chocolate—any combination works well.
- Use chocolate candy melts or melting wafers for smooth, even melting and prolonged workability, especially Ghirardelli Milk and White Chocolate Melting Wafers.
- Avoid melting regular chocolate chips, particularly white chocolate chips, as they tend to seize and do not melt smoothly for dipping.
- For a shinier finish, allow chocolate to set at room temperature rather than refrigerating or freezing.
Nutrition
- Serving Size: 1 cookie
- Calories: 150 kcal
- Sugar: 14 g
- Sodium: 90 mg
- Fat: 9 g
- Saturated Fat: 5 g
- Unsaturated Fat: 3 g
- Trans Fat: 0 g
- Carbohydrates: 17 g
- Fiber: 1 g
- Protein: 1 g
- Cholesterol: 5 mg

