Delicious Apple Slab Pie Recipe
If you’re looking for a show-stopping dessert that brings all those cozy fall vibes and makes your kitchen smell like heaven, you’ve got to try this Delicious Apple Slab Pie Recipe. It’s one of those fantastic recipes that’s surprisingly easy but totally impressive—perfect for family gatherings, potlucks, or simply treating yourself on a weekend afternoon. The flaky, buttery crust paired with tender, spiced apples baked in a giant sheet pan is honestly one of the best ways to enjoy apple pie, especially if you want something a little different and shareable. Stick with me here, and I’ll walk you through every step to nail it perfectly!
Why This Recipe Works
- Perfect Balance of Flavors: The blend of cinnamon, nutmeg, and allspice highlights the natural sweetness of the apples without overpowering them.
- Buttery, Flaky Crust: The cold butter technique ensures a tender, flaky crust that holds up beautifully to the juicy filling.
- Easy Slab Format: Baking in a sheet pan means less fuss with individual pies and plenty of servings for a crowd.
- Make-Ahead Friendly: The dough can chill beforehand and the pie can be assembled a day ahead, making this a stress-free option for entertaining.

Ingredients & Why They Work
This Delicious Apple Slab Pie Recipe uses classic, approachable ingredients that come together to give you a tender, spiced apple pie in slab form. The crust ingredients are simple but all critical to achieving that perfect texture, and the apple filling’s spices add cozy warmth that’s just irresistible. When shopping, pick firm apples that are good for baking—Granny Smith, Honeycrisp, or Pink Lady all work great depending on how sweet or tart you like your pie.
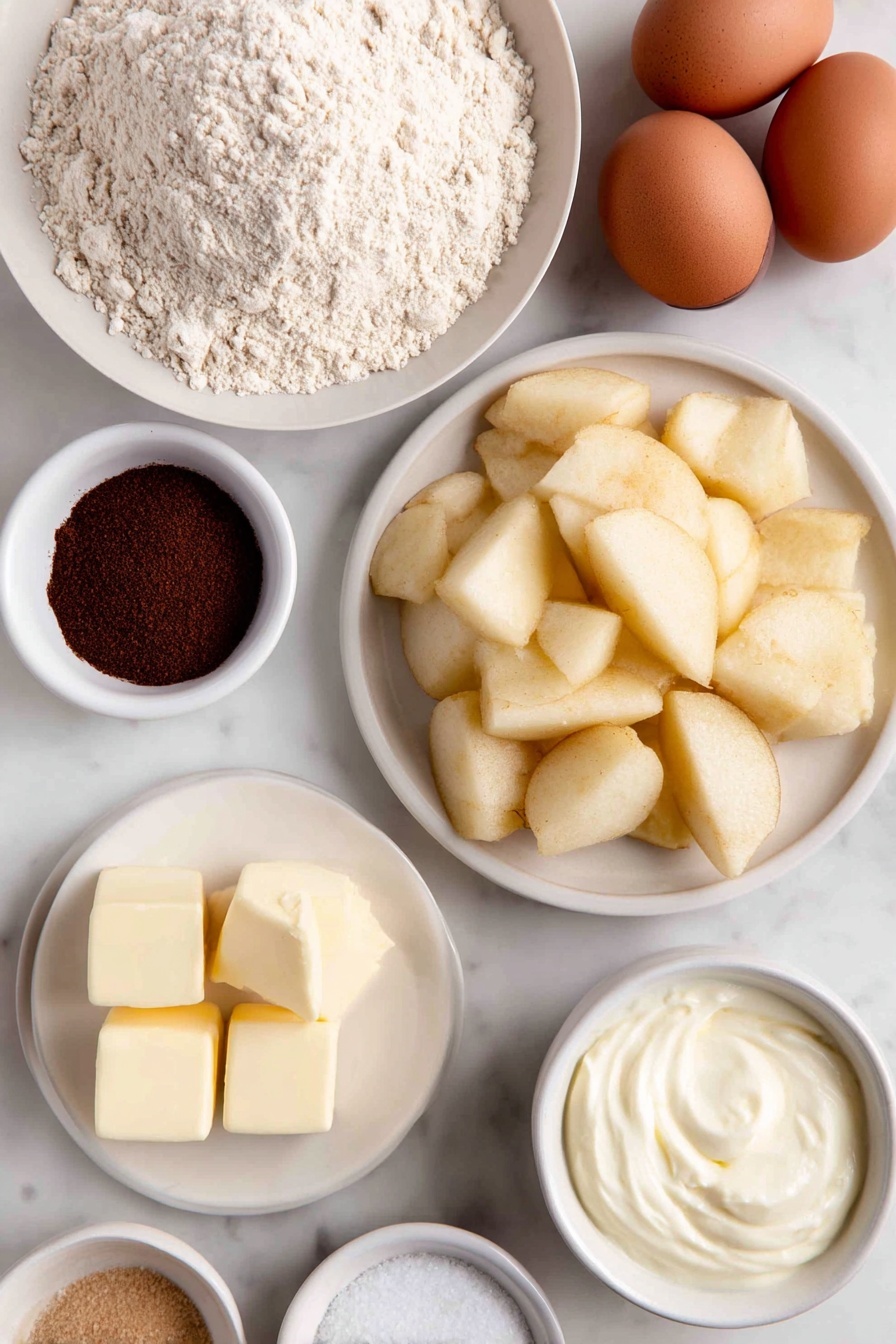
- All-purpose flour: The base of your flaky crust; using a good-quality flour helps with texture.
- Sugar: Used both in the crust for a slight sweetness and to sweeten the filling to taste.
- Salt: Enhances all the flavors and balances the sweetness.
- Unsalted butter: The secret to that flaky, tender crust—make sure it’s very cold!
- Very cold water: Helps bring the dough together without melting the butter.
- Apples: Peeled, cored, and chopped; a mix of tart and sweet apples works best.
- Lemon juice: Prevents the apples from browning and adds a fresh brightness.
- Cornstarch: Thickens the juicy apple filling so it’s not runny.
- Ground spices (cinnamon, nutmeg, allspice): Bring that classic warm apple pie flavor.
- Heavy cream or egg wash: Gives the crust a beautiful golden-brown finish.
Tweak to Your Taste
I love making this apple slab pie exactly as written, but it’s also super forgiving and easy to customize to what you love. Whether you want to try a different spice mix or swap out apples based on what’s fresh, a few tweaks can make it your own—and that’s part of the fun!
- Spice Variation: Sometimes I add a pinch of ground ginger or cardamom for an unexpected twist—my friends always ask what’s different about the pie!
- Dietary Modifications: You can swap regular sugar for coconut sugar or maple syrup if you want to try a less refined sweetness, and the crust can easily be made gluten-free with a 1:1 flour blend.
- Extra Texture: Adding chopped toasted pecans or walnuts to the filling before topping really ups the crunch quotient.
Step-by-Step: How I Make Delicious Apple Slab Pie Recipe
Step 1: Get the Crust Just Right
Start by measuring out your flour, sugar, and salt into a big bowl. Toss in your super cold, cubed butter and rub it into the flour using your fingers—this is my favorite part because you can really feel the texture changing as the butter breaks down just enough to get those pea-sized lumps that create flakiness. Stir in the cold water slowly until the dough just starts to come together into a soft ball. Don’t overwork it! This is key for a tender crust. Pop the dough into the fridge for at least 2 hours—you’ll want it as cold as possible to roll out beautifully later.
Step 2: Mix the Perfect Apple Filling
While the dough chills, peel and chop your apples into roughly ½-inch chunks and toss them with a good squeeze of lemon juice so they don’t brown. In a separate bowl, mix together the sugar, cornstarch, and warming spices. Sprinkle this over the apples and toss until everything is evenly coated. This mix thickens the juices and infuses that familiar apple pie warmth that really makes you hungry just thinking about it.
Step 3: Assemble Your Slab Pie Like a Pro
Preheat your oven to 375°F and line your sheet pan with parchment paper. Roll out the larger piece of dough on a floured surface into an 18×13-inch rectangle, then gently press it into the pan, letting the edges drape over. Chill the crust briefly while you roll the top crust to 16×11 inches. Pour your apple filling into the crust, then carefully lay the top crust over it. Trim and seal the edges firmly with your fingers. Brush the top with cream or egg wash for that gorgeous golden sheen, and don’t forget to cut plenty of 1-inch slits so all the steam can escape while baking.
Step 4: Bake and Then Practice Patience
Bake your slab pie for 40 to 45 minutes until the crust turns golden and you see the filling bubbling through the vents. This part is truly the hardest because your house smells so good! But trust me, letting it cool for at least 45 minutes is essential to keeping those apple juices in place when slicing. Cutting too soon will cause a gooey disaster on your plate, and you don’t want that.
Pro Tips for Making Delicious Apple Slab Pie Recipe
- Keep Everything Cold: Cold butter and water are non-negotiable for flaky, tender crust—chill your tools and ingredients when possible.
- Don’t Overfill: It may look like your pan is overflowing, but apples shrink a lot while baking—this recipe has the perfect amount of filling.
- Use Lots of Slits on Top: This prevents soggy crust by allowing steam to escape freely.
- Patience Is Key: Let your pie cool completely to firm up the filling for neat, clean slices—it’s worth the wait!
How to Serve Delicious Apple Slab Pie Recipe

Garnishes
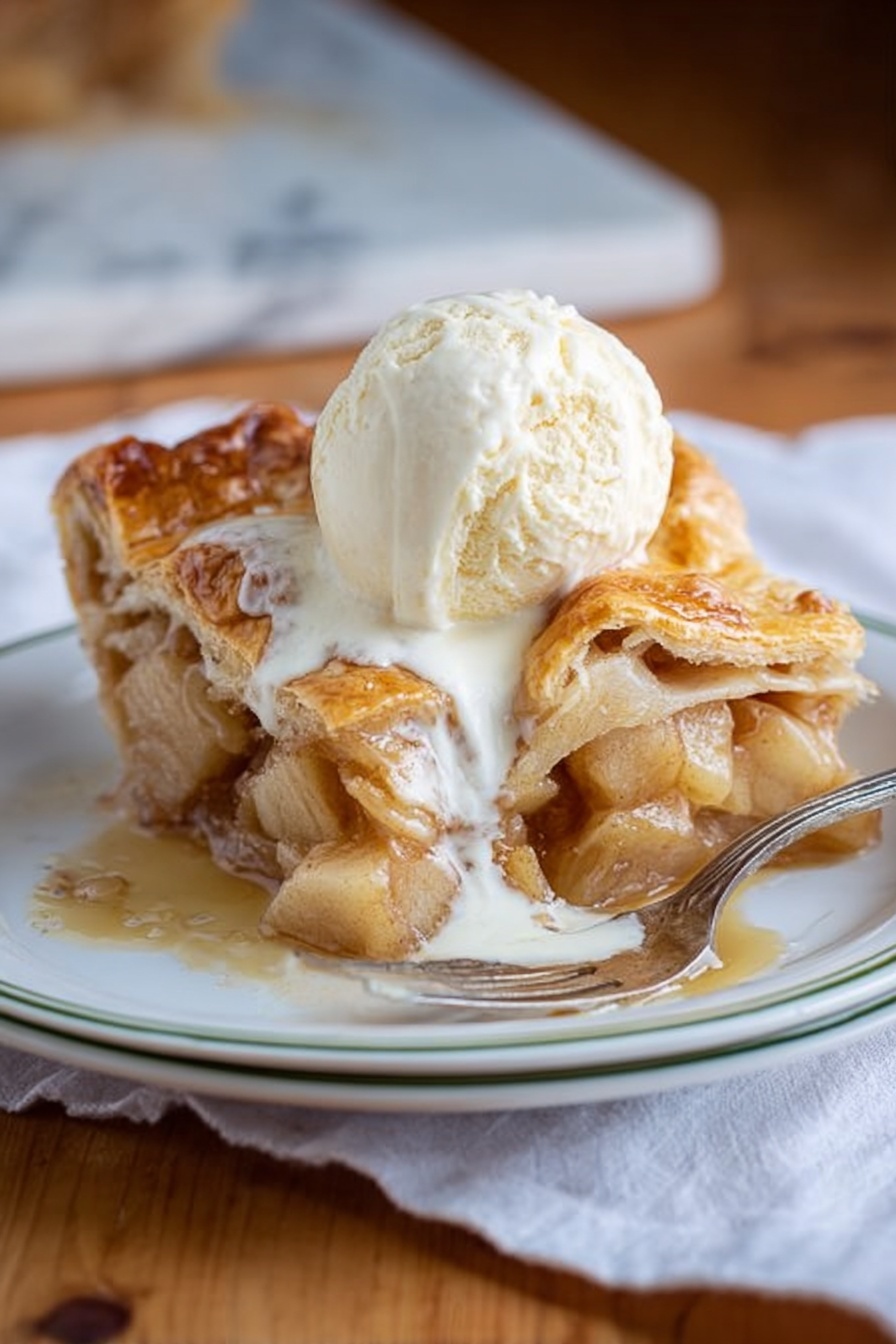
I love topping slices of this apple slab pie with a generous scoop of vanilla ice cream or a dollop of freshly whipped cream—both add creaminess that balances the warm spices perfectly. A sprinkle of toasted chopped pecans or a drizzle of caramel sauce can also elevate the presentation and flavor, making each bite feel extra special.
Side Dishes
When I’m serving this for a crowd, simple is best: a hot cup of coffee, sharp cheddar cheese (I know it sounds strange but it’s a classic combo with apple pie!), or even a glass of spiced cider complements the pie beautifully. For a cozy brunch, try pairing it with scrambled eggs or a mild, creamy cheese spread to balance the sweetness.
Creative Ways to Present
For special occasions, I’ll cut the slab pie into neat rectangles and serve it on a wooden board with small bowls of toppings—think caramel sauce, chopped nuts, and ice cream. You can even garnish with fresh herbs like a little mint or thyme for a pop of color that makes your dessert table pop. It’s a crowd-pleaser and looks stunning with minimal effort.
Make Ahead and Storage
Storing Leftovers
I usually cover leftovers with foil or plastic wrap and keep the slab pie at room temperature for the day if possible, as it tastes best fresh. If you’re storing it longer, refrigerate to keep the apples from getting too mushy, but bring slices back to room temp before serving for the best flavor.
Freezing
Yes, you can freeze this pie, though I recommend freezing before baking for best texture. Assemble the pie as usual, then wrap it tightly in plastic wrap and foil. Freeze for up to 3 months. When ready, bake it straight from frozen, adding about 10–15 minutes to the cook time.
Reheating
Reheat slices in a 300°F oven for about 15–20 minutes to warm through without drying out the crust. A quick zap in the microwave works in a pinch, but you’ll lose some of the crispness that makes this slab pie so fantastic.
FAQs
-
Can I use a store-bought pie crust instead of making my own for this Delicious Apple Slab Pie Recipe?
Absolutely! Using store-bought crust is a great shortcut if you’re short on time. Just make sure it’s large enough to fit your sheet pan, and you might want to add a little extra egg wash for that golden finish. Keep in mind that homemade crust tends to be flakier and richer, which really elevates this recipe, but the filling and flavors will still shine.
-
What apples work best in this Delicious Apple Slab Pie Recipe?
Firm apples like Granny Smith, Honeycrisp, Braeburn, or Pink Lady hold their shape well during baking and provide a nice balance between tart and sweet. I usually mix a couple of types to get that perfect depth of flavor and texture—just avoid super soft or mealy varieties as they’ll turn mushy.
-
Can I make this Delicious Apple Slab Pie Recipe in a different size pan?
Yes! The recipe is quite forgiving. If your pan is a bit smaller or bigger than 10×15 inches, don’t worry. You might have some extra dough for a small tart or you may need to adjust the thickness of the crust and apples slightly, but overall it’ll still turn out wonderfully.
-
Why does the recipe recommend waiting to slice the pie?
Patience here really pays off! The filling needs time to set after baking. If you slice too soon, the juices are still hot and runny, making a mess on your plate. Allowing the pie to cool for at least 45 minutes firms up those juices so your slices hold together beautifully.
Final Thoughts
Honestly, this Delicious Apple Slab Pie Recipe is one of my all-time favorites because it’s perfect for feeding a crowd, feels like a warm hug in dessert form, and isn’t intimidating at all to make. Whether it’s a chilly fall day or a casual family dinner, this slab pie lights up the table and hearts. I hope you have as much fun making and eating it as I do—don’t forget to let that pie cool before slicing, and definitely save room for seconds!
Print
Delicious Apple Slab Pie Recipe
- Prep Time: 45 minutes
- Cook Time: 45 minutes
- Total Time: 4 hours 15 minutes
- Yield: 18 servings
- Category: Dessert
- Method: Baking
- Cuisine: American
Description
This Apple Slab Pie is a large, rustic dessert perfect for gatherings, featuring a buttery, flaky crust and a spiced apple filling. The pie is baked in a jelly roll pan, creating a thick layer of tender apples encased in a golden crust, ideal for serving a crowd.
Ingredients
For the crust:
- 3 ¾ cups all-purpose flour (470 grams)
- 1 ½ tbsp sugar
- 1 ½ tsp table salt
- 3 sticks unsalted butter, cubed and kept very cold (12 oz or 340 grams)
- ¾ cup very cold water
For the apple filling:
- 4 pounds apples, peeled, cored and chopped into approximately ½-inch chunks (about 10 cups)
- Squeeze of lemon juice
- ¾ cup sugar
- 3 tbsp cornstarch
- 1 rounded tsp ground cinnamon
- ¼ tsp ground nutmeg
- ¼ tsp ground allspice
- ⅛ tsp table salt
To finish:
- 2 tbsp heavy cream or 1 egg beaten with 1 tbsp water
Instructions
- Make the crust: Measure the flour into a large, wide bowl and whisk in the sugar and salt. Toss in the cold butter cubes and coat them with flour. Using fingers, knives, or a pastry blender, mash the butter into smaller pea-sized pieces until the mixture is uniform and crumbly. Stir in ½ cup cold water gradually with a spatula until dough starts to come together, adding remaining water tablespoon by tablespoon if needed. Bring dough into a soft ball, divide into two pieces (one slightly larger), shape into rectangles about 1-inch thick, wrap in plastic wrap, and chill for at least 2 hours.
- Prepare the filling: In a large bowl, toss chopped apples with lemon juice. In a separate bowl, combine sugar, cornstarch, cinnamon, nutmeg, allspice, and salt. Sprinkle this mixture over the apples and toss well to coat evenly. Set aside.
- Preheat and line the pan: Heat the oven to 375° F. Line a 10×15×1-inch jelly roll pan with parchment paper. Roll out the larger dough piece on a floured surface into an 18×13-inch rectangle. Transfer to the pan, draping edges over the sides gently pressing into corners. Chill the pan with dough in the fridge or freezer while you roll out the second dough piece into a 16×11-inch rectangle.
- Assemble the pie: Remove pan from fridge/freezer. Pour the apple filling including juices onto the bottom crust. Drape the second dough rectangle over the apples. Trim edges to leave about ¾-inch overhang, then fold and seal the edges tightly with fingers.
- Finish and bake: Brush the top crust with heavy cream or egg wash. Using a sharp knife, cut multiple 1-inch slits in the top crust to allow steam to escape. Place the jelly roll pan on a larger baking sheet to catch any overflow. Bake for 45 minutes or until the crust is golden brown and filling bubbles through the slits.
- Cool before serving: Let the pie cool on a wire rack for at least 45 minutes before cutting to prevent a soggy mess and to allow filling to set properly. Serve slightly warm or at room temperature.
Notes
- Allow pie to cool almost completely before serving for best texture and to avoid messy slices.
- This pie is best enjoyed on the day it is baked but can be made a day ahead and stored covered at room temperature or in a cool place.
- If made in advance, reheat at 300° F for about 20 minutes and optionally broil for a few minutes to crisp the top crust, watching carefully to prevent burning.
- Pie assembly (up to placing top crust) can be done one day in advance; keep assembled but unbaked pie in the fridge until ready to bake.
Nutrition
- Serving Size: 1 slice (1/18th pie)
- Calories: 350 kcal
- Sugar: 24 g
- Sodium: 200 mg
- Fat: 18 g
- Saturated Fat: 11 g
- Unsaturated Fat: 6 g
- Trans Fat: 0.5 g
- Carbohydrates: 45 g
- Fiber: 3 g
- Protein: 3 g
- Cholesterol: 45 mg


