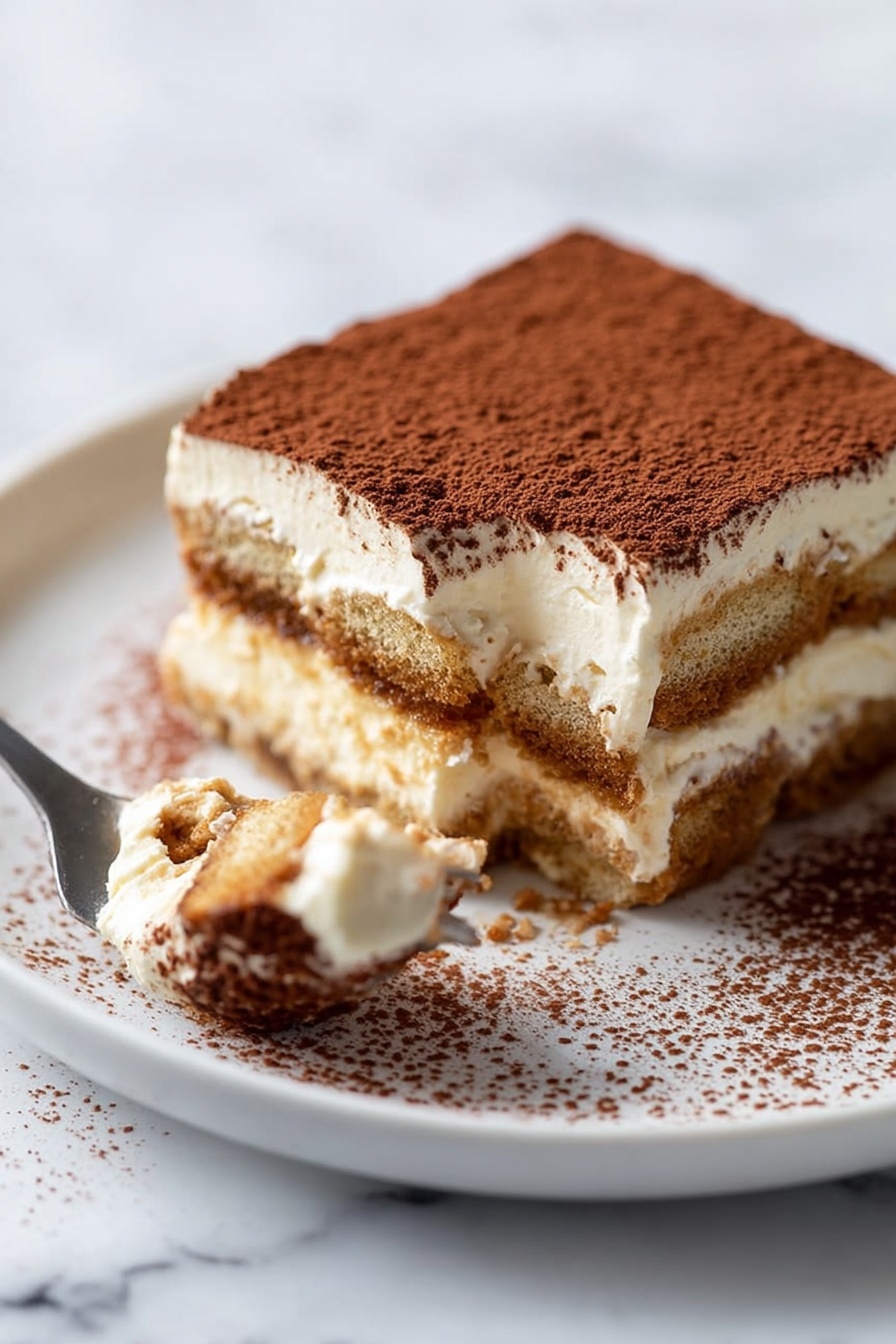
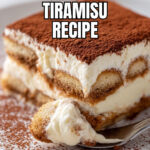
Easy Classic Tiramisu Recipe
If you’ve ever wanted to impress your friends or family with a dessert that feels fancy but is actually surprisingly simple to pull off, I’ve got you covered. This Easy Classic Tiramisu Recipe is my go-to when I want something indulgent, silky, and just delicately boozy—but with minimal fuss. Trust me, once you get the hang of it, you’ll want to make this all the time, whether it’s for a casual weekend treat or a special celebration!
Why This Recipe Works
- Simple Ingredients, Big Flavor: Classic mascarpone, rich espresso, and just a touch of liquor make every bite heavenly without complicated additions.
- Safety First with Eggs: We gently cook the egg yolks in a double boiler to avoid any risk of scrambling or raw texture, delivering smooth, safe custard every time.
- Perfect Texture Harmony: Folding in softly whipped cream creates that dreamy, airy consistency that’s light yet luxuriously creamy.
- Stay-Ahead Friendly: This tiramisu gets better with time and can chill overnight, making it a perfect make-ahead dessert.

Ingredients & Why They Work
Each ingredient has its own personality that, when combined, creates that unmistakable tiramisu magic. Plus, a few tips on how to choose the right ones will help ensure your Easy Classic Tiramisu Recipe turns out perfectly every time.
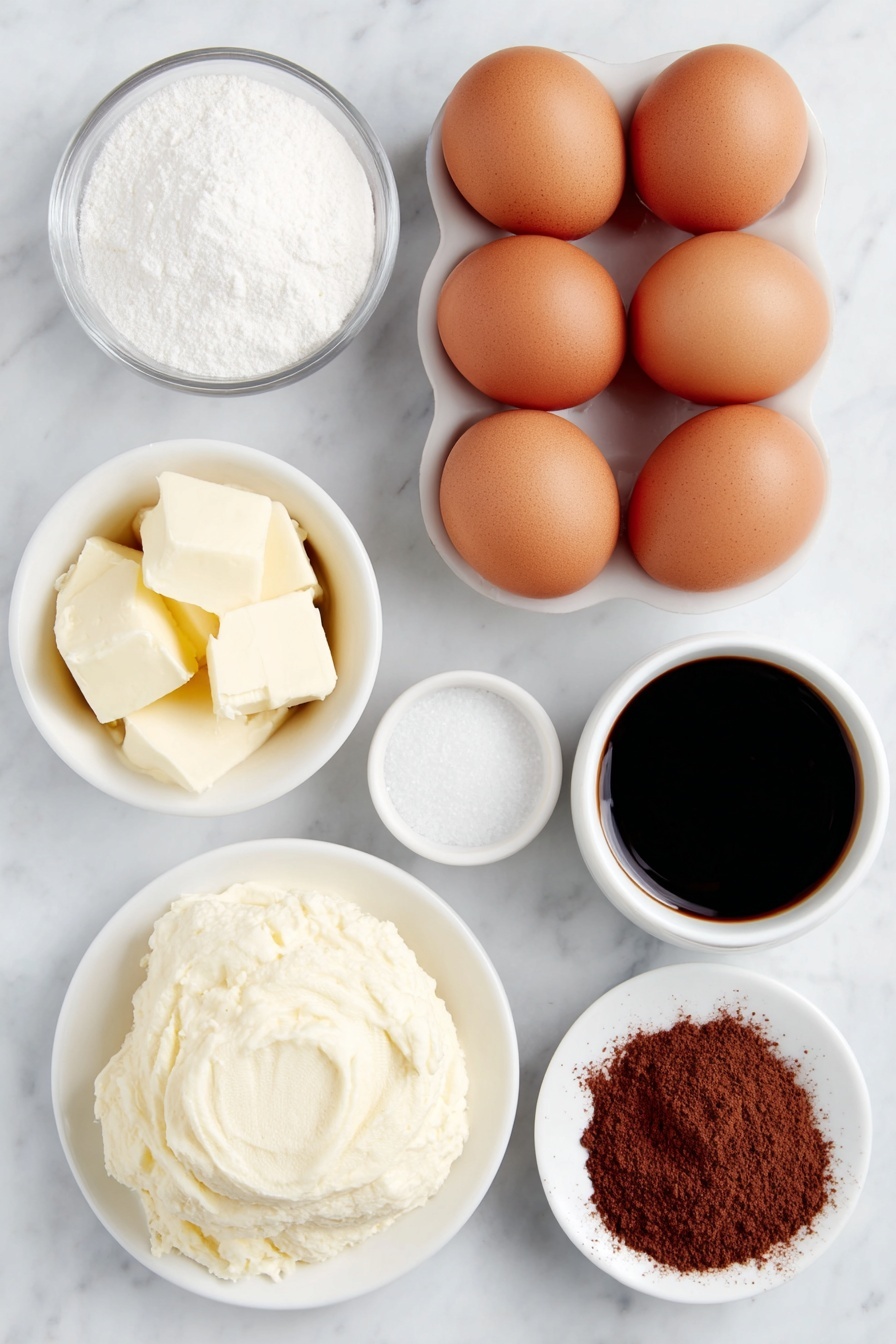
- Egg yolks: Bring richness and help create that luscious custard base; free-range eggs with bright yolks really enhance flavor.
- Granulated sugar: Sweetens without overpowering; I like to use pure cane sugar for a clean taste.
- Salt: Just a pinch to balance the sweetness and accentuate flavors.
- Mascarpone cheese: The star of the show—keep it cold and fresh for a silky texture that isn’t grainy or runny.
- Vanilla extract: Adds fragrant warmth; pure extract always tastes better than imitation.
- Heavy whipping cream: Gives the filling airiness and creaminess; chilled cream whips up faster and holds peaks better.
- Espresso: Deep, bold coffee flavor—use strong brewed espresso and chill it completely before dipping ladyfingers.
- Kahlua (optional): Adds a boozy kick, but feel free to leave it out or swap with dark rum if that’s your thing.
- Ladyfingers: Look for crunchy, dry ladyfingers—they soak up espresso just right without falling apart too fast.
- Unsweetened cocoa powder: A finishing touch that adds a bittersweet contrast and makes it look gorgeous.
Tweak to Your Taste
I’ve made this recipe hundreds of times, and I love how forgiving it is. Over the years, I’ve tweaked it depending on the occasion or what was in my pantry, and you can too! Whether it’s changing up the booze or spicing the espresso, personalization is where the fun begins.
- Stronger Coffee Kick: Once, I boosted the espresso amount and reduced the Kahlua just a bit—I actually preferred the punchier coffee flavor that way.
- Non-Alcoholic Version: For family dinners with kids, I skip the Kahlua and add a bit of vanilla or almond extract to keep the topping flavorful and exciting.
- Chocolate Lovers: Try layering in thin slices of dark chocolate or sprinkling chopped chocolate between layers for extra richness.
- Smaller Portions: This recipe makes a large batch, but I’ve halved it for more intimate gatherings, and it still works wonderfully.
Step-by-Step: How I Make Easy Classic Tiramisu Recipe
Step 1: Gently Cook Your Egg Yolks
This step is key for silky custard without any weird eggy flavor. I whisk the egg yolks, sugar, and salt together in a heatproof bowl over simmering water—like a gentle double boiler. It takes about 10-13 minutes until the mixture thickens, becomes pale, and reaches around 165°F. Keep whisking constantly, or you risk scrambling the eggs. Once done, I let it cool a bit—this is where patience pays off!
Step 2: Fold in Mascarpone and Vanilla
Once the egg mixture has cooled slightly, I add cold mascarpone and vanilla extract. It’s important not to rush or overmix here—fold gently until the mixture is silky smooth. No lumps, no curdling. I always take my mascarpone straight from the fridge because room temp cheese tends to get grainy. Trust me, this little detail makes a big texture difference.
Step 3: Whip the Cream to Medium-Stiff Peaks
In a separate chilled bowl, I whip the heavy cream until it holds medium-stiff peaks. If you under-whip, the tiramisu will feel runny; if you go too far, it can turn buttery. Medium-stiff is that sweet spot, offering structure while keeping it light. Then, I gently fold half the whipped cream into my mascarpone custard to loosen it up, followed by folding in the rest to keep it fluffy.
Step 4: Dip Ladyfingers and Layer
I mix the cold espresso and Kahlua in a shallow dish, then quickly dip each ladyfinger—just enough to soak but not soggy. This is where timing counts: I do one at a time and immediately lay them down in a 9×13-inch pan in a single layer. Then I spread half the mascarpone mixture evenly on top. Repeat with another layer of dipped ladyfingers and top with the remaining mascarpone mixture.
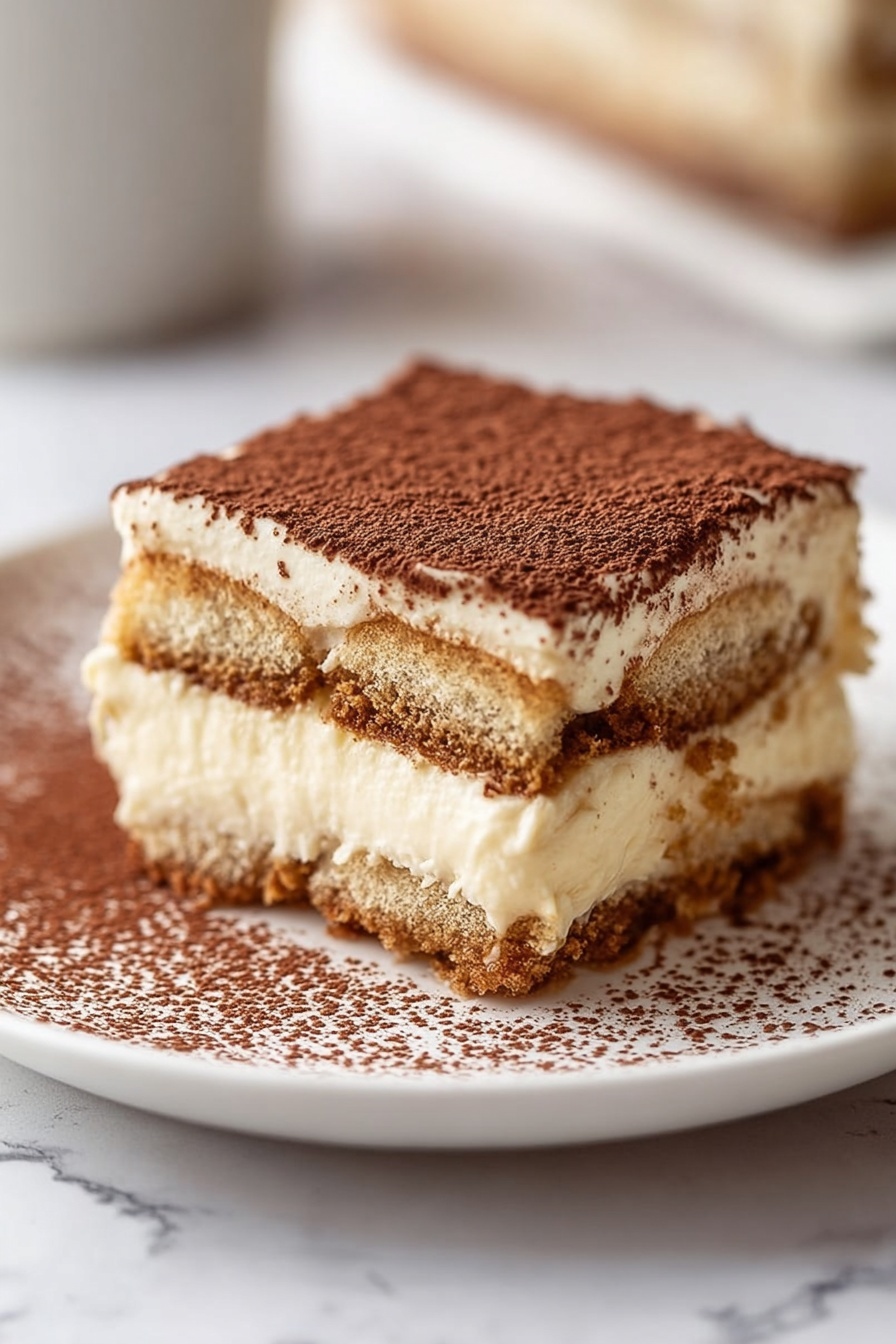
Step 5: Dust and Chill
The final touch: a generous dusting of unsweetened cocoa powder. I like to use a fine mesh sieve for even coverage. Cover your tiramisu tightly with plastic wrap, then refrigerate for at least 8 hours or overnight. This chill time is essential—it lets the flavors meld and the dessert set to a perfect sliceable consistency.
Pro Tips for Making Easy Classic Tiramisu Recipe
- Use a Thermometer: Checking the egg mixture’s temperature ensures it’s safe and perfectly thickened without guessing.
- Keep Everything Cold: Chill your mascarpone and whipping bowl, and use cold espresso to avoid quick absorption and soggy ladyfingers.
- Dip Ladyfingers Quickly: They soak up liquid fast; a quick dip keeps them tender but intact.
- Don’t Skip the Chill Time: The best tiramisu is made a day ahead—giving flavors time to marry and texture time to firm up.
How to Serve Easy Classic Tiramisu Recipe
Garnishes
I’m a simple girl when it comes to garnishes: a fine dusting of cocoa powder right before serving. Sometimes I add a few dark chocolate shavings on top for a little texture contrast—and it looks stunning too! Fresh mint can add a hint of brightness if you’re feeling fancy.
Side Dishes
Tiramisu is usually a dessert star all on its own, but if you want to serve something alongside, a light, fresh fruit salad or berries work beautifully. They cut through the richness and refresh the palate.
Creative Ways to Present
For birthdays or special events, I’ve served tiramisu in individual glasses layered just like the pan version—makes everyone feel like they’re getting a personal treat. You can also sprinkle a little edible gold dust or top with chocolate curls for added drama!
Make Ahead and Storage
Storing Leftovers
I always cover mine tightly with plastic wrap and keep tiramisu in the fridge, where it stays fresh and delicious for up to 4 days. Pro tip: the flavors deepen the longer it sits, so leftovers taste even better the next day!
Freezing
I’ve frozen tiramisu before by wrapping it snugly in plastic and foil. When you’re ready, thaw it in the fridge overnight. While freezing can slightly alter texture, it’s a great option if you want to prepare ahead and enjoy later.
Reheating
Honestly, tiramisu is best cold, so I recommend serving it chilled straight from the fridge. If leftovers have been frozen and thawed, give them a gentle stir before serving to revive the creaminess.
FAQs
-
Can I use raw eggs in this Easy Classic Tiramisu Recipe?
Great question! This recipe avoids raw eggs by gently cooking the egg yolks in a double boiler until they reach 165-170°F, which makes the mixture safe to eat while maintaining that luxurious texture. This method eliminates worry about salmonella and keeps your tiramisu creamy and smooth.
-
What do I do if my mascarpone is too soft or curdled?
Always use mascarpone straight from the fridge and fold it gently into the egg mixture—overmixing or using warm mascarpone can cause it to curdle. If it does happen, try to gently smooth the mixture without stirring aggressively. Picking high-quality, fresh mascarpone from a trusted brand also helps.
-
Can I substitute ladyfingers with something else?
Ladyfingers are traditional because their texture soaks up espresso perfectly, but if you’re in a pinch, you can use sponge cake slices or pound cake, lightly toasted if you like. Just be mindful they tend to absorb liquid differently, so adjust soaking time accordingly to avoid mushiness.
-
How long can I refrigerate tiramisu before serving?
This tiramisu tastes best after chilling at least 8 hours, ideally overnight, to let flavors develop and the dessert set firm enough for slicing. It can safely stay refrigerated for up to 4 days if wrapped well.
-
Can I make this Easy Classic Tiramisu Recipe dairy-free?
Traditional tiramisu relies on mascarpone and heavy cream, but you can try dairy-free cream cheese and coconut cream as substitutes. Be aware the texture and flavor will vary, and you might need to experiment with ratios to get a similar creamy consistency.
Final Thoughts
I have to say, this Easy Classic Tiramisu Recipe holds a special place in my heart—and in my dessert repertoire—because it’s one of those dishes that feels impressively elegant but is incredibly doable. Plus, it’s endlessly adaptable, so you can truly make it your own or follow it faithfully without stress. If you love rich, creamy, coffee-infused desserts, give it a try and watch how quickly it becomes a crowd favorite in your kitchen, too!
Print
Easy Classic Tiramisu Recipe
- Prep Time: 30 minutes
- Cook Time: 10 minutes
- Total Time: 8 hours 40 minutes
- Yield: 16 slices
- Category: Dessert
- Method: No-Cook
- Cuisine: Italian
Description
A classic Italian dessert featuring layers of espresso-dipped ladyfingers and a creamy mascarpone mixture, dusted with cocoa powder. This tiramisu recipe is rich, smooth, and perfect for an elegant treat or special occasion.
Ingredients
Mascarpone Mixture
- 6 large egg yolks
- 2/3 cup (135 grams) granulated sugar
- 1/4 teaspoon salt
- 24 ounces (680 grams) cold mascarpone cheese
- 2 teaspoons (10 ml) pure vanilla extract
- 1 1/2 cups (360 ml) cold heavy whipping cream
Assembly
- 2 cups (480 ml) cold espresso
- 1/4 cup (60 ml) Kahlua (optional)
- 40 to 45 ladyfingers
- 1/4 cup (22 grams) unsweetened cocoa powder
Instructions
- Prepare the egg mixture: Combine the egg yolks, granulated sugar, and salt in a large heat-proof bowl. Set the bowl over a saucepan of simmering water, whisking constantly to prevent scrambling. Continue whisking until the mixture thickens, turns pale, and reaches 165°F-170°F, approximately 13 minutes. Remove from heat and cool for 5 to 10 minutes.
- Incorporate mascarpone: Whisk the cold mascarpone cheese and vanilla extract into the egg mixture until smooth and lump-free, being careful not to overmix.
- Whip the cream: Using a separate cold mixing bowl and beaters, beat the heavy whipping cream to medium-stiff peaks. Gently fold half of the whipped cream into the mascarpone mixture, then fold in the remaining whipped cream until fully combined. Set aside.
- Prepare coffee mixture: In a shallow dish, mix the cold espresso with the Kahlua, if using.
- Dip ladyfingers: Quickly dip each ladyfinger, one at a time, into the coffee mixture, ensuring they are soaked but not soggy. Arrange half of the soaked ladyfingers in a single layer in a 9×13 inch baking pan.
- Layer mascarpone: Spread half of the mascarpone mixture evenly over the ladyfingers. Then, add another layer with the remaining dipped ladyfingers.
- Top with mascarpone and cocoa: Spread the remaining mascarpone mixture over the top layer of ladyfingers. Dust generously with unsweetened cocoa powder.
- Chill: Cover the baking pan tightly with plastic wrap and refrigerate for at least 8 hours or overnight to allow the flavors to meld and the dessert to set before serving.
Notes
- Tiramisu can be stored covered in the refrigerator for up to 4 days.
- Use cold mascarpone straight from the refrigerator to prevent curdling.
- For espresso, instant espresso powder mixed with warm water or strongly brewed coffee can be used; ensure it is cold before dipping ladyfingers.
- Kahlua is optional; omit if preferred, or adjust to taste by reducing espresso and increasing Kahlua for a stronger flavor. Dark rum can be used as a substitute.
- Choose crunchy ladyfingers to maintain structure; about 40 to 45 ladyfingers are needed, roughly two 7-ounce packages.
Nutrition
- Serving Size: 1 slice
- Calories: 450 kcal
- Sugar: 28 g
- Sodium: 85 mg
- Fat: 32 g
- Saturated Fat: 19 g
- Unsaturated Fat: 10 g
- Trans Fat: 0 g
- Carbohydrates: 30 g
- Fiber: 2 g
- Protein: 7 g
- Cholesterol: 160 mg

