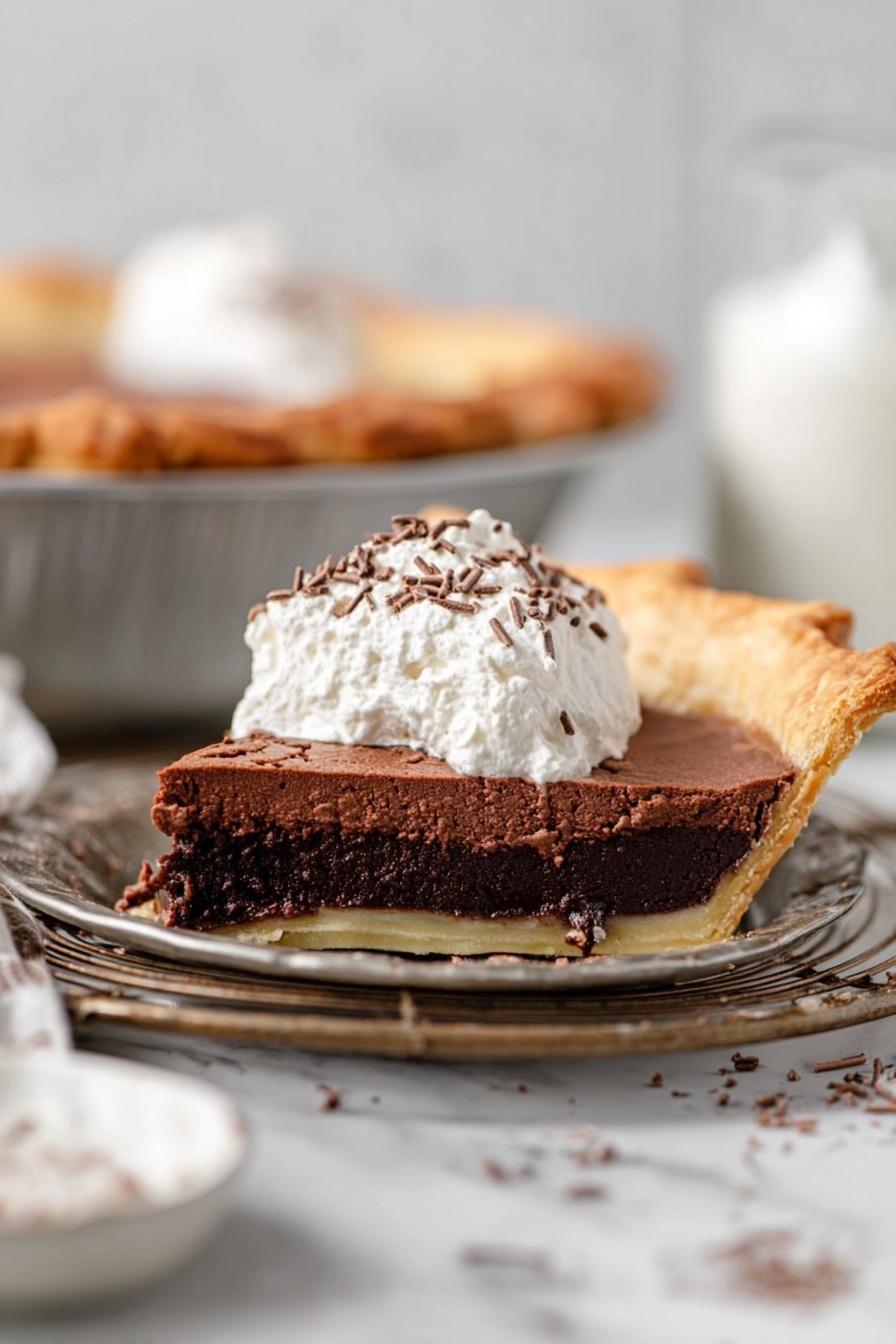
Fudgy Brownie Pie Recipe
If you’ve ever dreamed of a dessert that’s rich, chocolatey, and just the right balance between gooey and cakey, then buckle up because this Fudgy Brownie Pie Recipe is your new best friend. Seriously, I stumbled upon this gem when I wanted a brownie with a flaky crust—and trust me, it’s fan-freaking-tastic. So grab your apron, and let’s dive into a dessert that’s as comforting as it is impressive.
Why This Recipe Works
- Perfect Fudginess: Combining melted chocolate with a few carefully chosen ingredients gives this pie that luscious, fudgy center we all crave.
- Flaky Homemade Crust: Making and blind baking your own pie crust adds a wonderful textural contrast and keeps the filling from feeling too heavy.
- Shiny, Glossy Top: Using caster sugar mixed well with the eggs creates that beautiful, crackly, glossy surface that says “homemade with love.”
- Flexible & Reliable: Tried and tested, this Fudgy Brownie Pie Recipe is straightforward enough for a beginner but impressive enough for any dinner party.

Ingredients & Why They Work
The magic truly starts with simple, quality ingredients that work harmoniously. This pie’s richness comes from real dark chocolate and butter, while the cocoa powder deepens the flavor. The mix of granulated and brown sugars balances sweetness with a hint of molasses, and the homemade crust holds it all together perfectly. When shopping, be sure to get good-quality chocolate–it really makes a difference.

- Homemade Pie Crust: A flaky, buttery base is key to keeping the fudgy brownie filling from overwhelming the whole dessert.
- Dark Chocolate: Opt for about 70% cocoa for intensity without bitterness; this is the heart of the fudgy richness.
- Unsalted Butter: Using cold butter helps in creating a tender texture when melted with chocolate.
- Dutch Process or Unsweetened Cocoa Powder: Adds a deep chocolate punch and helps thicken the filling.
- Large Eggs: These give the filling structure and help produce the signature shiny brownie top.
- Caster Sugar: I prefer caster sugar because it dissolves more easily, but granulated works fine too if you don’t mind a slightly different texture.
- Light or Dark Brown Sugar: A little brown sugar adds moisture and a subtle depth of flavor.
- Salt & Vanilla Extract: Don’t skip these—they balance sweetness and enhance the chocolate notes.
- All-Purpose Flour: Just enough to hold the pie together without making it cakey.
Tweak to Your Taste
One of the things I love about this Fudgy Brownie Pie Recipe is how easy it is to modify it to suit your personal cravings. Whether you’re feeling adventurous or just want to keep it classic, a few tweaks can make it your own.
- Add Nuts: I sometimes toss in chopped walnuts or pecans to add crunch and an earthy contrast to the rich chocolate. My friends always ask me what gives it that extra oomph!
- Swap the Chocolate: For a more intense flavor, try bittersweet or even mix milk and dark chocolate. Just adjust the sugar slightly if you go sweeter.
- Make it Vegan: I’ve experimented with vegan butter and egg replacers with decent results. It won’t be quite the same, but still delicious for those who need it.
- Spice it Up: Adding a pinch of cinnamon or espresso powder makes the chocolate flavor pop even more—perfect for cozy evenings.
Step-by-Step: How I Make Fudgy Brownie Pie Recipe
Step 1: Crafting the Perfect Pie Crust
I usually prepare my pie crust the day before, or at least a couple of hours ahead so it has plenty of time to chill and rest. After rolling it out to about a quarter-inch thick, I place it carefully into a 9-inch pie pan, then trim and tuck the edges for a neat fold—this part really ups your pie’s presentation! Next, I pop it into the fridge to chill while I preheat the oven. Blind baking is key here. I line the crust with parchment and pie weights to ensure the base doesn’t puff up or shrink. Baking it at 425°F until the edges turn golden (about 18–20 minutes) sets the structure perfectly. Don’t forget to remove weights, reduce the heat, and bake a bit longer so the crust gets that slight golden touch inside too. Cool it completely before adding the filling—warm crust means soggy pie, and we want crisp!
Step 2: Melting the Chocolate and Butter
While the crust is chilling, I start on the filling. You want to melt the dark chocolate and butter gently—either over a simmering water bath or in the microwave in short bursts—so nothing burns or seizes. Stir frequently to get a smooth, silky chocolate butterbase. Then sift in your cocoa powder to enrich the flavor even more. Pro tip: make sure the chocolate is chopped into small pieces so it melts evenly and quickly.
Step 3: Whipping the Eggs and Sugars
This part is where your brownie pie gets its shine. I use an electric mixer to beat the eggs with caster and brown sugars for a couple of minutes until the mixture lightens in color and gets fluffy. This aeration helps create the shiny, slightly crackled top that makes brownies irresistible. If you mix by hand here, your pie might lack that glossy finish, so I recommend the mixer for best results.
Step 4: Bringing It All Together
Next, I fold the melted chocolate mixture into the whipped eggs and sugar, add salt and vanilla, then gently incorporate the sifted flour by hand until the batter is smooth with no lumps. Being gentle here keeps the texture fudgy rather than cakey. Pour the luscious batter into your cooled pie shell, let it settle for a few minutes, and lightly tap the pan to pop any air bubbles—a small step that works wonders.
Step 5: Baking to Fudgy Perfection
I bake the pie at 350°F for about 30–35 minutes. You’ll know it’s done when the filling puffs slightly, the top is glossy, and a skewer inserted in the center comes out with a few moist crumbs. I like to err on the side of under-baking slightly rather than over—this keeps your pie irresistibly fudgy and gooey inside. Once out of the oven, I let it cool completely on a wire rack, then refrigerate it for a few hours or overnight. Trust me, the flavors deepen and the texture firms up beautifully.
Pro Tips for Making Fudgy Brownie Pie Recipe
- Use Quality Chocolate: The difference between ok and outstanding is all in the chocolate. I recommend around 70% cocoa dark chocolate for richness without bitterness.
- Don’t Skip Blind Baking: Blind baking your crust keeps it crisp and prevents sogginess from the moist filling—worth the extra step every time.
- Whip Eggs & Sugar Well: Properly whipping the eggs with sugar creates that shiny top and lightens the filling’s texture.
- Avoid Over-Baking: Check the pie a few minutes before the timer, because over-baking dries out the fudgy center; you want moist crumbs on your skewer!
How to Serve Fudgy Brownie Pie Recipe
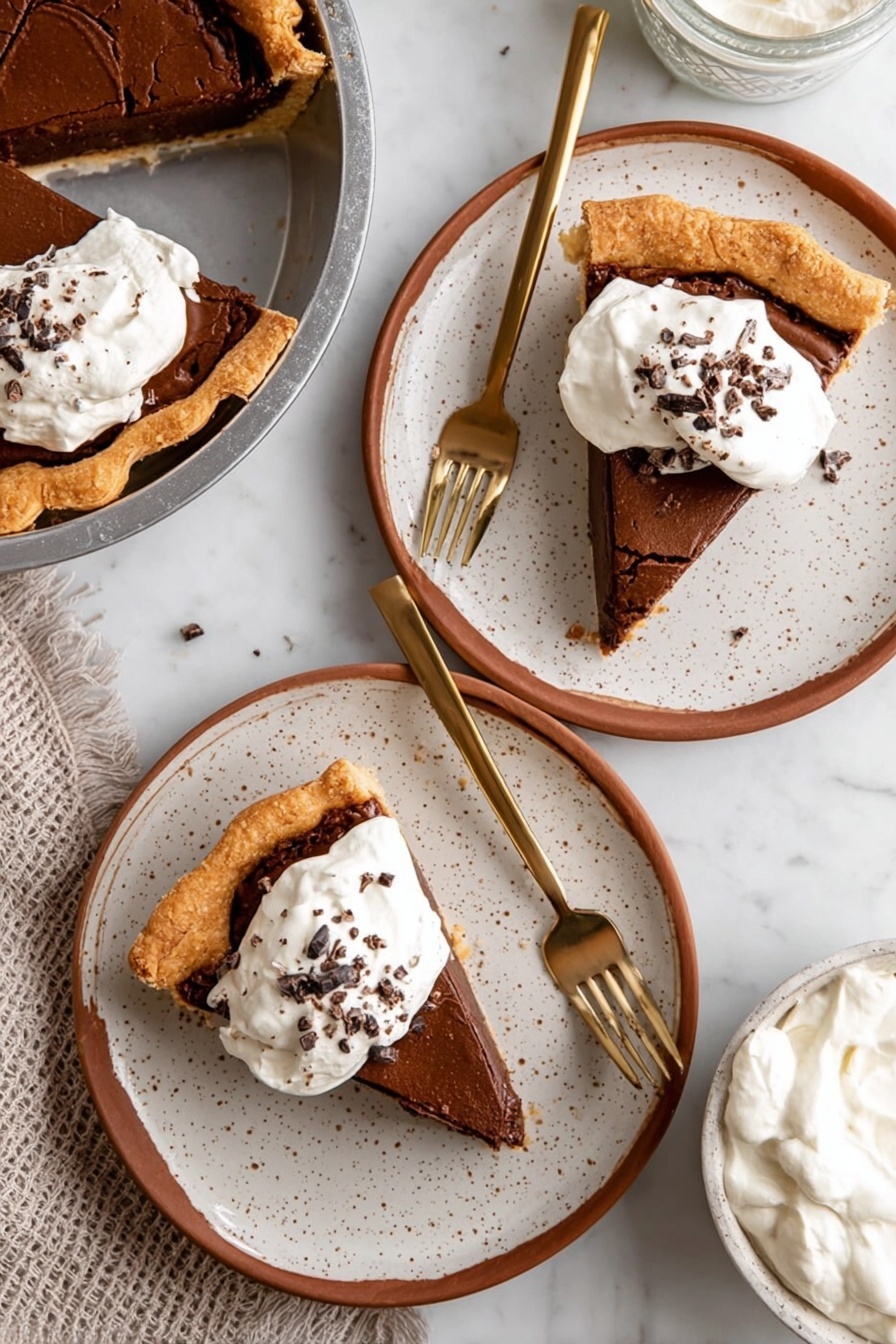
Garnishes
I like to keep it simple here—a dusting of cocoa powder or powdered sugar is classic, but if I’m serving guests, a little scoop of vanilla bean ice cream or a dollop of whipped cream takes it to the next level. Fresh raspberries or a sprinkle of toasted hazelnuts add a nice contrast both visually and in texture.
Side Dishes
This pie pairs wonderfully with a crisp coffee or a rich espresso if you want to stay in the chocolate mood. If you prefer something lighter, a fresh berry salad or a simple citrus sorbet balances the richness nicely.
Creative Ways to Present
For birthdays or celebrations, I’ve decorated the pie with chocolate shavings and edible gold flakes to make it extra fancy. Serving slices on pretty plates with a drizzle of salted caramel sauce is always a crowd-pleaser. And if you’re transporting it to a potluck, a rustic wooden board with some fresh mint sprigs adds an inviting touch.
Make Ahead and Storage
Storing Leftovers
After it’s fully cooled, I keep leftover slices stored in an airtight container at room temperature or lightly covered with plastic wrap for up to five days. The pie actually tastes great at room temp or chilled—though I’m team fridge cold!
Freezing
Yes, you can freeze this pie! I wrap it tightly in plastic wrap, then aluminum foil, and freeze for up to a month. When you’re ready, thaw it overnight in the fridge and serve chilled or bring it to room temp. The texture remains beautifully fudgy, though the crust loses a little crispness.
Reheating
If you prefer your brownie pie warm, pop individual slices in the microwave for about 15-20 seconds or warm the whole pie in a low oven (300°F) for 10 minutes. Just watch not to overheat it or your pie might lose that lovely fudgy texture.
FAQs
-
Can I use store-bought pie crust for the Fudgy Brownie Pie Recipe?
Absolutely! While homemade pie crust offers superior texture and flavor, a good quality store-bought crust works fine if you’re short on time. Just be sure to blind bake it properly to avoid a soggy bottom.
-
What’s the secret to the shiny brownie top?
The secret lies in properly whipping the eggs and sugar until fluffy and well combined, which creates that glossy, crackly surface when baked. Using caster sugar, which dissolves more easily than granulated sugar, helps too.
-
Can I make this pie ahead of time?
Yes! In fact, I recommend making it a day ahead. The extra time allows the flavors to develop and the filling to set perfectly. Just keep it refrigerated until ready to serve.
-
How do I avoid over-baking my Fudgy Brownie Pie?
Check your pie a few minutes before the timer ends and look for a shiny, puffed top with a skewer that comes out with moist crumbs. Remember, slight under-baking will keep the center fudgy and delicious.
Final Thoughts
This Fudgy Brownie Pie Recipe is truly one of those desserts that feels like a warm hug after a long day. It combines the best of both worlds—a tender, flaky crust with a decadent, gooey brownie center that will have everyone asking for seconds. Honestly, it’s become my go-to when I want to impress without stress. So, do yourself a favor and try this at home—you won’t regret it. Just make sure you have a glass of milk or your favorite coffee ready to enjoy alongside—it’s the perfect pairing!
Print
Fudgy Brownie Pie Recipe
- Prep Time: 1 hour
- Cook Time: 1 hour
- Total Time: 2 hours
- Yield: 8 servings
- Category: Dessert
- Method: Baking
- Cuisine: American
- Diet: Vegetarian
Description
This Fudgy Brownie Pie combines the rich, dense texture of a classic brownie with the flaky, buttery goodness of a homemade pie crust. Topped with a delightfully glossy finish, this dessert is perfect for chocolate lovers seeking a decadent treat that’s easy to slice and serve. Chilled for the best taste or served slightly softened at room temperature, this brownie pie offers a perfect balance of fudgy and tender with a beautiful presentation.
Ingredients
Pie Crust
- 1 homemade pie crust, shaped into a disc and chilled
Brownie Filling
- 135g dark chocolate (72%), coarsely chopped
- 120g unsalted butter, cold from the fridge
- 10g dutch process cocoa or regular unsweetened cocoa, sifted
- 2 large eggs (about 100g without shells)
- 135g caster sugar
- 65g light or dark brown sugar
- ¼ tsp salt
- ¼ tsp vanilla extract or vanilla bean paste
- 65g all-purpose flour, sifted
Instructions
- Prepare Pie Crust: Roll out the chilled pie dough on a lightly floured surface to ¼ inch (6mm) thickness, forming a circle slightly larger than a 9-inch pie tin. Transfer the dough to the pie tin, trim the edges leaving about one inch excess, then fold and tuck the dough under to form a neat edge. Chill the crust in the fridge for 15-20 minutes, then crimp the edges and dock the crust all over with a fork. Chill for another 30 minutes or freeze for 10 minutes to help set the crust.
- Blind Bake Pie Crust: Preheat oven to 425°F (220°C). Line the crust with parchment paper and fill with pie weights or dried beans, placing the pie tin on a baking sheet. Bake for 20 minutes until edges are golden. Remove weights and parchment, reduce oven temperature to 375°F (190°C), and bake for another 3 minutes until the inside is just set and lightly golden. Cool on a wire rack.
- Prepare Chocolate Mixture: Over simmering water, melt dark chocolate and butter in a heatproof bowl, stirring until smooth. Alternatively, microwave in 30-second bursts, stirring between, until fully melted. Sift cocoa powder on top and stir until well combined.
- Whip Eggs and Sugars: In a large bowl, beat eggs, caster sugar, and brown sugar on medium-high speed for 2-3 minutes using a handheld or stand mixer with whisk attachment. The mixture should lighten in color and increase in volume.
- Combine Mixtures: Add the melted chocolate mixture to the egg and sugar mixture, then mix in salt and vanilla extract until incorporated.
- Add Flour: Gently fold the sifted flour into the wet ingredients by hand until the batter is smooth and lump-free.
- Fill Pie Crust: Pour the brownie batter into the par-baked pie crust. Let it settle for a few minutes, then tap the pan on the counter to release any air bubbles.
- Bake Brownie Pie: Bake at 350°F (180°C) on the middle rack for 35 minutes, or until the filling is puffed, shiny on top and a skewer inserted comes out with moist crumbs. Avoid overbaking; a slight underbake is preferred.
- Cool and Chill: Let the pie cool on a wire rack to room temperature, then chill in the refrigerator until completely cold.
- Serve and Store: Serve chilled for best fudgy texture or at room temperature if you prefer it softer. Store leftovers in an airtight container at room temperature for up to 5 days.
Notes
- The homemade pie crust recipe makes two crusts; this recipe uses one. For help with par-baking, see posts on blind baking pie crust.
- US granulated sugar is finer than in some other countries; if using coarser sugar, ensure it is well combined with eggs to achieve a glossy brownie top.
- Using caster sugar gives the best glossy top but granulated sugar will work adequately.
- Chilling the pie completely helps the brownie set and enhances slicing.
- Not overbaking is key—slightly underbaked brownie filling results in a fudgier texture.
Nutrition
- Serving Size: 1 slice (1/8 of pie)
- Calories: 350 kcal
- Sugar: 28 g
- Sodium: 150 mg
- Fat: 22 g
- Saturated Fat: 12 g
- Unsaturated Fat: 8 g
- Trans Fat: 0 g
- Carbohydrates: 35 g
- Fiber: 3 g
- Protein: 5 g
- Cholesterol: 85 mg

