Halloween Dirt Cake Recipe
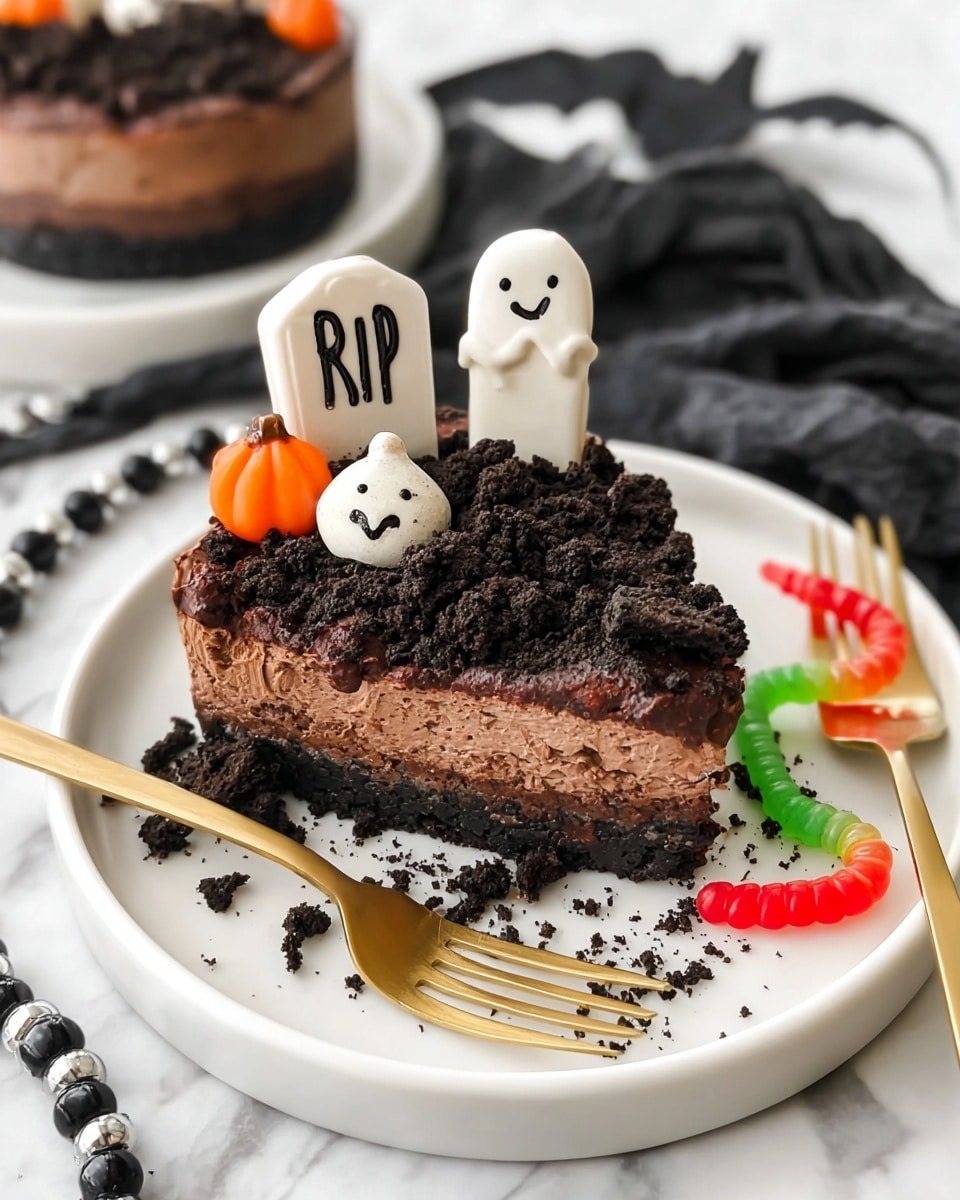
If you’re looking for a fun, spooky, and downright delicious dessert to wow your guests this season, you simply have to try my Halloween Dirt Cake Recipe. It’s this perfect mix of creamy pudding, rich cream cheese frosting, and a crunchy Oreo “dirt” topping that’s as fun to make as it is to eat. Plus, it’s a total crowd-pleaser that’ll bring out your inner kid and spooky vibes at the same time. Stick with me, and I’ll walk you through every step so your pudding cake comes out just right — and yes, it looks seriously cool on the dessert table!
Why This Recipe Works
- Easy No-Bake Delight: No oven needed, so it’s perfect for quick Halloween prep or hot October days.
- Perfect Texture Combo: Creamy pudding and cream cheese layers balance with crunchy Oreo crumbs for that “dirt” look and satisfying bite.
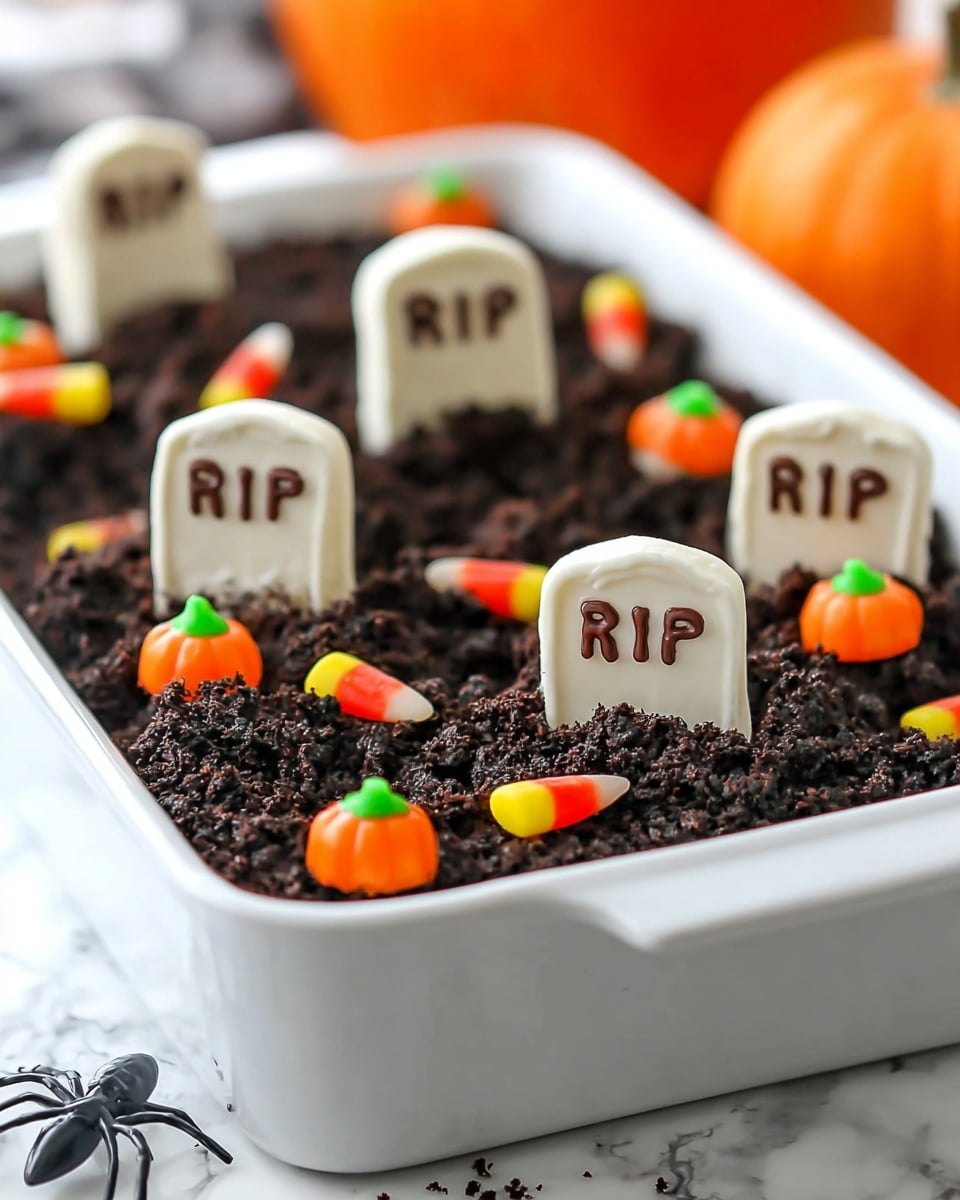
- Fun Decorations Included: Edible tombstones and gummy worms take your presentation from tasty to spooky-chic.
- Kid-Friendly and Crowd-Pleasing: Everyone loves this dessert, and it’s easy enough to get the kids involved in making it too.

Ingredients & Why They Work
This Halloween Dirt Cake Recipe uses simple, easy-to-find ingredients that work beautifully together. The creamy base pairs so well with the crushed Oreos that make your dessert look delightfully like dirt. Plus, the fun candy decorations add the perfect Halloween charm.

- Cream cheese: Adds richness and a slight tang that balances the sweetness perfectly.
- Butter: Softened to help smooth out the cream cheese; it gives a luscious texture.
- Powdered sugar: Sweetens the cream cheese mixture evenly without graininess.
- Frozen whipped topping: Provides lightness and volume making the filling fluffy and dreamy.
- Instant chocolate pudding mix: Quick and smooth chocolate flavor that sets up nicely.
- Milk: Essential for preparing the pudding; richness can be adjusted by milk type.
- Oreo cookies: The star of your “dirt” topping with their chocolatey crunch.
- Nutter Butter cookies: Perfect stand-ins for spooky tombstones when coated and decorated.
- White candy melts: For coating tombstone cookies, giving a smooth white “stone” appearance.
- Chocolate chips: Melted for writing “RIP” for that authentic creepy detail.
- Gummy worms: Classic creepy-crawly Halloween decoration that tastes great too.
Tweak to Your Taste
One of the best things about this Halloween Dirt Cake Recipe is how easy it is to make it your own. I love swapping candies or tweaking the toppings depending on what I have around or who I’m serving.
- Variation: For a peanut butter twist, try adding a swirl of peanut butter to the cream cheese layer—I did this one year for a potluck, and it was a total hit!
- Dairy-Free Option: Use dairy-free cream cheese and whipped topping alternatives to keep it allergy-friendly without missing the creaminess.
- Decor Swap: Instead of Nutter Butters, try animal-shaped cookies or graham crackers decorated with edible markers for a unique spin.
Step-by-Step: How I Make Halloween Dirt Cake Recipe
Step 1: Cream the Cream Cheese and Butter
Start by letting your cream cheese and butter soften at room temperature—they’ll mix so much better this way. Then, using either a stand or hand mixer, blend the cream cheese until it’s smooth before adding the softened butter. This step is key to a silkier filling, so don’t rush it. Slowly mix in the powdered sugar and folded-in whipped topping until everything is just combined. It should be fluffy but stable enough to mix with the pudding later.
Step 2: Make the Instant Chocolate Pudding
Prepare your instant pudding by whisking it with milk according to the package directions—a large bowl works best here. What I’ve learned is to whisk just until thickened; don’t overmix or it can get liquidy after resting. Once the pudding sets up, gently fold in the cream cheese mixture with a spatula. This folding keeps your pudding light and smooth without deflating the whipped topping.
Step 3: Crush the Oreos & Form the Dirt Layers
Here’s the fun part—Oreos! You want to crush whole Oreo cookies, filling and all, into fine crumbs. I use a food processor because it’s quick, but if you don’t have one, no worries—just place them in a resealable bag and crush gently with a rolling pin or meat mallet. Use half of those crumbs to firmly press into your 9 x 13 pan as the base crust (use your hands or the bottom of a cup to get it even).
Step 4: Assemble and Layer
Once your crust is set, spoon on the pudding mixture, spreading it evenly on top. Next, sprinkle the remaining Oreo crumbs over the pudding layer to create that iconic “dirt” look. Pop your cake into the fridge for at least 2 hours so it can set nicely; overnight works great if you want to prep ahead.
Step 5: Craft Your Tombstone Decorations
While your cake chills, melt white candy melts in the microwave until smooth. Dip each Nutter Butter cookie into the candy melts to create white “tombstones” and lay them out on parchment paper to set. Once dry, melt some chocolate chips and use a small plastic bag with the tip cut off to pipe “RIP” onto each tombstone. This little extra might seem fiddly, but trust me—it makes the whole cake come alive and look like the ultimate Halloween graveyard.
Step 6: Final Assembly and Serve
After the cake has chilled and set, gently press your decorated tombstone cookies into the top. Scatter gummy worms and any other Halloween candies you love around to add that creepy crawly touch. Serve immediately or keep refrigerated until it’s showtime!
Pro Tips for Making Halloween Dirt Cake Recipe
- Room Temp Matters: Always let your cream cheese and whipped topping soften at room temperature—otherwise, you’ll end up with lumps or a tough mixture.
- Oreos Crunch Goal: Crush Oreos finely but not powdery; tiny bits add texture that makes the dirt look realistic while still giving a pleasant bite.
- Pudding Mix Choice: Use instant pudding, NOT cook-and-serve—the instant variety keeps everything no-bake and smooth.
- Tombstone Tip: Let the candy-coated cookies dry fully before piping; any moisture will cause your “RIP” calligraphy to smear.
How to Serve Halloween Dirt Cake Recipe
Garnishes
I always top mine with a handful of gummy worms because they’re such a classic “dirt cake” garnish, and kids adore them. The chocolate-covered Nutter Butter tombstones add that perfect edible Halloween vibe—plus, I sometimes tuck in some edible candy eyeballs or sprinkles for extra spooky fun.
Side Dishes
This dessert pairs wonderfully with simple vanilla or caramel-flavored drinks. At one Halloween party, I served it alongside spiced apple cider and it was an absolute hit—kept the flavors balanced and not overwhelmingly sweet.
Creative Ways to Present
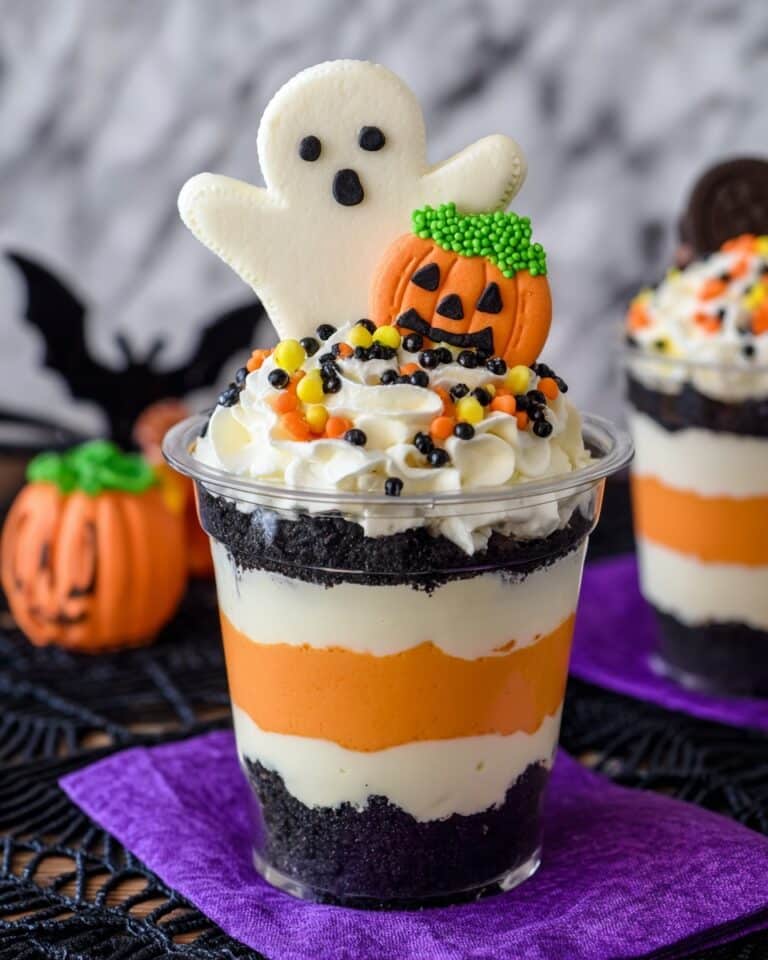
For an extra fun presentation, I love layering this dirt cake in clear glass trifle bowls or mason jars—guests can actually see those Oreo layers and pudding through the glass. It makes the dessert feel even more festive and perfect for potlucks or classroom parties.
Make Ahead and Storage
Storing Leftovers
Cover your leftover dirt cake tightly with plastic wrap and store it in the fridge—it keeps well for up to 5 days. I recommend pressing the wrap gently onto the surface of the pudding layer to avoid drying it out.
Freezing
I don’t usually freeze this dessert because the pudding’s texture can change after thawing. But if you want to freeze, do so before adding the Oreo topping and decorate after it’s thawed. That way, the texture stays smooth and the crushed cookies don’t get soggy.
Reheating
This cake is best served chilled, so no reheating needed. Just take it out of the fridge about 10 minutes before serving to let it soften slightly—it makes digging in way more enjoyable!
FAQs
-
Can I make the Halloween Dirt Cake recipe ahead of time?
Absolutely! In fact, it’s best to make it at least a couple of hours ahead so it has time to set in the fridge. You can prepare it the day before your party or event without any issues—just add the candy decorations just before serving to keep them fresh.
-
Can I substitute whipped cream for the whipped topping?
You can use homemade whipped cream, but keep in mind it may not hold up as well as store-bought frozen whipped topping, especially after mixing. If using fresh cream, whip it to stiff peaks and fold gently to maintain the texture, but expect the dirt cake to be a bit softer.
-
What’s the best way to crush Oreos without a food processor?
Just place the Oreos in a large zip-top bag, seal it securely, then crush with a rolling pin or kitchen mallet. Take your time and crush evenly for the best texture—small, uniform crumbs create that perfect dirt look.
-
Can I make this cake gluten-free?
You can, but you’ll need to find gluten-free chocolate sandwich cookies to replace Oreos and make sure the other ingredients you pick are gluten-free. Also, check the pudding mix ingredients carefully to ensure it fits your gluten-free standards.
Final Thoughts
This Halloween Dirt Cake Recipe has become a personal favorite because it’s easy, fun, and always a crowd-pleaser. It’s great for bringing out smiles at parties or even as a sweet treat after a casual family dinner. I love that you don’t have to fuss with baking, but you still get flavor and texture that feels homemade and special. Give it a try—I promise you’ll want to make it every year. Plus, decorating those tombstones? Total kid magnet and a blast to do together. Can’t wait to hear what creative twists you add!
Print
Halloween Dirt Cake Recipe
- Prep Time: 20 minutes
- Cook Time: 0 minutes
- Total Time: 2 hours 20 minutes
- Yield: 20 servings
- Category: Dessert
- Method: No-Cook
- Cuisine: American
Description
This Halloween Dirt Cake is a spooky and delicious no-bake dessert perfect for festive gatherings. Featuring a creamy chocolate pudding and cream cheese filling layered with Oreo cookie crumbs and topped with edible tombstone decorations and gummy worms, it’s both fun to make and serve. With a simple preparation and chilling time, it’s an ideal treat for Halloween parties.
Ingredients
Filling & Base
- 8 ounces cream cheese (1 package room temperature)
- ½ cup butter (softened)
- 1 cup powdered sugar
- 8 ounce container frozen whipped topping (thawed)
- 2 3.4 ounce boxes Instant Chocolate pudding mix
- 3 cups milk
- 1 15.5 ounce package Oreo Cookies (whole, with filling)
Tombstone Graveyard Decorations
- 8-10 Nutter Butter Cookies
- 6 ounces White Candy Melts
- ¼ cup chocolate chips (melted for writing RIP)
- 8-9 gummy worms or other Halloween candy
Instructions
- Prepare cream cheese mixture: Blend the softened cream cheese using a stand or hand mixer until smooth. Add the softened butter and mix until fully combined. Slowly add powdered sugar and thawed whipped topping, mixing at low speed until incorporated. Set aside.
- Make pudding: In a large bowl, prepare the instant chocolate pudding by combining pudding mix with milk according to package directions. Use a spatula to fold in the cream cheese mixture until well blended. Set aside.
- Crush Oreos: Place Oreo cookies (with filling) in a food processor and pulse until finely crushed. If needed, do this in batches for even crumbs. Alternatively, use a ziplock bag and kitchen mallet to crush the cookies.
- Form base: Press about half of the crushed Oreo crumbs firmly into the bottom of a 9 x 13 inch pan to create the crust. Use your hands or the bottom of a measuring cup for pressing.
- Layer pudding: Spread the prepared pudding mixture evenly over the Oreo crust layer.
- Add remaining crumbs: Sprinkle the remaining Oreo crumbs evenly over the pudding layer. Cover and refrigerate for at least 2 hours or overnight to set.
- Create tombstones: While the cake chills, melt the white candy melts in the microwave following package instructions. Dip each Nutter Butter cookie in the melted candy and let dry on parchment paper.
- Decorate tombstones: Melt chocolate chips in the microwave and place the melted chocolate in a small plastic bag with a cut corner. Pipe ‘RIP’ onto each coated cookie and allow to dry completely.
- Assemble decoration: Once the dirt cake is set, press the decorated Nutter Butter cookies upright into the top of the cake to represent tombstones. Add gummy worms and additional Halloween candy as desired for finishing touches.
- Serve or store: Serve immediately after decorating, or keep refrigerated until ready to serve.
Notes
- Use instant pudding mix, not cook-and-serve, for this no-bake dessert.
- Soften cream cheese and whipped topping by leaving them at room temperature for about 30 minutes before mixing for better texture.
- If you don’t have a food processor, crush Oreos in a ziplock bag using a mallet or rolling pin to achieve uniform crumbs.
- Store leftover dirt cake covered with plastic wrap in the refrigerator for up to 5 days.
- Nutritional values are approximate and may vary depending on brand and preparation methods.
Nutrition
- Serving Size: 1 slice (1/20th of cake)
- Calories: 350 kcal
- Sugar: 30 g
- Sodium: 200 mg
- Fat: 18 g
- Saturated Fat: 10 g
- Unsaturated Fat: 7 g
- Trans Fat: 0.5 g
- Carbohydrates: 40 g
- Fiber: 2 g
- Protein: 4 g
- Cholesterol: 40 mg


