Halloween Ghost Brownies Recipe
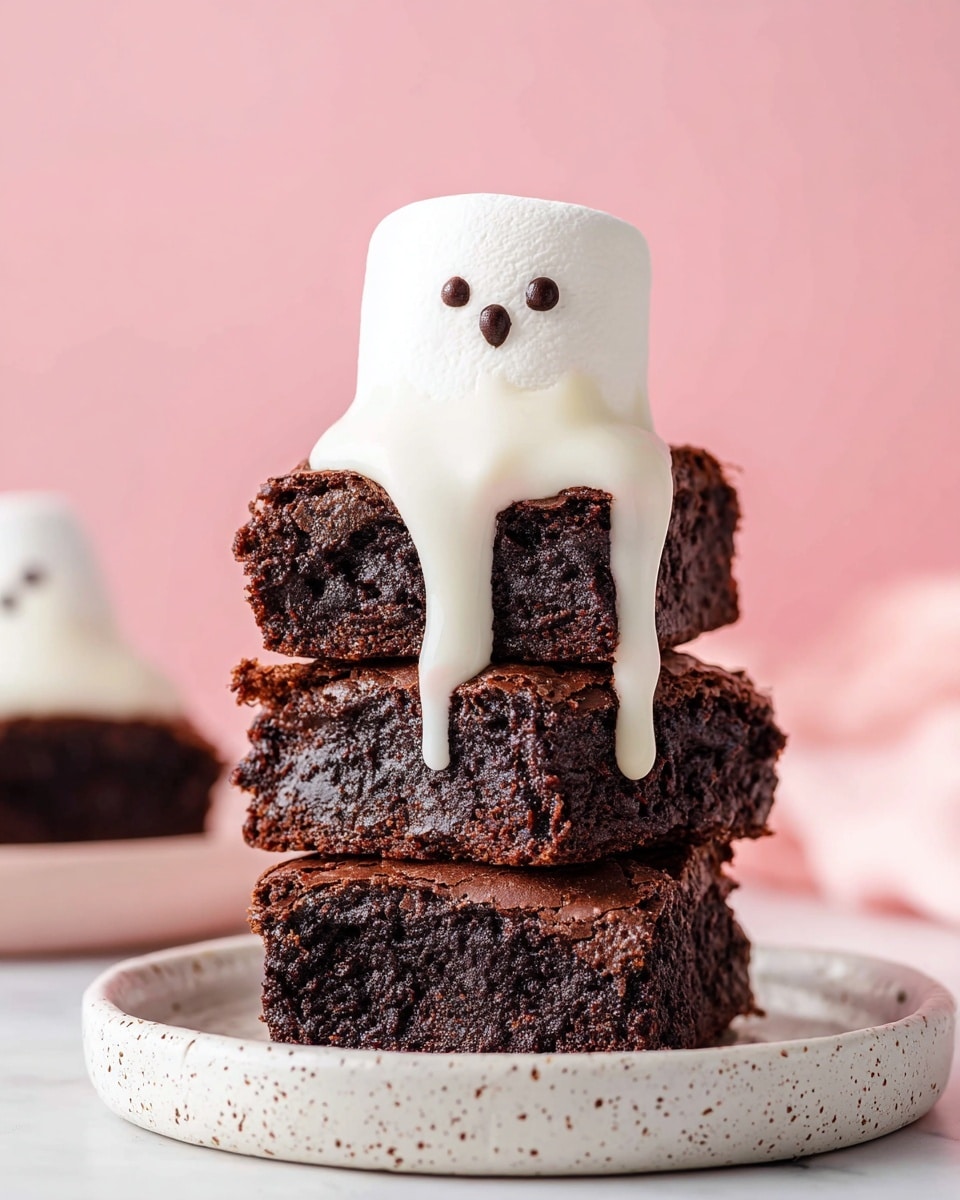
Hey there! If you’re looking for a fun, easy, and irresistibly cute treat for this spooky season, you’ve got to try this Halloween Ghost Brownies Recipe. These brownies are rich, fudgy, and topped with adorable marshmallow ghosts that are just begging to be devoured. I promise you, whether you’re treating kids, friends, or yourself, this recipe wins on taste and festive charm. Keep reading—I’m spilling all my tips to help you nail these ghostly delights perfectly!
Why This Recipe Works
- Quick & Easy: Using a boxed brownie mix keeps things simple but still delicious, saving you time without sacrificing flavor.
- Perfect Texture: The fudgy brownies paired with soft, melty marshmallow ghosts make each bite a heavenly Halloween treat.
- Fun & Festive Presentation: The white chocolate-coated marshmallows decorated as ghosts bring whimsy and wow factor suitable for any Halloween party.
- Flexible Ingredients: You can customize your toppings with candy eyes, chocolate chips, or black icing for the ghost faces to suit what you have on hand.

Ingredients & Why They Work
Let’s talk about the magic behind each staple here—the balance of rich, fudgy brownies and sweet, gooey marshmallow ghosts is what makes this Halloween Ghost Brownies Recipe so special. I prefer using quality ingredients when possible but keeping it simple too!

- Brownie Mix: Boxed mix = reliable and quick; you can also swap in your homemade brownie batter if you want.
- Eggs at room temperature: They bind everything together and help brownies rise perfectly.
- Avocado Oil: A neutral oil that keeps brownies moist without overpowering the chocolate flavor.
- Water: Adds moisture to the batter; don’t skip!
- Large Marshmallows: These become the “ghost bodies” — size matters here for that perfect spooky shape.
- White Chocolate Chips or Candy Melts: Melts nicely to coat marshmallows and give them that ghostly whiteness.
- Black Candy Melts, Candy Eyes, or Mini Chocolate Chips: These are crucial for the ghost faces — pick whichever you prefer or have at home.
Tweak to Your Taste
I love that this Halloween Ghost Brownies Recipe invites you to play with the toppings and flavors. Over time, I’ve found that switching up the ghost faces or even adding a splash of pumpkin spice to the brownie batter elevates the spooky season vibes!
- Variation: Sometimes I sprinkle chopped nuts or swirl in caramel before baking — it adds a surprise crunch and gooeyness that folks adore!
- Dietary adjustment: For dairy-free, try coconut-based white chocolate melts and check your brownie mix ingredients.
- Seasonal twist: Add orange or purple candy melts for the ghost coating instead of white for a colorful spin.
Step-by-Step: How I Make Halloween Ghost Brownies Recipe
Step 1: Bake the Perfect Brownies
Start by preparing your brownies exactly as the box (or your homemade recipe) directs—mixing eggs, oil, water, and brownie mix until smooth. Bake in a greased 9×9-inch pan. One little tip: using a sharp knife dipped in warm water to cut the brownies after they cool will give you nice, clean edges—trust me, it makes the presentation so much better!
Step 2: Adding the Ghost Marshmallows
Once the brownies are completely cool (this is key so the marshmallows don’t melt or slide off), place one large marshmallow in the center of each square. Make sure your marshmallows are jumbo size here — mini marshmallows just won’t have the same ghostly effect!
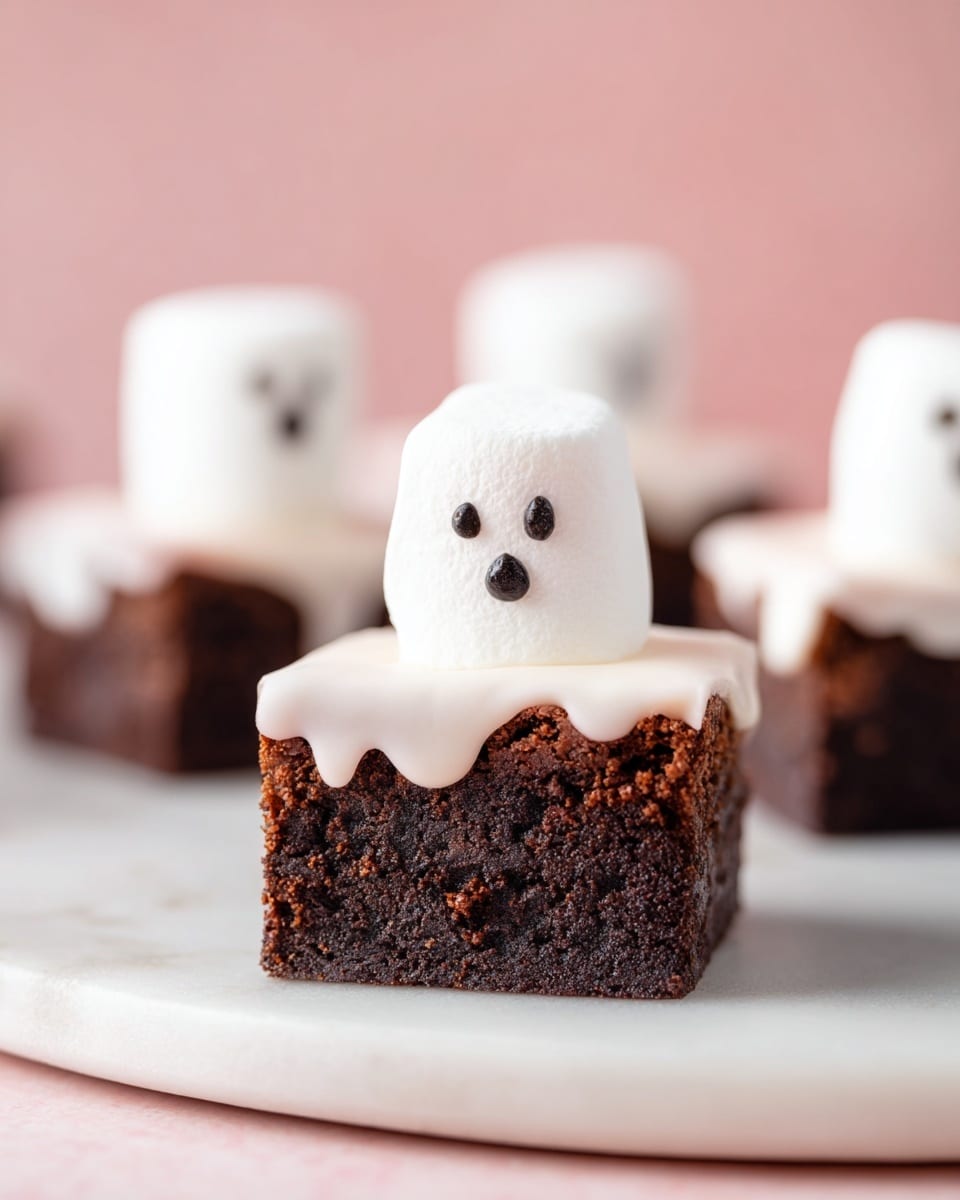
Step 3: Coat with White Chocolate & Create Ghostly Shapes
In a microwave-safe bowl, melt your white chocolate chips or candy melts in 30-second bursts, stirring gently each time until silky smooth. Then, spoon the melted white chocolate over each marshmallow, letting it drip down the sides. This creates that fantastic “ghost shape” look. If your white chocolate gets too thick, stirring in a teaspoon of coconut oil helps thin it perfectly.
Step 4: Ghost Faces Time!
While the coating is still warm, melt your black candy melts or use mini chocolate chips or candy eyes for the ghost faces. I use a toothpick to dot on eyes and a mouth with the melted black candy — it’s easier than you’d think and way less messy! If you’re using candy eyes, just press them gently onto the chocolate while it’s still wet. Then, let everything set for 20–30 minutes to let the chocolate harden properly.
Pro Tips for Making Halloween Ghost Brownies Recipe
- Cool Completely Before Decorating: Don’t rush! Brownies must be 100% cooled so marshmallows and chocolate stick beautifully and don’t slide.
- Use Jumbo Marshmallows: Standard large marshmallows give you that perfect ghost shape; minis just won’t cut it.
- Thinning Chocolate: If your melted white chocolate thickens, a small amount of coconut oil saves the day by making it more drizzle-friendly.
- Fast Setting: Pop the tray in the fridge for 10–15 minutes after decorating to speed up chocolate hardening — this keeps your ghosts neat and shiny.
How to Serve Halloween Ghost Brownies Recipe
Garnishes
I usually keep garnishes simple—sometimes I sprinkle a few festive orange or black sugar crystals around the plate for a little extra sparkle. If I’m feeling extra crafty, I’ll add a tiny toothpick “ghost flag” for kids to hold while eating. These garnishes add a playful touch without messing up the gooey ghost tops.
Side Dishes
Pair these brownies with a classic pumpkin-spiced latte or a steaming cup of hot cocoa—both complement the rich chocolate beautifully. If you’re serving at a party, a platter of fresh fruit like sliced apples or clementines balances the sweetness perfectly.
Creative Ways to Present
I’ve tried lining them up on a black platter with “spooky” toothpicks sticking out and even placing them in little cupcake liners to keep each ghost tidy. For a kid’s party, arranging the brownies on a platter with fake spider webs and mini pumpkins really raises the festive atmosphere!
Make Ahead and Storage
Storing Leftovers
Leftover Halloween Ghost Brownies keep well in an airtight container at room temperature for a few days, but personally, I store them in the fridge to keep the chocolate toppings nice and firm, extending freshness for up to 5 days.
Freezing
I’ve frozen these brownies on a tray first, then wrapped them individually in plastic wrap and sealed in a freezer bag. When thawed overnight in the fridge, the marshmallow ghosts stay surprisingly fluffy and the chocolate doesn’t crack — perfect for making ahead for a Halloween party.
Reheating
If you want to serve the brownies warm, I recommend warming just a bite-sized corner in the microwave for a few seconds—quick enough to soften the brownie without melting the ghosts too much. Otherwise, serve room temperature for best texture.
FAQs
-
Can I make the Halloween Ghost Brownies Recipe from scratch instead of using a box mix?
Absolutely! Feel free to use your favorite homemade brownie recipe. The key is making sure your brownies are fudgy and fully cooled before decorating. Homemade gives you total control over flavors, but the box mix keeps things fast and foolproof.
-
What if I don’t have candy melts or candy eyes?
No worries! You can melt white chocolate chips for the coating and use mini chocolate chips, black icing, or simply a toothpick dipped in melted chocolate to create eyes and mouths. It’s all about having fun and getting creative.
-
How do I stop the marshmallows from sliding off the brownies?
Make sure your brownies are fully cooled and the surface is dry before placing the marshmallows on. Adding the white chocolate coating also helps “glue” the marshmallows in place as it hardens. Patience here really pays off!
-
Can I make these ahead for a Halloween party?
Yes! You can make them a day or two in advance. Store them in an airtight container in the fridge to maintain freshness and firm up the chocolate. Just bring them to room temp before serving for the best flavor.
Final Thoughts
This Halloween Ghost Brownies Recipe has become my go-to for easy Halloween entertaining—a cute, tasty treat with minimal fuss but maximum fun. The smiles you’ll get from family and friends when these cute ghosts come out of the kitchen are priceless! Give it a try this year, and I’m pretty sure you’ll find it as delightfully spooky and delicious as I do. Happy baking and even happier haunting!
Print
Halloween Ghost Brownies Recipe
- Prep Time: 20 minutes
- Cook Time: 35 minutes
- Total Time: 1 hour 30 minutes
- Yield: 16 servings
- Category: Dessert
- Method: Baking
- Cuisine: American
Description
These Halloween Brownies are a spooky and fun treat featuring rich, fudgy brownie squares topped with ghostly marshmallows coated in white chocolate and decorated with candy eyes or mini chocolate chips. Perfect for an easy festive dessert that’s both delicious and visually impressive.
Ingredients
Brownie Base
- 1 box brownie mix
- 2 eggs at room temperature
- ½ cup avocado oil
- 3 tablespoon water
Ghost Topping
- 16 large marshmallows
- 1 cup white chocolate chips or white candy melts
- 1 tablespoon black candy melts or candy eyes or mini chocolate chips
Instructions
- Prepare Brownies: Prepare and bake the brownies according to the package directions in a greased 9×9-inch pan. Once baked, let them cool completely to ensure the toppings will set properly without sliding.
- Add Marshmallows: Cut the cooled brownies into squares. Place one large marshmallow in the center of each brownie square, serving as the ghost’s body.
- Melt White Chocolate: In a microwave-safe bowl, melt the white chocolate chips or candy melts in 30-second intervals, stirring after each until smooth and creamy.
- Coat Marshmallows: Spoon the melted white chocolate over each marshmallow, allowing it to drip down the sides to form a ghostly shape around the brownie.
- Create Faces: While the coating is still warm, melt the black candy melts in a microwave-safe bowl. Using a toothpick, carefully draw eyes and mouths onto each ghost. Alternatively, press candy eyes or mini chocolate chips onto each marshmallow to create ghost faces.
- Set Chocolate: Let the decorated brownies sit for 20 to 30 minutes to allow the chocolate to harden and set before serving.
Notes
- A box mix makes this recipe quick and reliable, but you can swap in your favorite homemade brownie base for a scratch version.
- Ensure brownies are completely cooled before adding marshmallows and chocolate to prevent toppings from sliding.
- Use standard large marshmallows; mini marshmallows do not work well for the ghost effect.
- If melted white chocolate is too thick, stir in 1 teaspoon coconut oil or vegetable shortening to thin it out.
- For ghost faces, alternatives to candy eyes include mini chocolate chips, black icing, or small dots of melted chocolate.
- Use a sharp knife dipped in warm water and wiped dry between cuts for neat brownie edges.
- Place the decorated tray in the fridge for 10–15 minutes to help the chocolate harden faster if desired.
- Store decorated brownies in an airtight container at room temperature for up to 3 days, or refrigerate for up to 5 days to maintain freshness.
Nutrition
- Serving Size: 1 brownie (approximate)
- Calories: 250 kcal
- Sugar: 20 g
- Sodium: 150 mg
- Fat: 14 g
- Saturated Fat: 5 g
- Unsaturated Fat: 7 g
- Trans Fat: 0 g
- Carbohydrates: 30 g
- Fiber: 1 g
- Protein: 2 g
- Cholesterol: 25 mg

