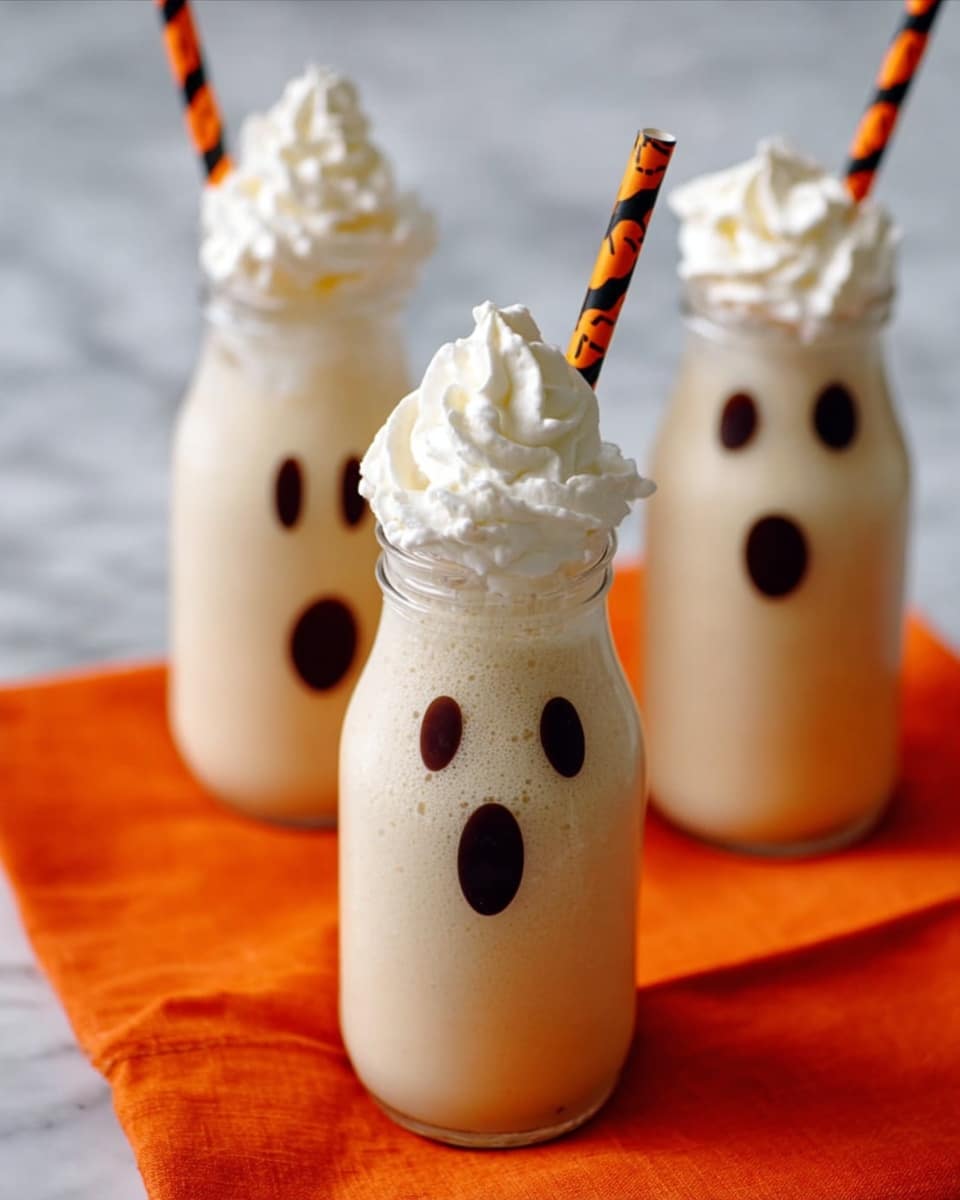
Halloween Ghost Milkshakes Recipe
If you’re looking for the perfect festive treat to delight both kids and adults this spooky season, you’ve got to try my Halloween Ghost Milkshakes Recipe. It’s wonderfully creamy, sweet, and just a little bit spooky with those cute ghost faces made from melted chocolate. Trust me, once you make these, they’ll become your go-to for Halloween parties or even just a fun family afternoon at home. Stick with me — I’ll walk you through every step so you can nail this fan-freaking-tastic treat!
Why This Recipe Works
- Simple Ingredients: Uses everyday ingredients that are easy to find but combined for maximum flavor and fun.
- Eye-Catching Presentation: The melted chocolate faces add a festive and professional touch without complicated tools.
- Customizable Consistency: You control how thick or thin the milkshake is by easily adjusting milk or ice cream.
- Quick & Kid-Friendly: Perfect for Halloween celebrations with minimal prep and a super fun decorating step for kids.

Ingredients & Why They Work
This Halloween Ghost Milkshakes Recipe lets simple classics shine. The creamy vanilla ice cream provides that dreamy base, while the milk thins it just enough for perfect sipping. The melted semisweet chocolate is key — it’s easy to pipe on ghost faces and sets nicely for that spooky charm. Plus, a dollop of whipped cream finishes it off with that cloud-like ghost effect.

- Vanilla ice cream: The creamy foundation that’s sweet but mild enough to let the chocolate details shine.
- Milk: Adjusts the shake’s thickness—use whole for richness or lower fat if you want a lighter treat.
- Semisweet chocolate chips: Melts smoothly and holds shape well, perfect for the ghost faces’ eyes, nose, and mouth.
- Whipped cream: Adds lightness and volume on top, mimicking fluffy ghostly clouds.
Tweak to Your Taste
One of my favorite things about this Halloween Ghost Milkshakes Recipe is how easy it is to personalize. Maybe you’re a peppermint fan or want to switch things up with pumpkin spice in the fall — I’ve tried a few variations, and I promise, almost anything works. Don’t be afraid to experiment! That’s what makes this treat so fun.
- Variation: I’ve added a teaspoon of pumpkin pie spice to the vanilla ice cream before blending — it gives the milkshake a subtle fall twist that’s absolutely delicious.
- Dietary swap: Use dairy-free vanilla ice cream and almond milk for a vegan-friendly ghost milkshake that’s just as creamy.
- Texture tweak: For an extra thick shake, try freezing your milkshake glasses before pouring – it keeps the chill longer and feels ultra indulgent.
Step-by-Step: How I Make Halloween Ghost Milkshakes Recipe
Step 1: Melting the Chocolate for Ghost Faces
First things first: those adorable ghost faces! Place your semisweet chocolate chips in a microwave-safe dish and zap them on high for 30 seconds. Stir well, then continue heating in 15-second bursts, stirring each time. The chocolate should be glossy and smooth, perfect for decorating. Tip: Use the end of a spoon handle dipped in chocolate to dot eyes and a mouth onto the inside of your glasses. Refrigerate these glasses for about 30 minutes so the chocolate sets — this step adds the festive “boo” factor and makes your milkshake look like Halloween magic!
Step 2: Blending the Milkshake
Next, scoop your vanilla ice cream into a blender and add the milk. Blend just until smooth and creamy—no need to overdo it or the shake might get too thin. I like to leave a little room in the blender so the shake gets really well mixed but not too runny. Remember, you can always add more milk a splash at a time if it’s too thick!
Step 3: Pouring and Adding Whipped Cream
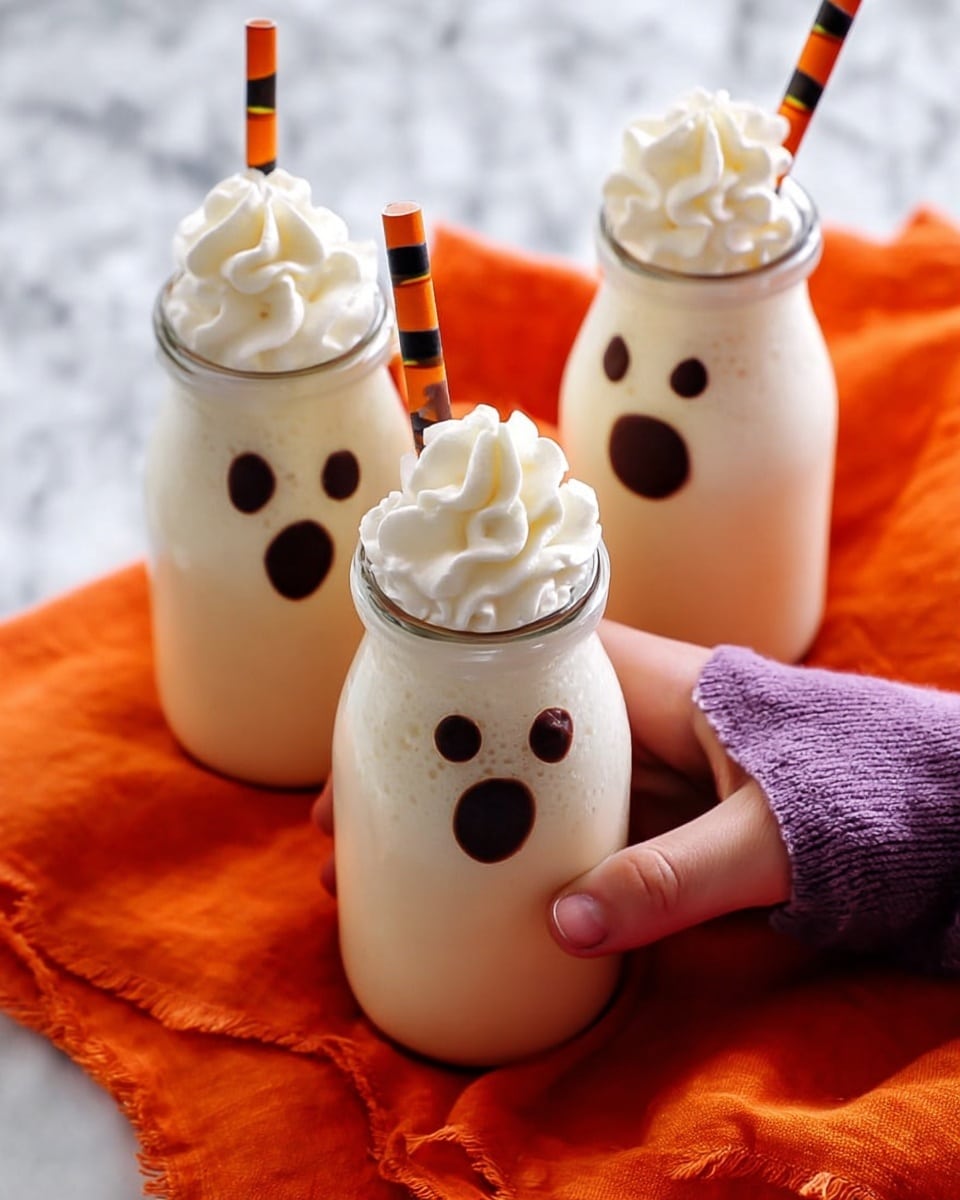
Now, carefully pour that creamy milkshake into your decorated glasses, trying not to disturb the chocolate faces. Leave about an inch at the top, then crown each glass with a generous swirl of whipped cream. This gives your ghosts their fluffy “heads” — so cute and perfect for the season!
Step 4: Serve and Enjoy Immediately
Serve your Halloween Ghost Milkshakes right away for the best texture and taste. The whipped cream is at its peak fluffiness, and the milkshake tastes fresh and cold—just how it should be. If you try to hang onto it too long, the whipped cream will melt, and the chocolate might start to soften, so enjoy the moment!
Pro Tips for Making Halloween Ghost Milkshakes Recipe
- Chocolate Melting: Stir frequently while melting to avoid burning; a smooth glossy finish is key for easy decorating.
- Glass Decorating: Use just a small amount of melted chocolate for the ghost features — too much can drip or smudge.
- Milkshake Consistency: Blend until smooth but check thickness before pouring; add milk or ice cream as needed to get your perfect sip.
- Serve Quickly: Whipped cream loses its shape fast, so serve immediately for that picture-perfect ghost effect.
How to Serve Halloween Ghost Milkshakes Recipe
Garnishes
I like to keep the garnish classic with a big puff of whipped cream—to me, it looks like the ghost’s “head.” Sometimes I add a few mini marshmallows or even a sprinkle of edible glitter to add some extra magic. A drizzle of caramel can add a sweet twist if you’re feeling fancy, but honestly, the chocolate ghost faces steal the show.
Side Dishes
If you’re serving these at a Halloween party, pair them with salty snacks like popcorn or lightly salted pretzels to balance the sweetness. Pumpkin-shaped sugar cookies or simple chocolate chip cookies also complement the milkshakes beautifully for a full spooky snack station.
Creative Ways to Present
For a party, I love using clear glass jars with twine or Halloween-themed ribbons tied around the neck. You could also place the glasses on a black tray sprinkled with edible “ghost dust” (powdered sugar or coconut flakes) for extra effect. Little decorative straws with bats or pumpkins make sipping more festive too!
Make Ahead and Storage
Storing Leftovers
I usually recommend making these fresh because of the whipped cream and chocolate faces, but if you do have some leftover milkshake, store it in an airtight container in the fridge for up to 24 hours. Just know the shake will thicken or separate slightly, so give it a good stir before drinking.
Freezing
Freezing the milkshake itself isn’t my favorite because the texture changes when frozen solid. However, you can freeze extra milkshake base (before adding whipped cream) in ice cube trays and then blend those cubes later for a fresh shake taste whenever you want to skip making it from scratch.
Reheating
Since this is a cold treat, reheating isn’t really an option. If your leftovers separate in the fridge, just let them sit at room temperature for a few minutes and stir well to bring back some creaminess.
FAQs
-
Can I use a different kind of chocolate for the ghost faces?
Yes! Semisweet chocolate chips work best because they melt smooth and set firm, but you can also try white chocolate chips for a fun contrast or even dark chocolate if you prefer a more intense cocoa flavor. Just keep in mind that the chocolate needs to be smooth and not too runny for proper decorating.
-
What if I don’t have a blender?
You can soften the ice cream slightly by letting it sit at room temperature for 5-10 minutes, then whisk it vigorously with the milk until combined. It won’t be quite as smooth or frothy, but the flavor will still be spot on!
-
How long do the chocolate ghost faces last on the glasses?
Once set and refrigerated, the chocolate ghost faces can last for a few days. Just be sure to keep the glasses in the fridge until you’re ready to serve to prevent melting or smudging.
-
Can I make this recipe ahead for a Halloween party?
Decorate the glasses with the chocolate faces a day ahead and refrigerate. Make and blend the milkshake shortly before guests arrive to keep it fresh, then top with whipped cream and serve immediately for best results.
Final Thoughts
This Halloween Ghost Milkshakes Recipe is one of those joyful kitchen moments where simplicity meets creativity—and you get a seriously tasty treat that’s perfect for the season. I love how easily the chocolate “ghost faces” transform an ordinary milkshake into a playful piece of Halloween magic that everyone smiles at. So, go ahead, invite your friends or kids into the kitchen, have fun making spooky faces on your glasses, and enjoy this creamy, dreamy delight together. You’ll be so glad you did!
Print
Halloween Ghost Milkshakes Recipe
- Prep Time: 30 minutes
- Cook Time: 0 minutes
- Total Time: 1 hour
- Yield: 4 servings
- Category: Dessert
- Method: Blending
- Cuisine: American
Description
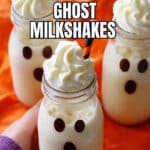
This fun and festive Halloween Ghost Milkshake recipe features creamy vanilla milkshakes served in glasses decorated with spooky ghost faces made from melted chocolate and topped with whipped cream. Perfect for a seasonal treat that combines playful presentation with delicious taste.
Ingredients
Ghost Face Decoration
- 1/4 cup semisweet chocolate chips
Milkshake
- 3 cups vanilla ice cream
- 1 3/4 cups milk
- Whipped cream (such as Reddi Whip) for topping
Instructions
- Prepare the ghost faces: Place the semisweet chocolate chips in a microwave-safe dish and heat on high for 30 seconds. Stir and continue heating in 15-second increments, stirring after each, until the chocolate is smooth and creamy. Using the handle end of a spoon dipped in the melted chocolate, carefully draw small ghost face features (eyes, nose, mouth) inside the glasses. Place the decorated glasses in the refrigerator for about 30 minutes to let the chocolate set.
- Make the milkshake: Add the vanilla ice cream and milk to a blender and blend until smooth and well combined. Pour the milkshake mixture into the prepared glasses, leaving about one inch of space at the top.
- Add whipped cream: Top each milkshake with a generous amount of whipped cream.
- Serve: Serve the milkshakes immediately while cold and fresh.
Notes
- To adjust thickness, add more milk a little at a time for a thinner shake or more ice cream for a thicker consistency.
- The recipe yields approximately 4 1/2 cups of milkshake, so servings will depend on your glass size.
- Use only a small amount of melted chocolate to draw the facial features for best results.
- Approximate nutrition info is provided as a guide and may vary based on ingredients used.
Nutrition
- Serving Size: 1 cup
- Calories: 350 kcal
- Sugar: 30 g
- Sodium: 120 mg
- Fat: 15 g
- Saturated Fat: 9 g
- Unsaturated Fat: 5 g
- Trans Fat: 0 g
- Carbohydrates: 45 g
- Fiber: 1 g
- Protein: 6 g
- Cholesterol: 50 mg
