
Halloween Graveyard Pudding Cups Recipe
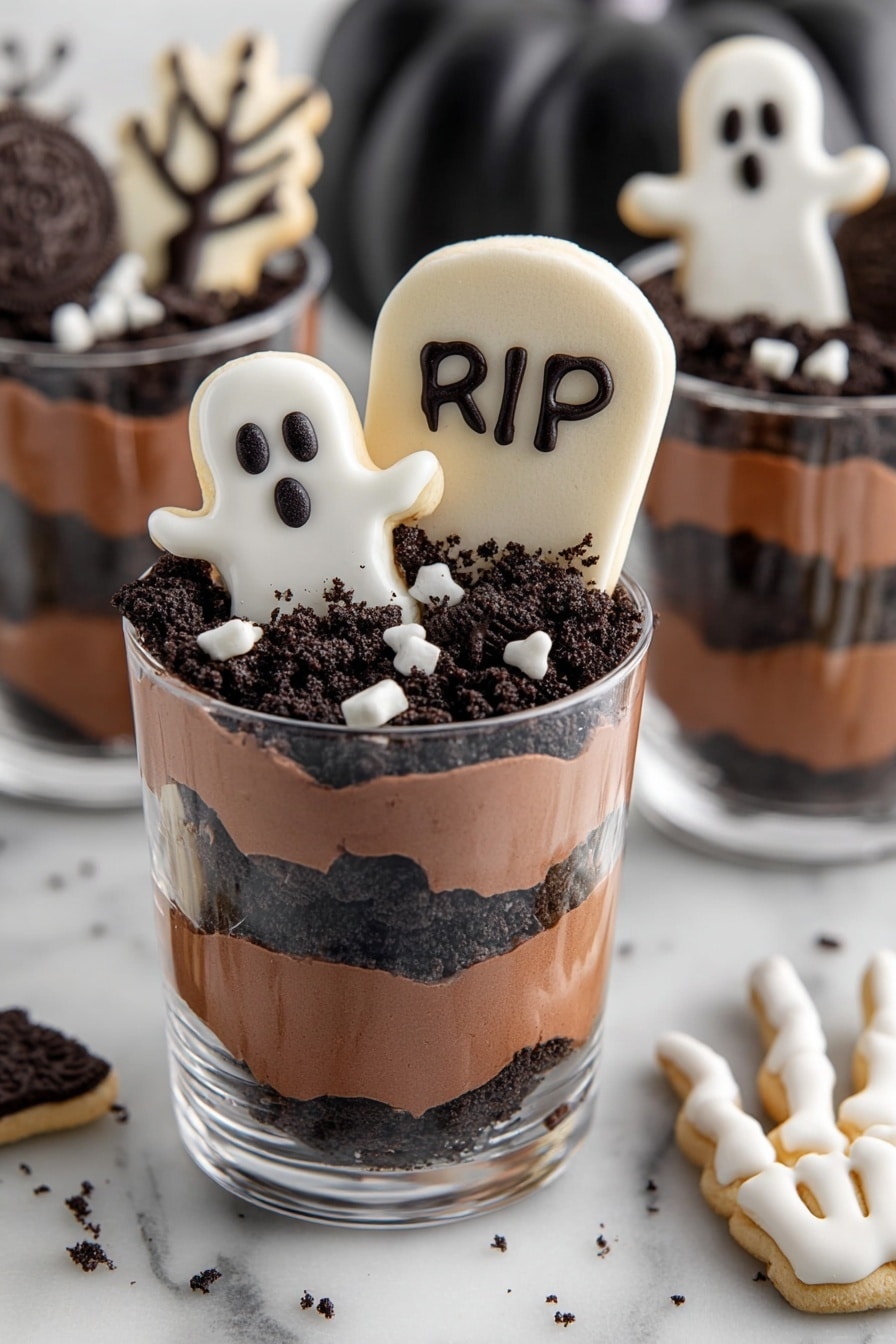
If you’re on the hunt for a dessert that instantly brings all the Halloween vibes—and tastes downright delicious—I’ve got a treat for you. This Halloween Graveyard Pudding Cups Recipe is the perfect mix of spooky and sweet, with layers of creamy chocolate pudding, crunchy Oreos, and adorable white chocolate ghosts and tombstones that you can craft yourself! Trust me, whether you’re making these for a kids’ party or just want to impress your friends with a fun fall dessert, these pudding cups are an absolute crowd-pleaser. So, grab your apron and let’s dig into some graveyard goodness together!
Why This Recipe Works
- Easy yet impressive: You get a show-stopping dessert that’s surprisingly simple to throw together, perfect when time or patience is limited.
- Textural contrast: The creamy pudding, crunchy Oreos, and crisp candy decorations all come together for a fun mouthfeel that keeps people coming back for bites.
- Customizable spooky decor: Crafting white chocolate ghosts and chocolate tombstones adds a personal, playful touch that really makes this dessert pop.
- Great for all ages: Kids and adults alike love these, making them an all-around party hit.

Ingredients & Why They Work
This Halloween Graveyard Pudding Cups Recipe combines familiar, comforting ingredients that work harmoniously for a fun, festive treat. Each component plays its part—milk and instant pudding create that silky base, Oreos add a dirt-like crunch, and the candy melts transform into spooky decorations you’ll be proud of. Here are a few tips on picking the best ingredients to ensure your pudding cups turn out perfectly every time.
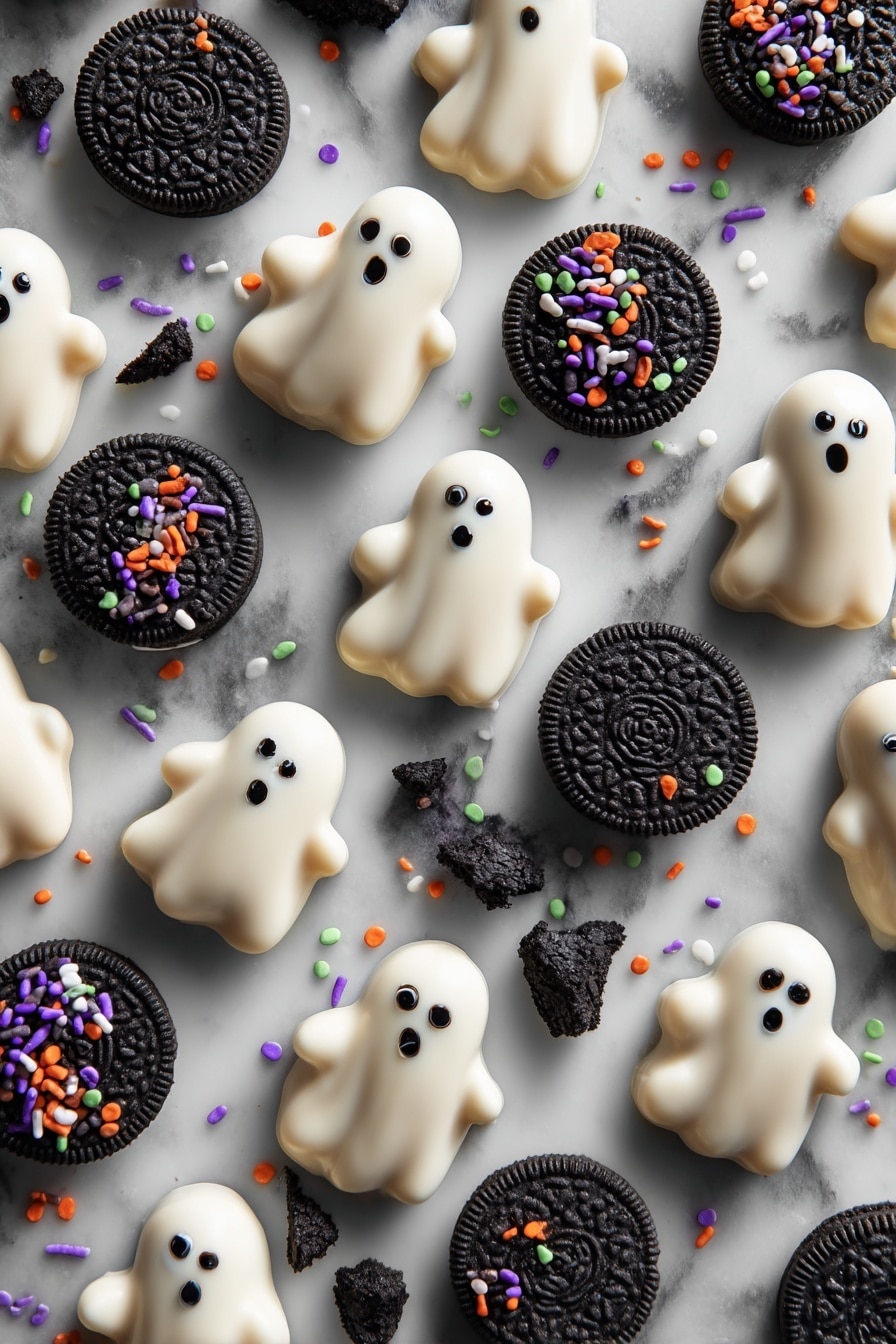
- White chocolate: Using white chocolate melts ensures smooth, glossy ghosts that set nicely and hold their shape.
- Black candy melts: These are perfect for piping fine details like eyes, mouths, and spooky trees—it’s way easier to work with than regular melted chocolate.
- Milano cookies: Firm and slightly sweet, these make excellent tombstones that won’t crumble when stood upright.
- Instant chocolate pudding mix: Quick to prepare with cold milk, it delivers rich chocolate flavor and keeps the dessert fuss-free.
- Oreos: Crushed Oreos mimic the “dirt” of the graveyard and add wonderful crunch contrasting with smooth pudding.
- Halloween sprinkles (optional): A festive final flourish that adds pops of color and whimsy—totally optional but so fun!
Tweak to Your Taste
One of the best things about this Halloween Graveyard Pudding Cups Recipe is how easy it is to make your own. I love switching up the type of pudding for different flavor profiles or adding a little extra crunch depending on what I have on hand. You’re totally encouraged to tailor the spooky elements too—don’t be shy about getting creative!
- Variation: I once swapped the chocolate pudding for vanilla and topped the cups with crushed chocolate graham crackers for a lighter, classic graveyard look—it was a hit and super tender on the palate.
- Diet-friendly: Use dairy-free pudding and non-dairy milk for a vegan-friendly version and opt for vegan candy melts to keep the fun going.
- Seasonal twist: Around Thanksgiving, I’ve replaced Halloween sprinkles with tiny candy pumpkins or cinnamon-dusted cookie crumbles for a fall vibe.
Step-by-Step: How I Make Halloween Graveyard Pudding Cups Recipe
Step 1: Creating the White Chocolate Ghosts
First things first, melt the white chocolate in short bursts in the microwave—20 seconds at a time—to avoid burning it. Stir between intervals to get that silky texture. Spoon generous dollops onto parchment paper and gently drag the bottom of each dollop downward with the back of your spoon to craft ghost shapes. For added spookiness, use a toothpick to pull out little “arms” on either side. Pop these ghosts in the fridge to set up firm while you prep other elements.
Step 2: Adding the Spooky Faces and Trees
While your ghosts chill, melt the black candy melts as directed. Transfer the melted candy into a piping bag fitted with a small tip—that control is key here! Carefully pipe eyes and creepy mouths onto each ghost. Next, pipe tree silhouettes on parchment paper; tip: make sure the base of each tree is thicker so it stands upright. Use any leftover candy melts to write spooky inscriptions on your Milano cookies, turning them into eerie tombstones. Let everything harden completely before moving on.
Step 3: Mixing the Pudding
Whisk together your instant chocolate pudding mix and cold milk until you get a smooth, lump-free texture. Don’t rush this step because you want a silky pudding that’ll layer beautifully. Set it aside for a few minutes as it thickens—this waiting is worth it for the perfect consistency.
Step 4: Building the Graveyard Cups
Now for the fun part: assembly! Start with a layer of pudding at the bottom of each cup, then sprinkle a layer of crushed Oreos on top to mimic dirt. Repeat with another pudding layer and finish with a final Oreo crunch layer. Pop the cups into the fridge for about an hour to set so everything melds wonderfully together.
Step 5: Bringing the Graveyard to Life
When you’re ready to wow your guests, carefully place one Milano cookie tombstone into each cup, press a white chocolate ghost beside it, and tuck a black candy tree in the back. If you like a bit more color or whimsy, sprinkle on Halloween sprinkles to top it off. Serve chilled and enjoy the delighted gasps!
Pro Tips for Making Halloween Graveyard Pudding Cups Recipe
- Use Parchment Paper: Always pipe your ghosts and trees on parchment to make removal quick and clean without sticking.
- Temperature Matters: Don’t overheat your candy melts—warming them slowly keeps them glossy and workable.
- Layer Evenly: When adding pudding and crushed Oreos, keep layers fairly even so each bite gets a perfect blend of flavors and texture.
- Set Time is Key: Give yourself at least an hour in the fridge after assembly so the pudding firms up—this step makes serving easier and tidier.
How to Serve Halloween Graveyard Pudding Cups Recipe
Garnishes
For garnishes, I usually keep it classic and fun. The white chocolate ghosts are my favorite little stars, but adding a sprinkle of Halloween-themed candy bits or edible glitter takes things up a notch—plus, kids love the sparkle. You could also throw in a few mini candy pumpkins or even edible eyes for extra creep factor depending on your crowd.
Side Dishes
While these pudding cups work great as a standalone snack or dessert, pairing them with simple sides like caramel apples or spiced nuts creates a deliciously balanced Halloween spread. For a party, I like to set these alongside a bowl of popcorn mixed with candy corn—it’s a sweet and salty combo that everyone digs.
Creative Ways to Present
I once arranged these pudding cups on a black tray lined with fake spider webs and scattered plastic spiders for a super eerie effect my guests couldn’t stop talking about! For a kids’ party, using clear plastic cups with glow-in-the-dark rings underneath made the scene even more magical. You could also serve them in mini cauldrons or mason jars to keep it rustic and charming.
Make Ahead and Storage
Storing Leftovers
If you happen to have any leftovers (they do go fast!), cover your pudding cups tightly with plastic wrap or store them in airtight containers in the fridge—this keeps them fresh for up to three days. Just remember to keep the ghost and tree decorations separate until serving to avoid any sogginess or melting.
Freezing
I’ve found that freezing these pudding cups isn’t the best idea because the texture of the pudding tends to get watery when thawed. It’s much better to enjoy them fresh or within a couple of days refrigerated.
Reheating
Since these are chilled desserts, there’s no need to reheat, thankfully! Just take them out about 10 minutes before serving if they’ve been in the fridge to let them soften up a touch for an even creamier bite.
FAQs
-
Can I make the Halloween Graveyard Pudding Cups Recipe dairy-free?
Absolutely! Use a dairy-free instant pudding mix and substitute regular milk with almond, oat, or coconut milk. Just check that your candy melts and cookies are vegan-friendly as well to keep everything dairy-free.
-
How far ahead can I prepare the pudding cups?
You can assemble the pudding cups up to a day in advance; just keep the decorative elements like ghosts, trees, and tombstones separate until right before serving. This keeps them looking fresh and prevents melting.
-
What if I don’t have candy melts for decoration?
No worries! You can melt good-quality chocolate chips and temper them carefully for piping or decorate with Halloween-themed gummies or even plastic picks for a fuss-free alternative.
-
Can kids help with this recipe?
Definitely! Kids love shaping the ghosts and adding faces with piped candy melts—you might want to handle the melting parts, but decorating is a great hands-on activity for little helpers.
-
How do I keep the ghosts from melting too quickly?
Make sure to chill the ghosts fully before adding facial details and assemble the cups shortly before serving. Keep them refrigerated until that last minute to maintain their crisp shape.
Final Thoughts
This Halloween Graveyard Pudding Cups Recipe has become one of my absolute favorite festive desserts. I love how approachable it is—you don’t have to be a pro chocolatier to create these cute little spooky scenes, and the flavor combo is always a hit no matter the crowd. If you want a fun dessert that doubles as decoration and gets everyone excited for Halloween, give this a try. I promise you’ll end up making it a tradition like I did!
Print
Halloween Graveyard Pudding Cups Recipe
- Prep Time: 20 minutes
- Cook Time: 0 minutes
- Total Time: 1 hour 20 minutes
- Yield: 6 cups
- Category: Dessert
- Method: No-Cook
- Cuisine: American
- Diet: Vegetarian
Description
These Halloween Graveyard Pudding Cups are a festive and delicious dessert perfect for spooky celebrations. Layered with creamy chocolate pudding and crushed Oreos, and topped with white chocolate ghosts, black candy tree decorations, and Milano cookie tombstones, these cups are sure to delight both kids and adults alike.
Ingredients
Decorations
- ⅔ cup white chocolate, melted
- ½ cup black candy melts, melted
- 6 Milano cookies
- Halloween sprinkles, optional
Pudding
- 1 (3.9 ounce) box instant chocolate pudding mix
- 1 ¾ cups cold milk
- ½ – 1 cup crushed Oreos
Instructions
- Create White Chocolate Ghosts: Melt the white chocolate in a microwave-safe bowl by heating in 20-second intervals, stirring until smooth. Drop heaped spoonfuls onto a parchment-lined tray, dragging the bottoms with the back of a spoon to form ghost shapes. Use a toothpick to pull out portions on each side to create ghostly arms. Refrigerate until set.
- Decorate Ghosts: Melt the black candy melts following package instructions. Transfer to a piping bag with a small tip and pipe eyes and mouths onto the white chocolate ghosts. Set aside to harden completely.
- Create Candy Trees and Tombstones: Using the remaining black candy melts, pipe spooky tree shapes on parchment paper with thicker bases to anchor them; let set. Pipe inscriptions onto the Milano cookies with melted black candy to resemble tombstones.
- Prepare Pudding: In a large bowl, whisk the instant chocolate pudding mix with cold milk until smooth. Let it sit for a few minutes to thicken.
- Assemble Pudding Cups: In each serving cup, add a bottom layer of pudding, followed by crushed Oreos. Repeat with another pudding layer and finish with crushed Oreos. Refrigerate for about one hour to allow pudding to set.
- Decorate Cups: Before serving, gently press a Milano cookie tombstone into each cup, place a white chocolate ghost next to it, and position a candy tree at the back. Sprinkle with Halloween sprinkles if desired.
- Serve: Serve the decorated pudding cups chilled and enjoy the spooky, sweet treat.
Notes
- Store assembled pudding cups covered in plastic wrap or airtight containers in the refrigerator for up to 3 days.
- Keep the white chocolate ghosts, candy trees, and decorated tombstones separate until ready to serve to maintain their shape and texture.
- You can substitute Milano cookies with any other thin chocolate cookies if preferred.
- For a stronger chocolate flavor, use dark chocolate candy melts instead of black.
- Use full-fat milk for creamier pudding; however, low-fat milk will also work.
Nutrition
- Serving Size: 1 cup
- Calories: 320 kcal
- Sugar: 28 g
- Sodium: 150 mg
- Fat: 16 g
- Saturated Fat: 10 g
- Unsaturated Fat: 5 g
- Trans Fat: 0 g
- Carbohydrates: 40 g
- Fiber: 2 g
- Protein: 4 g
- Cholesterol: 15 mg
