Halloween Pizzas Recipe
Hey there! If you’re looking for a super fun and festive way to celebrate spooky season, this Halloween Pizzas Recipe is just the thing you need. I’ve made these with friends and family, and let me tell you, the kids and adults alike are always delighted by how creative and tasty they turn out. Plus, it’s an easy recipe to make in a pinch—no need for fancy dough rising times or complicated steps. Stick around, because I’m sharing all my best tips to help you make these Halloween pizzas pop with flavor and fun!
Why This Recipe Works
- Quick No-Rise Dough: This dough comes together fast, so your Halloween pizza party can start sooner!
- Customizable Toppings: You get endless options to create spooky designs with pepperoni, veggies, and more.
- Kid-Friendly Fun: It’s hands-on and perfect for getting little ones excited about cooking and Halloween.
- Flavorful & Festive: The combination of fresh mozzarella and a savory pizza sauce makes for a crowd-pleaser every time.

Ingredients & Why They Work
The ingredients in this Halloween Pizzas Recipe are straightforward but thoughtfully chosen. The no-rise dough is especially great because it uses yeast in a way that lets you jump right into baking with minimal waiting. Plus, fresh mozzarella adds creaminess without overpowering the fun, spooky toppings you pick.

- All-purpose flour: The perfect base for a tender yet crisp crust; I recommend unbleached if you can find it.
- Fleischmann’s Pizza Yeast: This yeast gives a nice lift without needing extra proofing time.
- Granulated sugar: Helps activate the yeast and adds just a touch of sweetness to balance savory toppings.
- Salt: Essential for flavor depth in the dough.
- Very warm water: Using water that’s just the right temperature wakes up the yeast without killing it.
- Vegetable or canola oil: Keeps the crust soft and adds a subtle richness.
- Pizza sauce: I usually use a good-quality jarred sauce or homemade marinara; both work beautifully here.
- Fresh mozzarella cheese: Melts beautifully and stretches perfectly for that classic pizza vibe.
- Desired toppings: Pepperoni, bell peppers, olives, onions, pineapple, parsley, salami, Canadian bacon — pick whatever you love and think spooky shapes!
Tweak to Your Taste
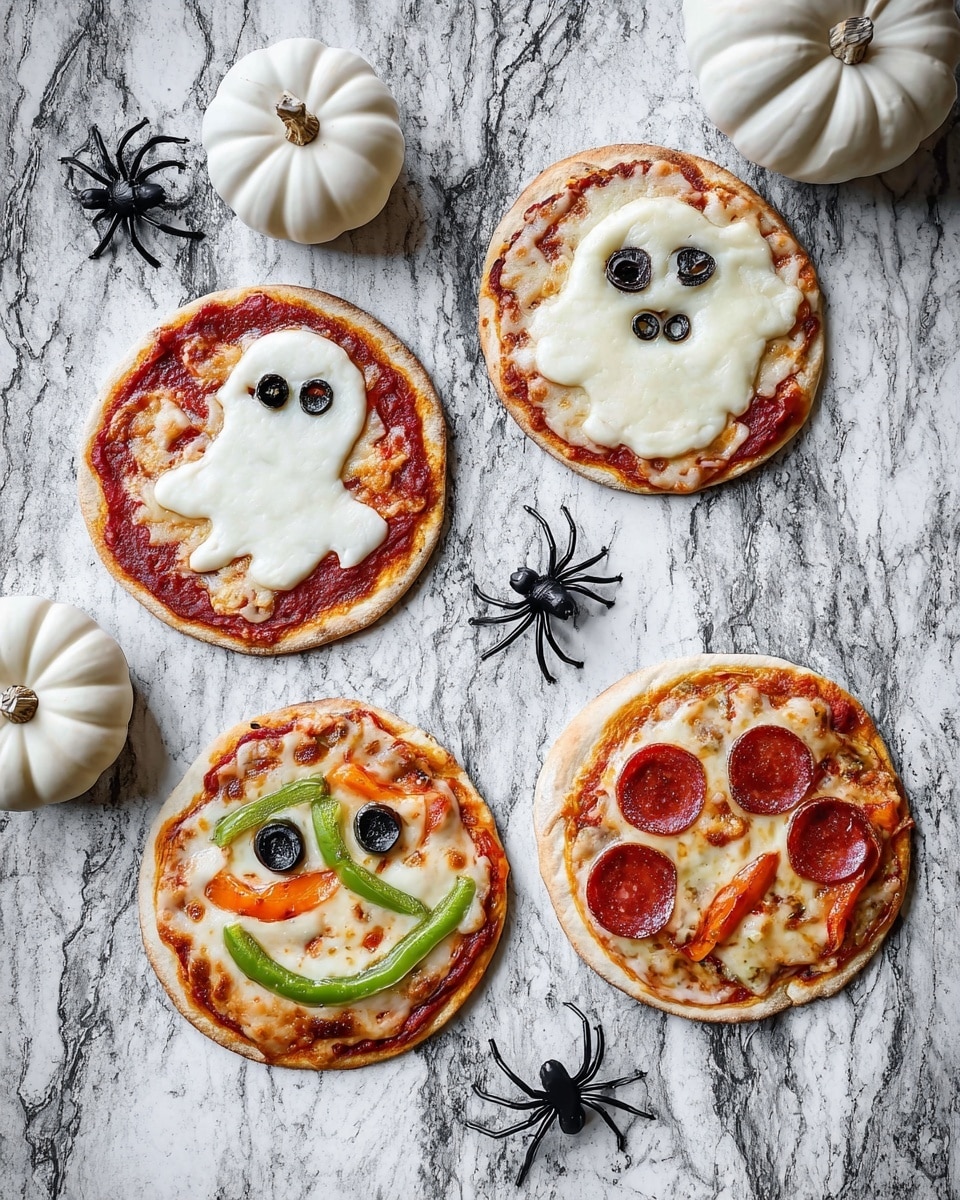
I love how flexible this Halloween Pizzas Recipe is. You can truly let your creativity run wild with toppings and shapes. Personally, I sometimes swap out the traditional pepperoni for little eyes made from olives and slices of bell pepper for pumpkin smiles. It’s all about having fun!
- Vegetarian Variation: Using bell peppers, olives, mushrooms, and onions creates colorful, spooky faces that are totally kid-friendly.
- Meaty Option: Adding Canadian bacon and salami gives a nice, hearty bite—perfect if you’re feeding hungry teenagers.
- Gluten-Free Twist: I haven’t tried it myself yet, but swapping the dough for a gluten-free crust should work if you’re careful with toppings.
- Spicy Kick: For those who like a little heat, a sprinkle of red pepper flakes or slices of jalapeño really bring the pizza to life.
Step-by-Step: How I Make Halloween Pizzas Recipe
Step 1: Whip Up the Quick Dough
Start by combining 1 cup of flour, the undissolved yeast, sugar, and salt in a large bowl. I find mixing the dry first helps the yeast distribute evenly. Then add the warm water and oil and stir until well blended, about a minute—the dough will be smooth but sticky. Don’t worry if that sounds unusual; this is key to a soft crust! Gradually add the rest of the flour until it forms a soft ball that’s still slightly tacky but not gooey.
Step 2: Knead & Divide
Pour the dough onto a floured surface and knead it for about 4 minutes. It should get smooth and elastic, so don’t rush it! Then divide the dough into 4 equal parts—each one will make a perfect mini 8-inch pizza crust.
Step 3: Pre-bake the Crusts
Roll or pat each dough ball into an 8-inch circle and place on a greased baking sheet. Pop these in a 450°F oven for 5-6 minutes. This pre-bake step is important—it helps the crust stay crisp and not soggy once your sauce and toppings go on.
Step 4: Decorate with Your Favorite Toppings
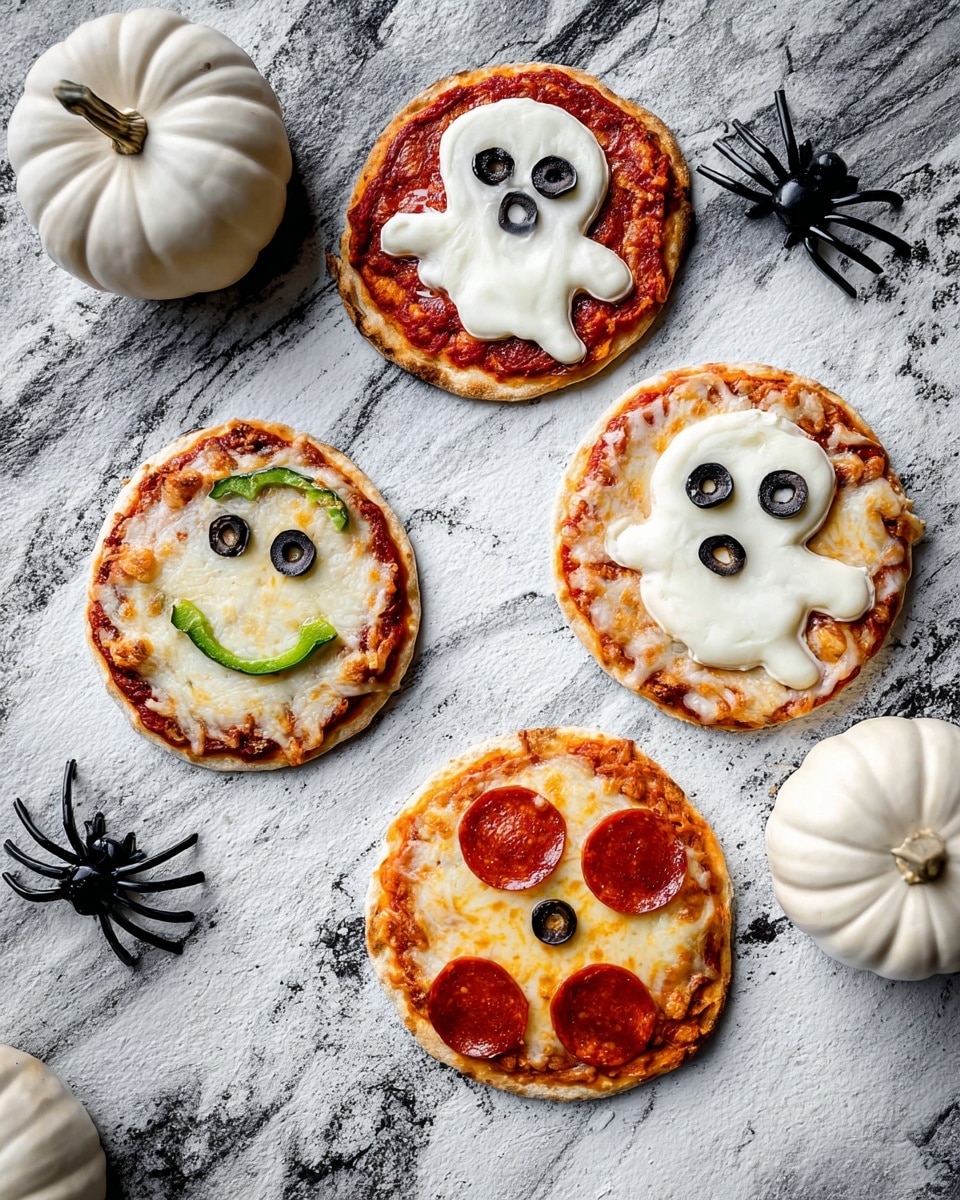
Spread about a quarter cup of pizza sauce on each pre-baked crust. Then bring out your toppings and have fun! Whether you’re making jack-o’-lantern faces, spooky spiders from olives, or ghostly shapes, you can truly get creative here. I love how this part makes pizza night memorable, especially for kids!
Step 5: Final Bake & Enjoy
Bake the topped pizzas for about 5-8 minutes more, until the cheese is melty and bubbly, and the toppings are heated through. Keep an eye on them to avoid burning, especially if you have thinner crusts or lots of toppings.
Pro Tips for Making Halloween Pizzas Recipe
- Warm Water Magic: Make sure your water is comfortably warm—around 110°F—to properly activate the yeast without killing it.
- Don’t Skip Pre-Baking: Pre-baking the crust prevents sogginess and helps toppings crisp up nicely.
- Keep Dough Slightly Sticky: A slightly sticky dough gives a softer crust, so don’t over-flour during kneading.
- Make It a Family Event: Turning topping into a mini competition for best-spooky design turns dinner into a memory.
How to Serve Halloween Pizzas Recipe
Garnishes
I love adding fresh parsley and a little drizzle of olive oil just as the pizzas come out of the oven—it brightens the flavors and keeps things looking fresh. Also, a sprinkle of chili flakes or Parmesan cheese can add a nice little finishing touch if you want to kick flavor up a notch.
Side Dishes
A crisp green salad with vinaigrette balances the cheesy richness wonderfully. For a real Halloween party, I like to serve baked pumpkin wedges or even some roasted garlic green beans that match the seasonal vibe.
Creative Ways to Present
One of my favorite presentation ideas is to plate the pizzas on a big wooden board surrounded by spooky decorations—think plastic spiders and orange napkins! Sometimes I cut the pizzas into fun shapes before baking, using cookie cutters like bats or pumpkins. The kids love it!
Make Ahead and Storage
Storing Leftovers
After a fun night, I usually store leftovers wrapped tightly in plastic wrap or in airtight containers in the fridge. They keep well for up to 3 days. Reheating in the oven or toaster oven keeps the crust nice and crisp compared to the microwave.
Freezing
I’ve successfully frozen these Halloween pizzas after assembling them on the pre-baked crusts. Just cover each pizza tightly with plastic wrap and foil, then freeze for up to 2 months. When you’re ready, bake straight from frozen, adding a few minutes to the cooking time. It’s a total lifesaver for last-minute parties!
Reheating
To keep leftovers tasting fresh, I reheat them in a 375°F oven for about 8-10 minutes. This helps keep the crust crisp and the cheese melty—so much better than a soggy microwave slice!
FAQs
-
Can I make the dough ahead of time for this Halloween Pizzas Recipe?
Absolutely! The dough can be prepared a few hours ahead and stored airtight in the fridge. Just let it come to room temperature before rolling it out to make handling easier.
-
What are some easy Halloween-themed pizza topping ideas?
I like using black olives for spider eyes, bell pepper strips for jack-o’-lantern smiles, and pepperoni arranged as ghosts or bats. You can also form pumpkin faces using slices of salami and cheese shapes.
-
Can I use pre-made pizza dough instead of making the crust from scratch?
Yes, that works just fine if you want to save time. Just pre-bake the store-bought crust for a few minutes before adding toppings to avoid sogginess.
-
How do I prevent the toppings from falling off the pizza?
Keep toppings moderate in size and weight. For example, thinly slice veggies and use smaller amounts to ensure everything stays put while baking. Press toppings lightly into the sauce before baking to help them adhere.
Final Thoughts
This Halloween Pizzas Recipe has become a go-to for my spooky season celebrations because it’s quick, fun, and flexible enough to suit everyone’s tastes. Making these pizzas brings out the kid in me—and sharing that creativity with friends and family makes the whole experience extra special. I know you’ll enjoy making and munching on these festive pies as much as I do. So grab your toppings, preheat your oven, and let’s make some deliciously spooky memories!
Print
Halloween Pizzas Recipe
- Prep Time: 15 minutes
- Cook Time: 12 minutes
- Total Time: 27 minutes
- Yield: 4 servings
- Category: Main Course
- Method: Baking
- Cuisine: Italian-American
Description
This Halloween Pizzas recipe features a no-rise pizza crust topped with classic pizza sauce, fresh mozzarella, and your favorite toppings arranged creatively for spooky fun. The easy dough comes together quickly and bakes into a soft, chewy crust perfect for festive designs.
Ingredients
No-Rise Pizza Crust
- 1 ¾ to 2 cups all-purpose flour
- 1 envelope Fleischmann’s Pizza Yeast
- 1 1/2 teaspoons granulated sugar
- 3/4 teaspoon salt
- 2/3 cup very warm water
- 3 Tablespoons vegetable oil or canola oil
Toppings
- 1 cup pizza sauce
- 1/2 pound fresh mozzarella cheese
- Desired pizza toppings: pepperoni, bell peppers, olives, onion, pineapple, parsley, salami, Canadian bacon
Instructions
- Preheat Oven: Set the oven to 450°F to prepare for baking the pizzas.
- Mix Dough Ingredients: In a large bowl, combine 1 cup flour, undissolved yeast, sugar, and salt. Add warm water and oil; mix well about 1 minute until blended.
- Form Dough: Gradually add remaining flour to make a soft dough. Pour dough onto a floured surface and knead about 4 minutes until smooth and elastic, adding flour as needed. Divide into 4 portions.
- Shape Crusts: Roll or pat each dough portion into an 8-inch circle and place on a greased baking sheet.
- Prebake Crusts: Bake the crusts for 5-6 minutes until just set and lightly browned on the bottom.
- Add Sauce and Toppings: Spread pizza sauce evenly over each crust. Add fresh mozzarella and desired toppings arranged for Halloween-themed pizzas.
- Bake Final Pizzas: Return pizzas to oven for 5-8 minutes until cheese is melted and bubbly.
Notes
- The pizza sauce can be made ahead and stored in the fridge up to one week.
- Chop all pizza toppings and keep them in airtight containers in the fridge for convenience.
- The dough can be prepared a few hours before baking and stored covered in the fridge.
- For freezing, assemble pizzas on partially pre-baked crusts, cover well, and freeze up to 2 months. Bake from frozen, adding a few extra minutes to cook time.
Nutrition
- Serving Size: 1 pizza
- Calories: 350 kcal
- Sugar: 3 g
- Sodium: 550 mg
- Fat: 12 g
- Saturated Fat: 5 g
- Unsaturated Fat: 6 g
- Trans Fat: 0 g
- Carbohydrates: 41 g
- Fiber: 2 g
- Protein: 15 g
- Cholesterol: 25 mg


