Halloween Pretzels with Candy Melt Eyeballs Recipe
There’s something magically spooky and irresistibly cute about these **Halloween Pretzels with Candy Melt Eyeballs Recipe**—they’re the perfect mix of salty, sweet, and just the right amount of creepy fun for any Halloween spread. I first made these for a last-minute party, and honestly, they stole the show. Plus, they’re insanely easy to whip up, so if you’ve been hunting for a simple yet impressive Halloween treat, you’re in the right place!
Why This Recipe Works
- Quick and Easy: You can create fun, eye-catching treats in under 40 minutes without complicated steps.
- Versatile Ingredients: Using candy melts and pretzels means you can customize colors and flavors to match your vibe or stash.
- Kid-Friendly Fun: This recipe doubles as a crafty activity for little monsters and witches alike.
- Perfect Presentation: The eyeball look is both adorable and spooky, making these pretzels a conversation starter at any party.

Ingredients & Why They Work
This recipe is all about the perfect balance of salty pretzels and sweet candy melts with a pop of color and fun from sprinkles. Choosing good quality candy melts and pretzels really makes a difference—not just in taste, but in how well the eyeballs hold their shape. Here’s what makes each ingredient shine:

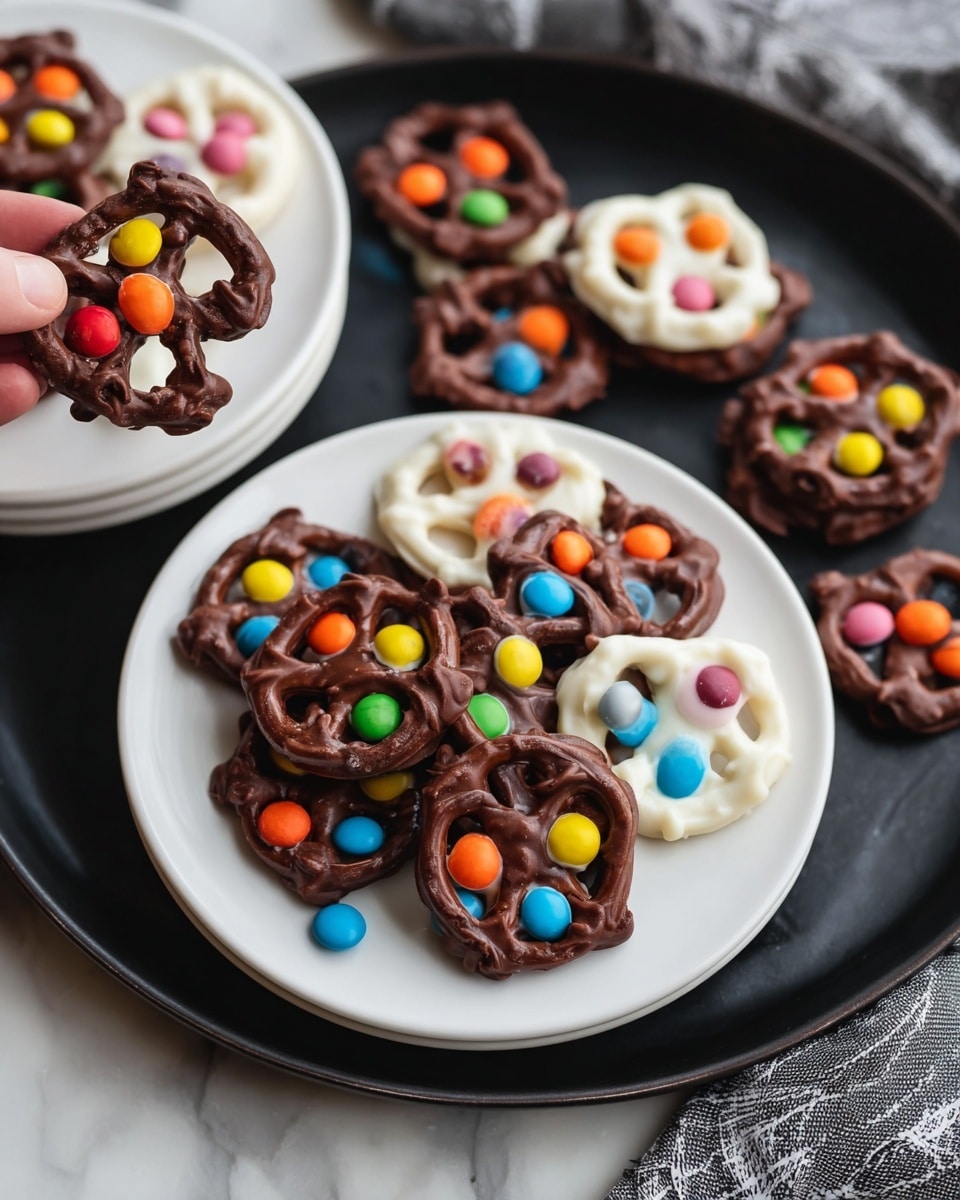
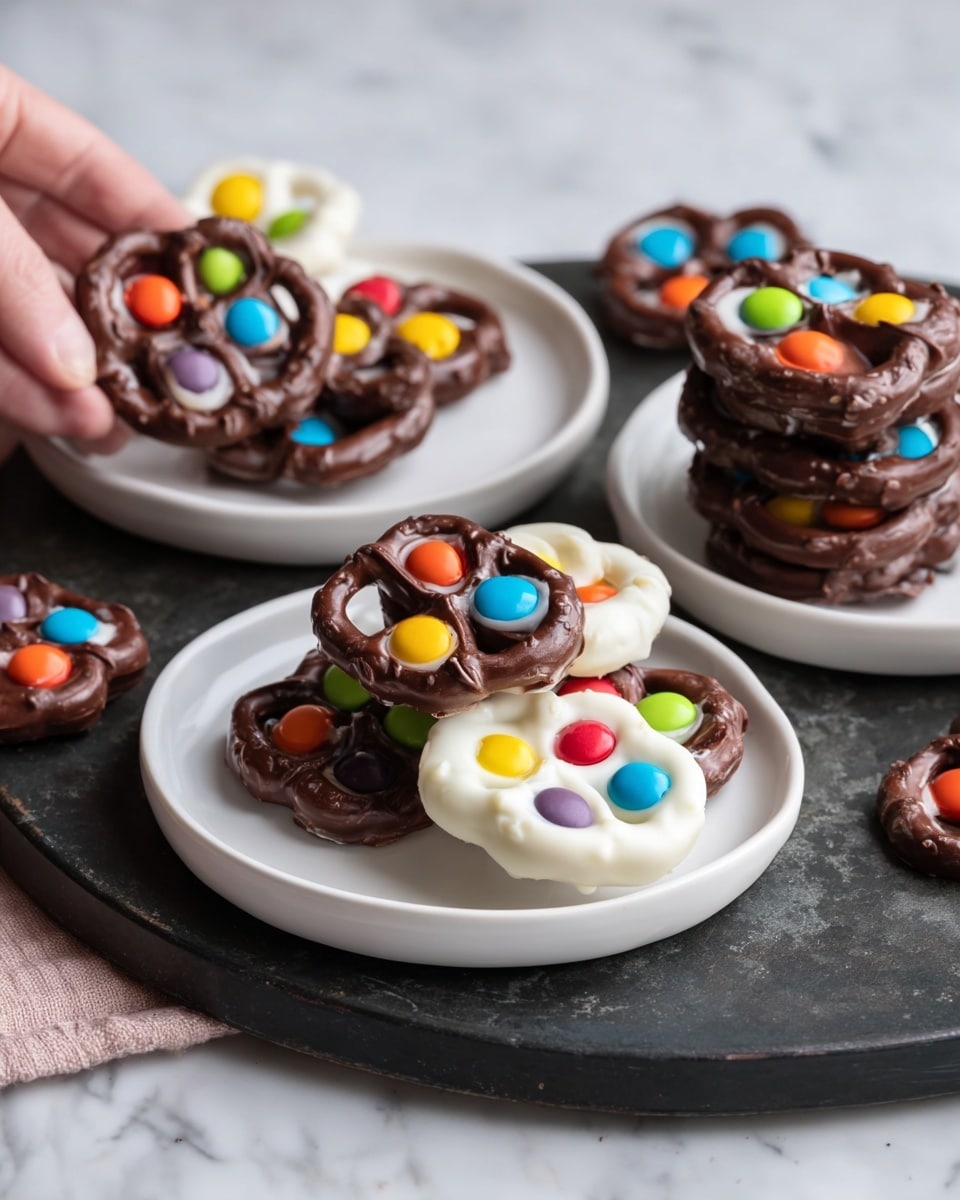
- Yogurt-covered pretzels (or milk chocolate-covered pretzels): Their salty crunch pairs perfectly with the sweet candy melts, and their shape is ideal for holding “eyeballs.”
- Colored candy melts (orange, red, green, yellow): These melt smoothly and come in vibrant colors that make your eyeballs pop—plus, they’re easy to pipe onto pretzels.
- Sprinkles, jimmies, nonpareils, or mini candies: The fun “pupils” of your eyeballs, adding texture and that whimsical Halloween flair.
Tweak to Your Taste
I love how flexible this Halloween Pretzels with Candy Melt Eyeballs Recipe is—you can really let your creativity run wild. Over the years, I’ve found a few tweaks that make these treats even more fun or suited to different tastes. You should definitely experiment and make them your own!
- Variation: For an extra pop of color and flavor, I sometimes use white chocolate candy melts and add a drop of peppermint extract before piping—it’s unexpected and delicious!
- Dietary Adjustments: If you want a dairy-free version, look for vegan candy melts and pretzels, which work just as beautifully.
- Difficulty Level: If you’re making these with kids, pipe fewer eyeballs at once—it helps keep everything manageable and reduces the risk of setting before the sprinkles stick.
Step-by-Step: How I Make Halloween Pretzels with Candy Melt Eyeballs Recipe
Step 1: Lay Out Your Pretzels
Start by spreading your yogurt- or milk chocolate-covered pretzels evenly on a sheet of wax paper or parchment. Trust me, this step sets the foundation—make sure they’re not crowded so the candy melts don’t run together. I like to work in small batches, about 6 pretzels at a time, which helps keep things neat and manageable.
Step 2: Melt Your Candy Melts
Follow the package instructions to gently melt your candy. I usually microwave in 20-second intervals, stirring in between to avoid burning. You can transfer the melted candy to a piping bag or a small plastic bag with a corner snipped off—this makes it so much easier to control where those eyeballs go. Don’t rush this step; a smooth melt means smooth piped dots.
Step 3: Pipe the Eyeballs and Add Pupils
Now for the fun part: pipe a candy melt “eyeball” into the top left and right holes of each pretzel. The key is to do about six at a time—pipe, then quickly add your sprinkles or mini candies while the candy is still soft so they stick perfectly. Timing is everything here, and it takes just a little practice to find your rhythm.
Step 4: Let Them Set Completely
Patience, my friend—leave those candy eyeballs to harden in a cool spot. You can speed this up by popping the tray in the fridge for about 15 minutes. This step is non-negotiable because you don’t want your pupils sliding off when handled!
Step 5: Pack and Store
Once set, transfer your spooky creations to an airtight container. I like to layer them carefully so none get squished. These Halloween Pretzels with Candy Melt Eyeballs Recipe treats hold up well for a few days, perfect for parties or treats handed out to trick-or-treaters.
Pro Tips for Making Halloween Pretzels with Candy Melt Eyeballs Recipe
- Small Batches: Piping too many at once can make you rush—working in small batches ensures sprinkles stick perfectly before setting.
- Use a Piping Bag: Controlling the candy melt flow with a piping bag helps create uniform eyeballs without mess.
- Keep the Candy Melts Warm: If your candy starts to harden while piping, gently warm it again in short bursts to keep it smooth.
- Chill Before Storing: Make sure eyeballs are fully set in the fridge or a cool room before stacking or packaging to avoid smudges.
How to Serve Halloween Pretzels with Candy Melt Eyeballs Recipe
Garnishes
I like to keep it simple here—sometimes a sprinkle of edible glitter dust just adds a little witchy sparkle on top. If you want to get fancy, toss some mini candy corns or use colored sugar on the pretzels before the candy sets for extra texture and color contrast. It’s all about those little details that excite your guests!
Side Dishes
These Halloween pretzels are fantastic on their own but I love pairing them with classic Halloween candy bowls or even a hot cocoa bar to balance the salty-sweet combo. They also fit perfectly alongside pumpkin-shaped cookies or spooky cupcakes if you’re putting together a bigger Halloween dessert spread.
Creative Ways to Present
One of my favorite ways to present these is on a black platter with some fake cobwebs and little plastic spiders scattered around for that ultimate creepy vibe. For kid parties, I arrange them in mini cauldrons or mason jars with toothpicks stuck in the pretzels for easy grabbing. It’s simple but always a hit!
Make Ahead and Storage
Storing Leftovers
After they’ve fully set, I store leftover Halloween Pretzels with Candy Melt Eyeballs in an airtight container at room temperature—just make sure it’s a cool, dry spot. They maintain their crunch and that adorable eyeball look for up to 3 days without any weird melting or stickiness.
Freezing
I haven’t personally frozen these before because they’re so quick to make, but if you want to prep ahead, just freeze them fully set on a tray first and then transfer to freezer bags. When thawed at room temp, they should hold up well—just avoid moisture to keep those candy melts intact.
Reheating
No reheating needed here, thank goodness! These are best enjoyed as-is, straight from storage. If you want to freshen up slightly, just let them come to room temperature before serving so the flavors and textures are just right.
FAQs
-
Can I use regular pretzels instead of yogurt-covered or chocolate-covered?
Absolutely! Regular pretzels work fine, but the candy melts might not stick quite as well to untreated pretzels. You could lightly brush them with a bit of melted white chocolate or candy melt first to create a “glue” layer for the eyes.
-
What if my candy melts get too thick when melting?
If your candy melts become too thick, gently stir in a tiny bit of vegetable oil or shortening to loosen the texture—it helps with smooth piping and avoids clumps.
-
How long do these Halloween pretzels keep fresh?
Stored properly in an airtight container at room temp, they usually stay fresh and crunchy for up to three days. Beyond that, the pretzels might start to lose their crunch.
-
Can I make the eyeballs bigger or different shapes?
Totally! Feel free to get creative with the size and shape of your candy melt eyeballs—just keep in mind bigger melts may take longer to set and can be a bit messier to handle.
Final Thoughts
If you’re looking for a treat that’s as delightful to make as it is to eat, this Halloween Pretzels with Candy Melt Eyeballs Recipe is a total winner. It’s playful, quick, and perfect for adding that little spooky season charm without any fuss. Give it a go—you’ll be amazed at how easy it is to bring this bit of Halloween magic to your table. I promise your friends and family will be asking for more eyeballs next year!
Print
Halloween Pretzels with Candy Melt Eyeballs Recipe
- Prep Time: 10 minutes
- Cook Time: 30 minutes
- Total Time: 40 minutes
- Yield: 8 servings
- Category: Snack
- Method: No-Cook
- Cuisine: American
Description
Delightfully festive Halloween Pretzels coated with colorful candy melts and decorated with sprinkles to create fun eye designs. Perfect for a spooky party treat or a kid-friendly snack that’s both easy and eye-catching.
Ingredients
Ingredients
- 1 package yogurt-covered pretzels
- 1 package milk chocolate-covered pretzels (optional)
- Colored candy melts (orange, red, green, yellow)
- 1/2 cup sprinkles, jimmies, nonpareils, dots, or mini M&Ms
Instructions
- Arrange Pretzels: Lay out the yogurt-covered and/or milk chocolate-covered pretzels on a piece of wax paper, spacing them evenly for decorating.
- Heat Candy Melts: Following the package directions, melt the colored candy melts until smooth and pourable. Transfer the melted candy into a piping bag for easy application.
- Pipe Candy Melt Eyes: Pipe candy melts into the top left and right holes of each pretzel to form eye shapes. Work on about six pretzels at a time to avoid the candy melts setting too quickly.
- Add Sprinkles: Immediately after piping, press sprinkles or candy pieces onto the candy melt areas to create pupils on the eyes. This should be done quickly before the candy sets to ensure proper adhesion.
- Set Pretzels: Allow the decorated pretzels to set completely at room temperature until the candy melts harden and the decorations are secure.
- Storage: Once fully set, pack and store the Halloween pretzels in an airtight container to keep them fresh until serving.
Notes
- Decorate in small batches (about 6 pretzels at a time) to work efficiently before the candy melts harden.
- You can customize the look by using different colored candy melts and a variety of sprinkles or candies for pupils.
- Ensure pretzels are completely dry before decorating to help candy melts adhere better.
- Store in an airtight container at room temperature to avoid moisture affecting the candy coating.
- If candy melts begin to thicken during decorating, gently rewarm as per package instructions.
Nutrition
- Serving Size: 1 serving
- Calories: 150 kcal
- Sugar: 12 g
- Sodium: 150 mg
- Fat: 7 g
- Saturated Fat: 4 g
- Unsaturated Fat: 3 g
- Trans Fat: 0 g
- Carbohydrates: 20 g
- Fiber: 1 g
- Protein: 2 g
- Cholesterol: 0 mg
