
Homemade Croissant Bread Recipe
If you’ve been dreaming about buttery, flaky layers nestled inside a soft loaf, this Homemade Croissant Bread Recipe is going to change your baking game. I promise you, it’s worth the time and a little elbow grease — the aroma alone will have your kitchen feeling like the coziest neighborhood bakery. Stick with me, and I’ll walk you through every step so you can enjoy that perfect croissant bread, fresh from your own oven.
Why This Recipe Works
- Perfect Lamination: The layering of butter and dough creates those irresistible flaky layers that define croissant bread.
- Soft Yet Structured Dough: A carefully balanced dough that’s soft enough to roll but strong enough to rise properly.
- Homemade, No Preservatives: You control the ingredients, so no weird additives or fillers.
- Detailed Step-by-Step Guidance: Clear, friendly instructions help you avoid common pitfalls and bake with confidence.

Ingredients & Why They Work
Every ingredient in this Homemade Croissant Bread Recipe plays a crucial role. Together, they bring out rich flavors, tender crumb, and that buttery flakiness we all adore. When shopping, go for quality butter and fresh yeast — your bread will thank you!

- Whole Milk: Adds richness and helps activate the yeast with warmth.
- Instant or Active Dry Yeast: The magic behind the rise and light texture.
- Granulated Sugar: Feeds the yeast and adds a touch of sweetness balancing the butteriness.
- Salt: Enhances flavor and controls yeast fermentation.
- Butter (softened for dough): Adds tenderness and flavor within the dough.
- All-Purpose Flour: Provides the structure; spooned and leveled for accuracy.
- Salted Butter (for lamination): Essential for creating those signature layers; should be pliable but not too soft.
- Egg (for egg wash): Gives the loaf a beautiful golden, shiny crust.
- Water (for egg wash): Thins the egg for easy brushing and even coverage.
Tweak to Your Taste
While I love this recipe just as it is — buttery, flaky, and straightforward — it’s nice to make it your own. I’ve played around with some add-ins and variations to keep things interesting.
- Cinnamon Sugar Variation: Sprinkling cinnamon sugar on the dough before rolling it up added a sweet, spicy kick I adored — like a croissant-meets-cinnamon-roll vibe.
- Nutty Addition: Toasted chopped pecans or walnuts folded in before rolling add crunch and warmth.
- Dairy-Free Option: Swap whole milk for almond or oat milk; just keep it warm to the touch for yeast activation.
Step-by-Step: How I Make Homemade Croissant Bread Recipe
Step 1: Activate the Yeast and Mix Your Dough
Start by whisking warm whole milk, yeast, and sugar together. You’ll want the milk about 110°F (43°C) — comfortably warm but not hot, as high heat can kill the yeast. When foam appears at the surface after about 5 minutes, you’re ready for the next step. Adding salt, softened butter, and most of the flour at once helps develop flavor and texture. Beat it up with a stand mixer if you have one, or a sturdy spoon if not — just prepare for a little workout! The dough will be soft, a little sticky, and that’s perfect; resist the urge to dump in too much flour.
Step 2: Knead for Strength and Softness
Kneading is where the magic begins. I use my mixer’s dough hook for an easy 5-minute knead, but using your hands on a floured surface is just as good — it’s where you get to bond with your dough. The goal? Soft, tacky dough that springs back when you poke it, and passes the “windowpane test.” This step builds structure so your bread will rise nicely and hold delicate layers.
Step 3: First Rise — Let It Double
Place your dough in a lightly oiled bowl and cover with a towel or plastic wrap. Find a cozy warm spot because yeast loves a gentle heat. After about 1.5 to 2 hours, your dough should nearly double — full of bubbles and ready for shaping. Don’t rush this; good things come to those who wait.
Step 4: Chill and Prepare for Lamination
Gently punch down that lovely dough and roll it onto a silicone mat or lightly floured surface, shaping a 10×14-inch rectangle. Cover and chill for 20 minutes. Meanwhile, slice your lamination butter into 1/4-inch-thick pieces, aiming for a consistency that’s pliable but not greasy. This pause lets the gluten relax and gives you a dough that’s easier to roll and fold without tearing.
Step 5: The Lamination Dance — Butter In, Fold, and Roll
This is where your croissant bread starts taking shape. Lay butter down the center third of your dough rectangle, fold the sides over like a business letter, and pinch the seams to seal. Roll out to a 9×12-inch rectangle, then fold again. Chill for 20 minutes, then repeat this rolling and folding two more times — the classic triple fold creates those incredible flaky layers. Don’t rush; follow the same timing with each fold and keep the dough cold but pliable.
Step 6: Shape the Loaf and Second Rise
For the final fold, roll out, fold, then roll out one more time to your 9×12-inch rectangle. Starting at the short edge, roll the dough up tightly like cinnamon rolls. Cut the roll into five even segments (eyeball this; no need for perfection!). Place them seam side down into a greased loaf pan for a snug fit. Cover tightly and let rise 45–60 minutes until puffy. The anticipation is real — you’re almost there!
Step 7: Egg Wash and Baking Time
Preheat your oven to 350°F (177°C). Whisk the egg with water and generously brush your croissant loaf to get that gorgeous golden sheen. Here’s a trick I learned: tent the loaf loosely with foil after 25 minutes to prevent burning so the inside can fully bake during the remaining time. Bake for about 1 hour or until an instant-read thermometer reaches 195°F (90°C) — this is the hallmark that your loaf is perfectly cooked. Let it cool in the pan for at least 30 minutes before removing — slicing warm will cause the flaky layers to collapse, and we don’t want that!
Pro Tips for Making Homemade Croissant Bread Recipe
- Butter Temperature is Key: Aim for lamination butter and dough to be around the same cool temperature (~60°F/15°C) for smooth rolling and folding.
- Don’t Overflour the Dough: Use the minimum flour necessary to prevent sticking to keep the dough soft and tender.
- Use a Silicone Baking Mat: Rolling dough on a mat makes handling much easier, preventing sliding and sticking.
- Tent During Baking: Cover with foil partway through baking to stop premature browning and ensure fully baked layers inside.
How to Serve Homemade Croissant Bread Recipe

Garnishes
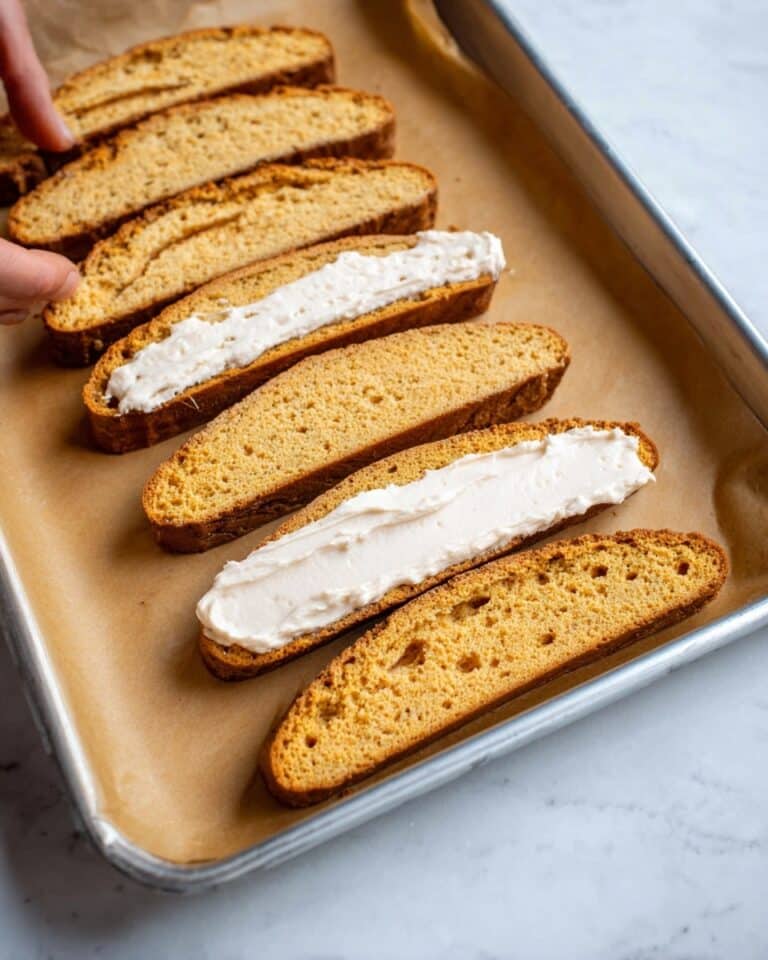
I love to serve slices with a simple spread of jam or honey to complement the buttery layers. For a savory twist, a smear of garlic herb butter or cream cheese works beautifully. Sometimes I just enjoy it plain, fresh out of the oven, letting the texture and flavor shine.
Side Dishes
This bread pairs wonderfully with soups or stews for a comforting meal — think creamy tomato soup or a hearty chicken stew. It’s also fantastic alongside charcuterie boards or a fresh green salad, making it versatile for any occasion.
Creative Ways to Present
For brunch or special holidays, I’ve tried arranging the sliced croissant bread in a circular pattern on a platter, with little ramekins of butter, jam, and fresh fruit in the center — it’s such a welcoming and inviting display. You could also toast slices and use them to create mini open-faced sandwiches topped with smoked salmon or avocado.
Make Ahead and Storage
Storing Leftovers
I usually wrap leftover croissant bread tightly in plastic wrap or place it in an airtight container, storing it at room temperature for up to three days. This keeps the crust crisp and the inside soft. If I need to store it longer, the fridge works for up to a week, but I prefer to freeze.
Freezing
Freezing baked loaf slices in a heavy-duty bag is my go-to. When I want fresh croissant bread, I take out slices the night before or pop them directly in a toaster or oven from frozen — either way, they come out almost as good as fresh!
Reheating
For reheating, I prefer warming slices at 325°F (160°C) in the oven for about 5–7 minutes to restore crispness. Avoid microwaving because it can make your bread chewy or soggy, which nobody wants.
FAQs
-
Can I make the dough ahead of time?
Absolutely! You can refrigerate the shaped dough in the loaf pan for up to 15 hours after laminating and shaping. Just make sure to let it come to room temperature and rise before baking, which makes your schedule flexible without sacrificing quality.
-
What if my dough tears during lamination?
It happens to the best of us! Simply sprinkle flour over any exposed butter, patch gently, and continue rolling. Let the dough relax for a few minutes if it feels stubborn before trying again—patience is your friend.
-
Can I halve or double this recipe?
This recipe works best as written because of the specific lamination process. If you want more than one loaf, I recommend making two batches separately. For less, freeze leftovers or freeze formed dough as instructed.
-
Is active dry yeast okay instead of instant yeast?
Yes! Both work well. Just know that with active dry yeast, rise times might be slightly longer, so keep an eye on the dough’s size rather than strictly timing.
-
Can I add fillings like jam or chocolate?
Dry fillings like cinnamon sugar, nuts, or chocolate chips work well. Jam tends to add too much moisture and can make rolling tricky, so it’s best avoided.
Final Thoughts
Honestly, making this Homemade Croissant Bread Recipe feels like a little adventure each time — from kneading to the buttery lamination folds, right through to that first buttery bite. It’s one of those recipes where patience and care really pay off. If you love croissants but want a loaf you can slice (and share), I can’t recommend this enough. So next time you’ve got a lazy morning, give it a try and treat yourself — you deserve that warm, flaky joy right at your kitchen table.
Print
Homemade Croissant Bread Recipe
- Prep Time: 4 hours 45 minutes
- Cook Time: 1 hour
- Total Time: 6 hours 30 minutes
- Yield: 1 loaf
- Category: Bread
- Method: Baking
- Cuisine: French
- Diet: Vegetarian
Description
This Croissant Bread Loaf recipe combines the buttery, flaky layers of a classic croissant with the convenience of a loaf form. Perfect for breakfast or an indulgent snack, it uses a multi-step lamination process to create delicate layers, resulting in a tender, rich bread with a golden crust. Ideal for bread lovers seeking a flaky texture in an easy-to-slice loaf.
Ingredients
Dough
- 1 cup (240ml) whole milk, warmed to about 110°F (43°C)
- 2 and 1/4 teaspoons (7g) instant or active dry yeast (1 standard packet)
- 3 Tablespoons (38g) granulated sugar
- 1 and 1/4 teaspoons salt
- 3 Tablespoons (43g) unsalted or salted butter, softened to room temperature and cut into 3 equal pieces
- 3 cups (375g) all-purpose flour (spooned & leveled), plus more as needed and for lamination
Lamination
- 3/4 cup (12 Tbsp; 170g) salted butter, slightly softened
Egg Wash
- 1 large egg, cold or room temperature
- 1 Tablespoon (15ml) water
Instructions
- Prepare the dough: Whisk the warm milk, yeast, and sugar together in the bowl of your stand mixer fitted with a dough hook. Cover and let sit for 5 minutes until foamy. Add salt, butter, and 2 cups (250g) flour. Beat on medium speed for 2 minutes, scraping the bowl as needed. Add remaining flour, beat on low speed until soft dough forms, adding 2–3 more tablespoons if sticky.
- Knead the dough: Beat in the mixer or knead by hand on a floured surface for 5 minutes until dough passes windowpane test and feels slightly tacky but not sticky.
- First rise: Lightly grease a large bowl, place dough inside, cover, and allow to rise in warm place for 1.5 to 2 hours until nearly doubled.
- Flatten and chill dough: Punch down dough, place on a silicone mat or parchment-lined baking sheet, gently stretch into 10×14-inch rectangle. Cover and chill in refrigerator for 20 minutes.
- Prepare lamination butter: Slice salted butter into 1/4-inch thick pieces; ensure butter is pliable but not too soft.
- First lamination: Remove dough from fridge, place butter down center third of dough. Fold edges over butter like a business letter and pinch ends to seal. Rotate, flour top lightly, roll to 9×12-inch rectangle, fold edges like a letter again. Cover and chill 20 minutes.
- Second and third laminations: Remove dough, rotate, flour, roll out to 9×12 inches, fold edges over like a letter twice more, covering between each fold. Refrigerate 20 minutes after each fold.
- Final lamination and shaping: Roll out dough to 9×12 inches twice as before. Roll dough from a 9-inch side into a log. Cut into 5 even rolls.
- Second rise: Grease a 9×5-inch loaf pan, place rolls seam side down inside, cover tightly, and let rise until slightly puffy, about 45 to 60 minutes.
- Preheat oven: Set oven to 350°F (177°C).
- Apply egg wash and bake: Whisk egg and water, brush loaf generously. Bake for 1 hour, loosely tenting with foil after 25 minutes to prevent over-browning. Bake until internal temperature reaches 195°F (90°C).
- Cooling: Remove loaf from oven, cool in pan on wire rack for 30 minutes, then release from pan and cool an additional 15 minutes before slicing to prevent crumbling.
Notes
- Overnight Dough Option: After shaping rolls, cover and refrigerate for up to 15 hours. Remove 3 hours before baking and allow to rise 1–2 hours at room temperature before baking.
- Freezing Dough: Freeze shaped dough after shaping step for up to 3 months. Thaw in refrigerator at least 3 hours before baking, then let rise 1–2 hours at room temperature.
- Butter Temperature for Lamination: Butter for lamination should be pliable but not greasy or too cold; ideally about 60°F (15°C) to ease rolling and folding.
- Adding Filling: Dry fillings like cinnamon sugar, chopped nuts, or chocolate chips can be added before rolling into a log. Avoid wet fillings like jam to prevent sogginess.
- Ingredient Substitutions: Whole milk is preferred, but lower fat or non-dairy milk can be used. Use salt butter for lamination and either salted or unsalted butter in dough.
- Mixing Without Mixer: Dough can be mixed by hand using a large spoon or spatula and kneaded on a floured surface if no stand mixer is available.
- Storage: Store leftover bread covered at room temperature up to 3 days, refrigerate up to 1 week, or freeze up to 3 months.
Nutrition
- Serving Size: 1 slice (approx. 1/10 loaf)
- Calories: 250 kcal
- Sugar: 4 g
- Sodium: 200 mg
- Fat: 10 g
- Saturated Fat: 6 g
- Unsaturated Fat: 3 g
- Trans Fat: 0 g
- Carbohydrates: 32 g
- Fiber: 1 g
- Protein: 5 g
- Cholesterol: 40 mg


