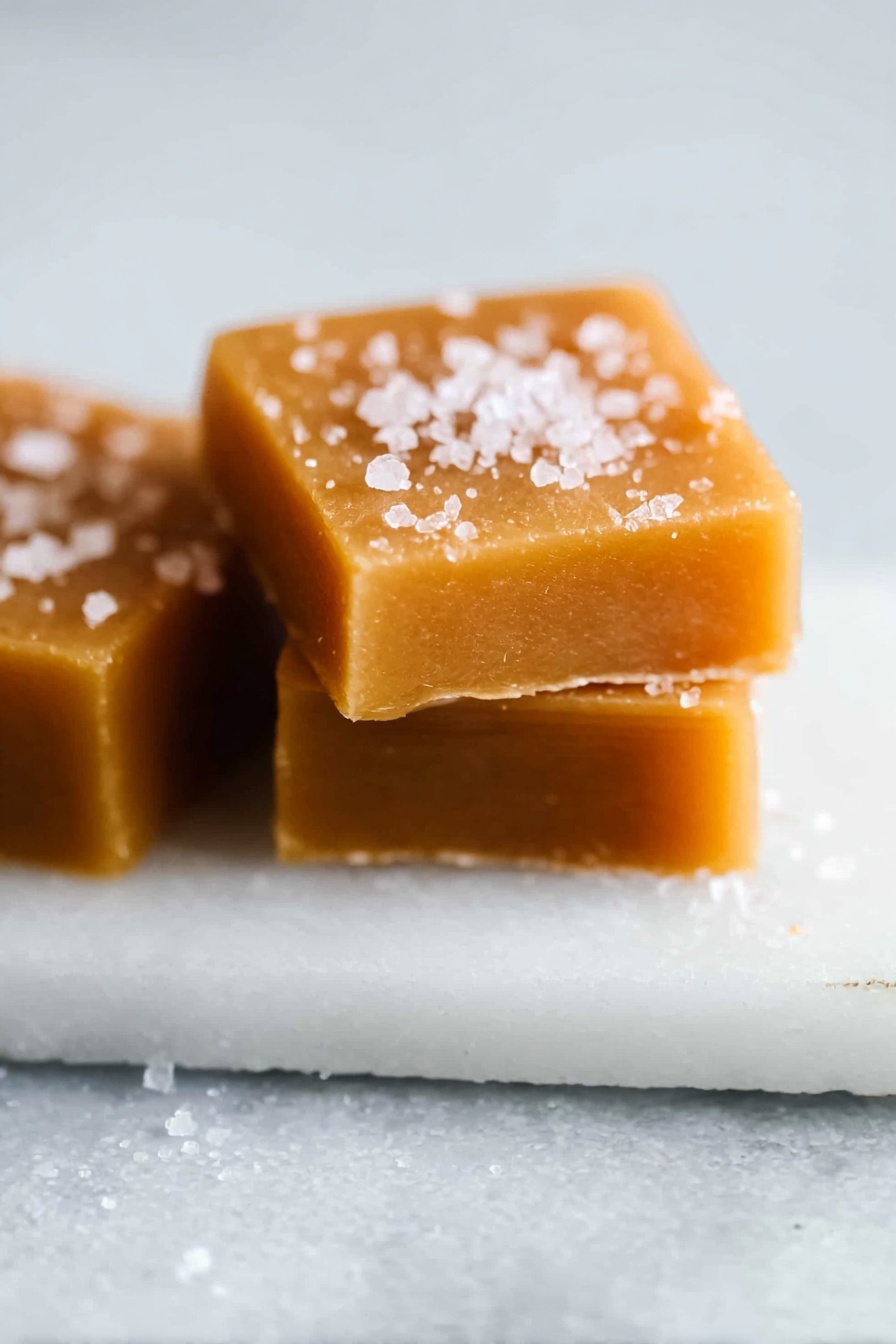
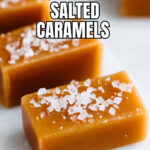
Homemade Salted Caramels Recipe
I can’t wait to share this fan-freaking-tastic Homemade Salted Caramels Recipe with you! If you’ve ever dreamed of those perfect, chewy, buttery morsels with just the right hint of saltiness, this recipe is going to become your new best friend. I’ve spent years tweaking my technique to get it just right, and I promise once you make these, you’ll wonder why you ever bought caramels from a store!
Why This Recipe Works
- Perfect Balance of Salt and Sweet: Using flaked sea salt on top gives the caramels a delicious contrast that makes the flavors pop.
- Precise Temperature Control: Cooking the sugar syrup to the exact temperatures ensures the caramels chewy texture without being too soft or hard.
- Simple, Quality Ingredients: With just butter, cream, sugar, and corn syrup, this recipe is straightforward yet incredibly rich and satisfying.
- Clear, Step-by-Step Instructions: Each step helps you avoid common candy-making pitfalls and builds confidence for a sweet success.

Ingredients & Why They Work
The magic of this Homemade Salted Caramels Recipe comes down to a beautiful combination of carefully chosen ingredients. Each one plays a role in delivering the perfect blend of smooth, creamy caramel with that signature pinch of sea salt crunch on top.
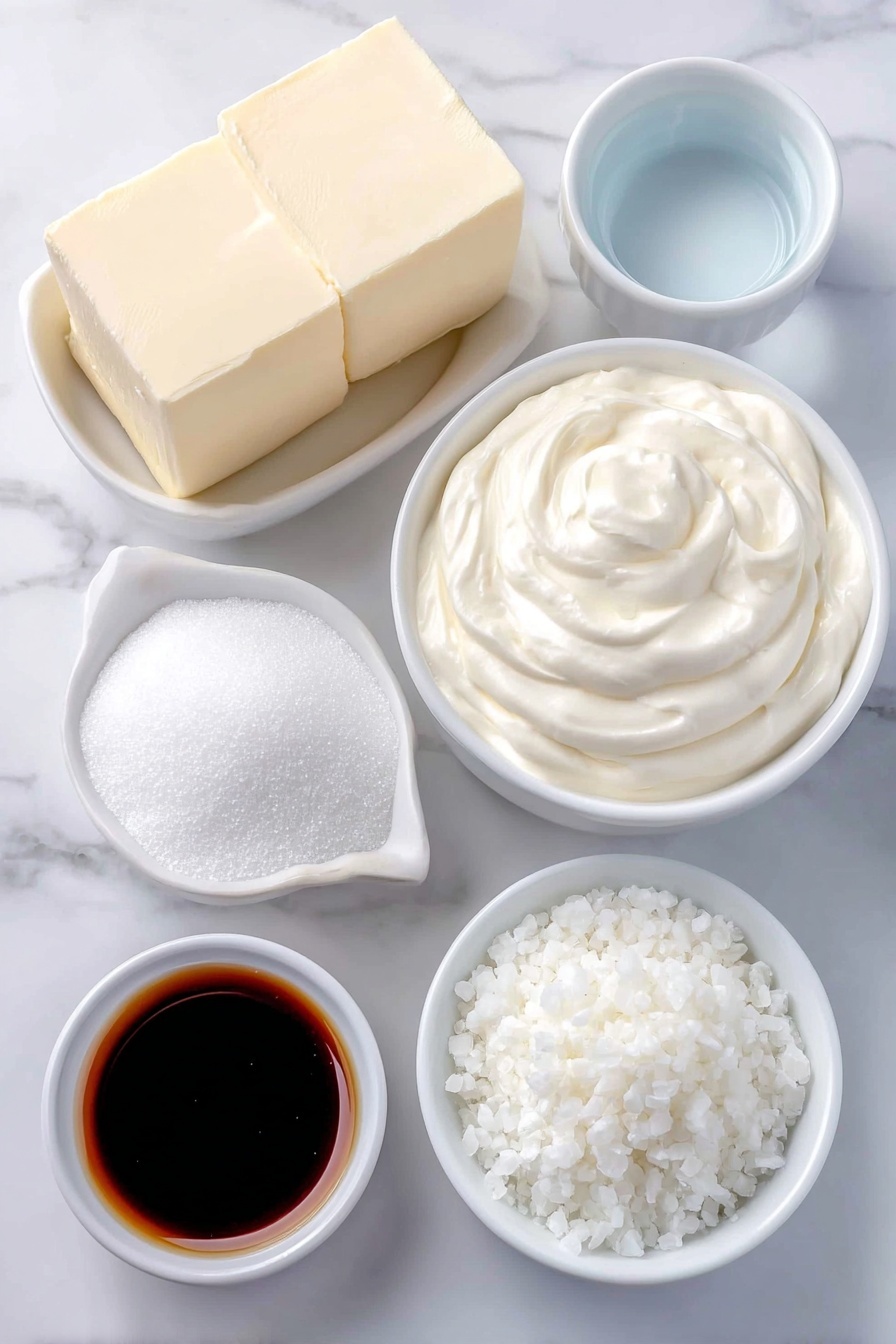
- Salted Butter: Using salted butter enhances the caramel’s flavor, adding just the right touch of saltiness without needing to add extra salt into the mix; if you prefer unsalted, just add a little fine salt yourself.
- Heavy Cream: The richness of heavy cream creates that silky, melt-in-your-mouth texture you want from caramel – make sure it’s at least 35% butterfat for best results.
- Water: Helps dissolve the sugar and corn syrup to create the perfect syrup base.
- Light Corn Syrup: This ingredient keeps the sugar from crystallizing, which is essential to get silky smooth caramels.
- Granulated Sugar: The main sweetener that cooks down to form the caramel’s signature amber color and flavor.
- Flaked Sea Salt: Maldon or similar is ideal; it adds a beautiful finishing touch that’s not overpowering but gives a wonderful balance to the sweetness.
Tweak to Your Taste
One of the best things about this Homemade Salted Caramels Recipe is how easy it is to customize. I’ve experimented over time and love sharing little tweaks so you can make them exactly the way you and your loved ones enjoy best.
- Softer Caramels: For a softer chew that melts on your tongue, try adding 2 to 4 extra tablespoons of cream – it gives the caramel a more luxurious feel without losing that signature chewiness.
- Firmer Caramels: If you prefer a slightly more firm bite, cook the caramel mixture to 245°F (118°C) instead of 240°F (115°C) before pouring it out.
- Salt Variations: Experiment with other sea salts like fleur de sel or smoked salt for a unique twist that keeps guests guessing.
- Corn Syrup Alternative: I sometimes swap corn syrup for golden syrup or even pure honey – it changes the note of sweetness just enough to feel special but still yield great results.
- Make it Vegan: Try using vegan butter and coconut cream as a substitute, but know that texture may differ slightly.
Step-by-Step: How I Make Homemade Salted Caramels Recipe
Step 1: Prep Your Pan Like a Pro
Get ahead by lightly oiling a 9×5-inch loaf pan, then lay in parchment paper with an overhang so you can easily lift the caramels out when they’re done. I like to oil the parchment too—it sounds small, but trust me, this makes unmolding so smooth it almost feels effortless.
Step 2: Melt Butter and Cream Together
Cut the butter into smaller pieces and add them to a microwave-safe bowl along with the heavy cream. Heat for about 1-2 minutes until everything’s melted and hot but not boiling. Having this ready ahead is key to quickly incorporating it into the sugar mixture later.
Step 3: Craft Your Sugar Syrup
Combine water and corn syrup in a heavy-bottomed saucepan first. Then carefully add sugar, avoiding splashing it on the sides. Cook over medium heat until it boils, then cover for 1 minute—this steams the pan and melts any sugar crystals stuck on the edges, which helps you avoid grainy caramel.
Step 4: Watch the Temperature Like a Hawk
Remove the lid and clip on your candy thermometer. Cook the sugar syrup until it reaches exactly 320°F (160°C). You’ll notice an amber color starting to form at the edges—that’s your green light! This step is critical; don’t rush, or your caramel texture will suffer.
Step 5: Slowly Incorporate Butter and Cream
Start adding your hot butter and cream mixture in small batches—a sixth at a time works best. Stir gently using the thermometer’s base to combine. The syrup will bubble up fiercely, so be cautious not to let it overflow. This step is exhilarating—remember to keep your cool!
Step 6: Finish Cooking to the Perfect Temperature
After adding all the butter and cream, your mixture’s temperature will drop—this is normal. Keep cooking until it hits 240°F (115°C) for soft caramels or slightly higher if you want firmer ones. Timing here affects the chew, so use your thermometer and trust the process.
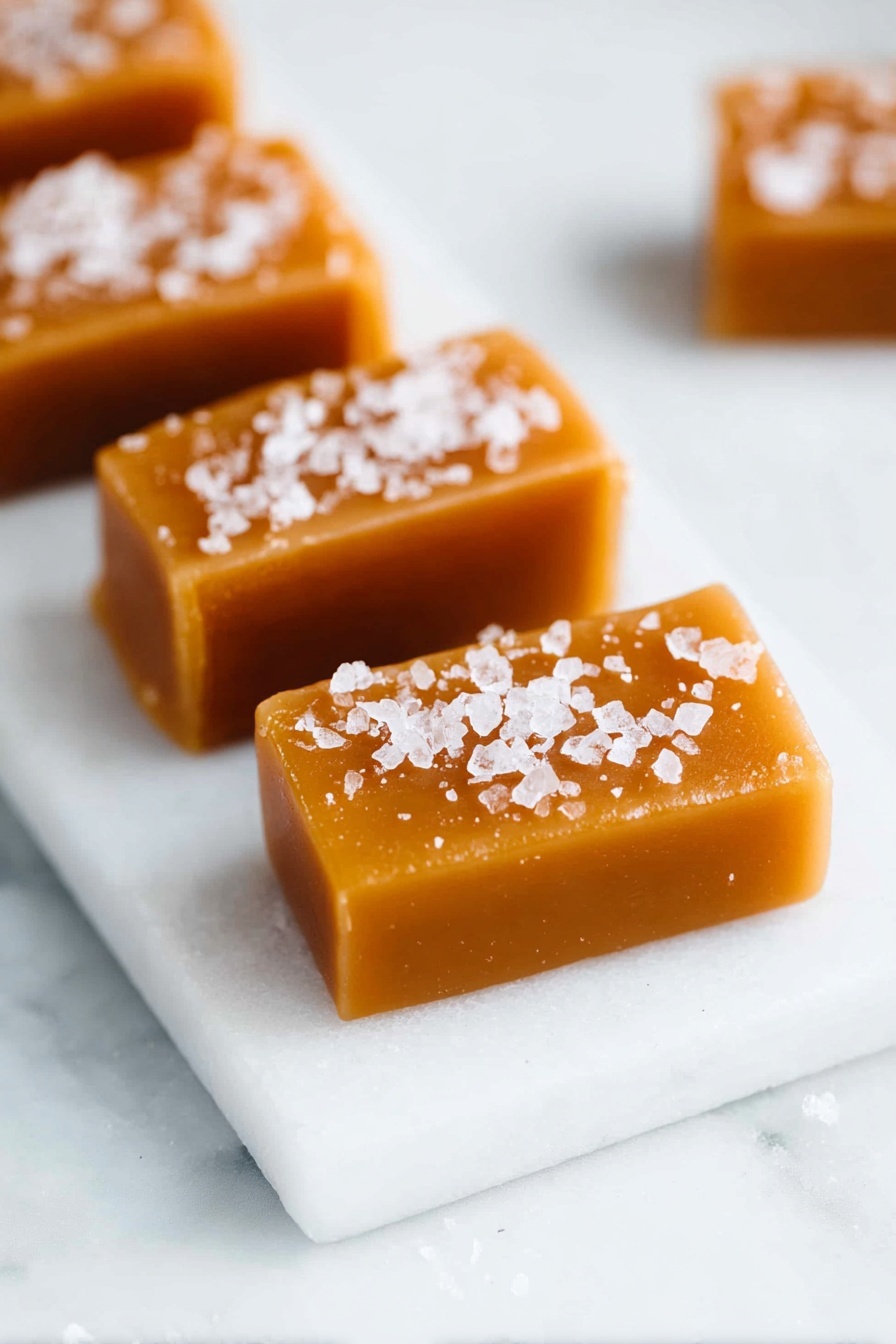
Step 7: Pour, Salt, and Cool
Carefully pour the hot caramel into your prepared pan. Let it rest for about 20 minutes to set slightly, then sprinkle the top with flaked sea salt. This layering of salt just before it cools adds that phenomenal flavor burst in every bite. Let the whole thing cool completely on the counter—about 3 ½ hours.
Step 8: Cut and Enjoy
Use the parchment overhang to unmold the caramel slab from the pan. If it’s still too soft to slice neatly, pop it into the fridge for 30-45 minutes to firm up. Then grab a sharp, large knife and cut into your preferred shapes. I’m a fan of 1-inch by 1/2-inch rectangles—bite-sized and elegant.
Pro Tips for Making Homemade Salted Caramels Recipe
- Use a Good Candy Thermometer: I can’t stress this enough—accurate temperature reading is the secret to perfect caramel every time.
- Be Patient When Adding Butter & Cream: Pour slowly and stir gently to prevent boiling over and to get a smooth consistency.
- Oil Your Parchment Paper Well: It makes removal of the caramel slab so much easier without sticky frustrations.
- Don’t Skip the Salt on Top: The flaked sea salt compensates for the sweetness and amps up the flavor like nothing else.
How to Serve Homemade Salted Caramels Recipe
Garnishes
I usually keep it simple with a sprinkling of Maldon sea salt flakes right after pouring the caramel into the pan. Sometimes, just for fun or holidays, I add a tiny dusting of crushed toasted nuts or even a light drizzle of dark chocolate. It adds a fun visual and flavor boost that impresses every time!
Side Dishes
Caramels are a fantastic sweet treat on their own but pair beautifully with a cup of strong coffee or black tea. I’ve also served them alongside vanilla ice cream or homemade apple pie—those buttery, salted bites balance out desserts so nicely.
Creative Ways to Present
For holidays and gift-giving, I like to cut my homemade salted caramels into elegant little rectangles, individually wrap them in waxed paper, and tie each with a festive ribbon. Placing them in glass jars or decorative tins always gets compliments. Plus, they make perfect, heartfelt gifts that friends and family can’t get enough of!
Make Ahead and Storage
Storing Leftovers
I wrap each caramel individually in plastic wrap or waxed paper to keep them fresh, then store them in an airtight container. In my experience, they last about two weeks refrigerated. I find this method not only keeps them fresh but also prevents them from sticking together—a total lifesaver.
Freezing
Freezing homemade salted caramels works really well! I pop the wrapped pieces into a freezer-safe bag, removing as much air as possible. They keep well for up to a month, and when you’re ready to indulge, just let them thaw at room temperature for a bit. The texture remains beautifully chewy, just like fresh.
Reheating
If your caramels get a bit too firm after refrigeration or freezing, don’t worry. I usually microwave a few wrapped pieces for about 5-7 seconds, then let them sit for a minute—perfectly soft again without melting or losing shape.
FAQs
-
Can I use unsalted butter instead of salted butter in this Homemade Salted Caramels Recipe?
Absolutely! If you only have unsalted butter, just add about ¼ teaspoon of fine salt to the caramel mixture or ensure you sprinkle a little extra sea salt on top. The salt is essential to balance the sweetness and bring out the rich flavors.
-
What can I substitute for light corn syrup in this recipe?
While light corn syrup is ideal for preventing crystals, you can substitute with golden syrup or pure honey. Just be mindful that honey might add a subtle floral flavor, and it may slightly affect texture, but it’s delicious and worth trying!
-
How do I know when the caramel is done?
The easiest way is with a candy thermometer—when the temperature hits 240°F (115°C), you’re in the soft ball stage perfect for chewy caramels. The caramel will also thicken and have a deep golden color around the edges.
-
Why is my caramel grainy?
Graininess usually comes from undissolved sugar crystals. Covering the pan briefly during sugar boiling, stirring gently, and using corn syrup helps avoid this. Also, avoid stirring the sugar directly while it cooks—let it dissolve naturally.
-
Can I double the recipe?
Doubling can be tricky because it’s harder to control the temperature and texture. I recommend making two batches instead unless you have a big enough pan and plenty of experience with candy-making. Temperature monitoring becomes extra crucial when scaling up.
Final Thoughts
This Homemade Salted Caramels Recipe holds a special place in my kitchen and heart. It’s one of those treats that feels both nostalgic and luxurious—perfect for sharing or sneaking a sweet moment alone. Once you try making these, you’re going to get it: the silky texture, the buttery flavor, the little crunch of salt—it’s pure magic. I hope you enjoy making and savoring them as much as I do. Trust me, friends, you’ll want to keep this recipe close forever!
Print
Homemade Salted Caramels Recipe
- Prep Time: 3 hours 45 minutes
- Cook Time: 20 minutes
- Total Time: 4 hours 5 minutes
- Yield: 30 pieces
- Category: Dessert
- Method: Stovetop
- Cuisine: American
Description
These homemade salted caramels are soft, chewy, and perfectly balanced with a touch of flaked sea salt. Made with butter, heavy cream, sugar, corn syrup, and a bit of water, these treats are cooked carefully to reach the ideal temperature for that classic caramel texture. Individually wrapped, they make a lovely gift or a decadent snack.
Ingredients
Caramel Ingredients
- 8 tablespoons salted butter (113g)
- ½ cup heavy cream (120ml), at least 35% butterfat
- 3 tablespoons water (44ml)
- ¼ cup light corn syrup (60ml)
- 1 cup granulated sugar (200g)
- ½ teaspoon flaked sea salt, like Maldon
Instructions
- Prepare pan. Lightly oil a 9×5-inch loaf pan. Cut a piece of parchment paper to fit inside the pan with at least an inch overhang on the sides. Lightly oil the parchment paper, place it in the pan, and set aside.
- Heat butter and cream. Cut the butter into 8 pieces and place in a microwave-safe bowl with the heavy cream. Heat in the microwave for 1 to 2 minutes until the butter melts and the mixture is hot. Set aside.
- Make sugar syrup. In a small, heavy-bottomed saucepan, combine the water and corn syrup. Add the sugar carefully to avoid splattering up the pan’s sides. Place over medium heat and cook until the sugar boils. Cover with a lid for 1 minute to create steam and help dissolve any sugar stuck to the sides.
- Cook to 320°F. Remove the lid and attach a candy thermometer to the saucepan. Cook the sugar until it reaches 320°F (160°C) and turns an amber color around the edges, about 5 to 10 minutes.
- Add butter and cream. Slowly pour about one-sixth of the butter and cream mixture into the hot sugar, stirring continuously to incorporate. Repeat adding the mixture in small batches, stirring between each addition. The mixture will bubble vigorously, so proceed cautiously.
- Cook to 240°F. After all butter and cream is added, continue cooking the mixture until it reaches 240°F (115°C), about 5 to 10 minutes.
- Cool. Carefully pour the caramel into the prepared loaf pan. Let it cool uncovered for 20 minutes, then sprinkle the top evenly with the flaked sea salt. Allow it to cool completely at room temperature, about 3 ½ hours.
- Cut into caramels. Once cooled and set, unmold the caramel. If too soft to handle, refrigerate for 30 to 45 minutes to firm up. Use a large, sharp knife to cut into 1-inch by ½-inch rectangles or desired shapes.
Notes
- Wrap caramels individually in plastic wrap or waxed paper for storage.
- Store refrigerated for up to two weeks or freeze for up to one month.
- Use a standard candy thermometer and a 1 ½ to 2-quart heavy, thick-bottomed saucepan for best results.
- Corn syrup can be substituted with pure honey or golden syrup though corn syrup is most reliable.
- If using unsalted butter, add ¼ teaspoon of fine salt to the recipe.
- For softer caramels, add 2 to 4 tablespoons more cream.
- For firmer caramels, cook the final mixture to 245°F (118°C) instead of 240°F (115°C).
- Doubling the recipe is not recommended due to temperature control difficulties; make multiple batches instead.
Nutrition
- Serving Size: 1 piece (about 20g)
- Calories: 90 kcal
- Sugar: 12 g
- Sodium: 50 mg
- Fat: 4 g
- Saturated Fat: 3 g
- Unsaturated Fat: 1 g
- Trans Fat: 0 g
- Carbohydrates: 13 g
- Fiber: 0 g
- Protein: 0 g
- Cholesterol: 12 mg
