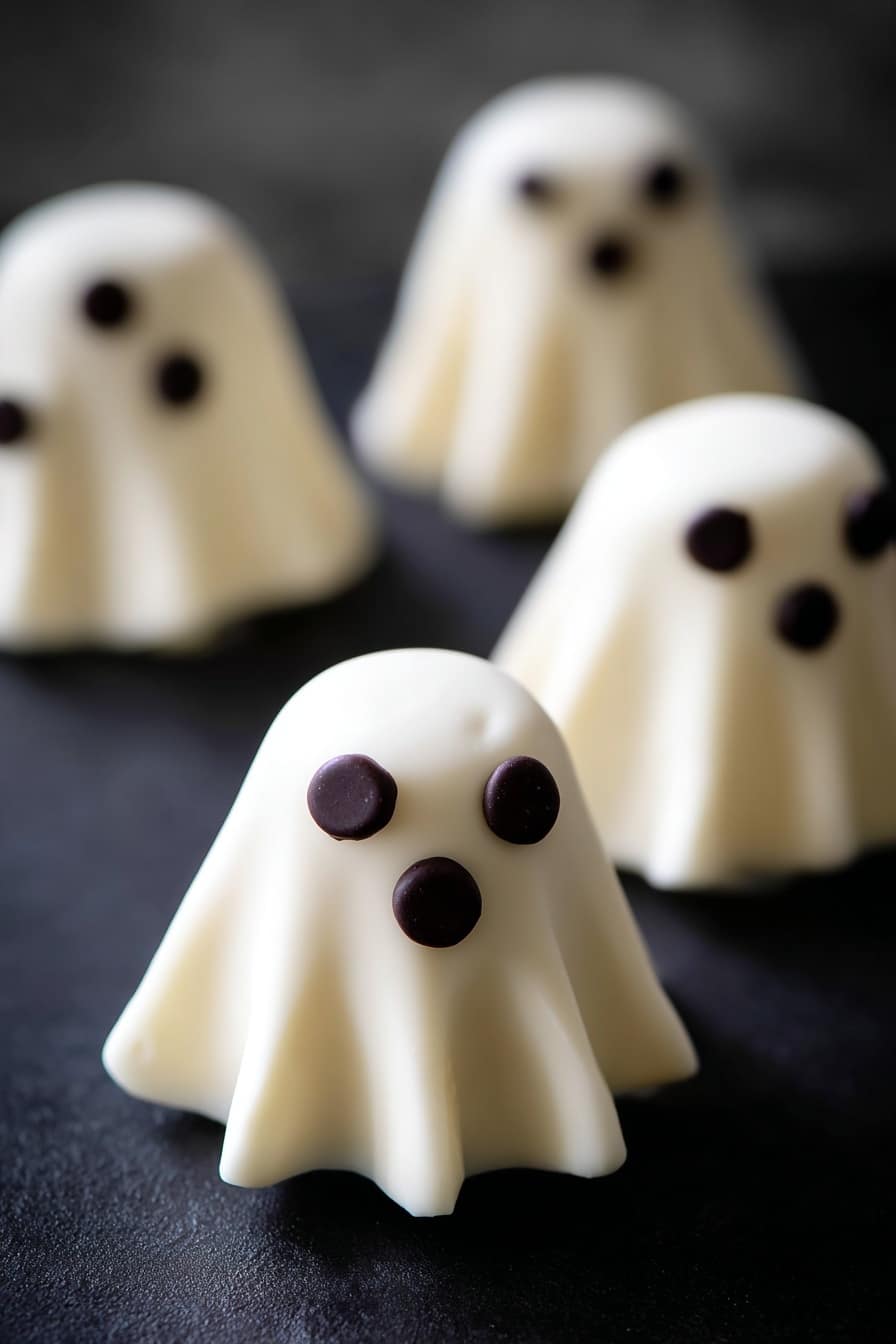
Marshmallow Ghosts: Easy Halloween Treats Recipe
If you’re looking for a fun, spook-tacular way to celebrate Halloween, I’ve got the perfect treat for you! These Marshmallow Ghosts: Easy Halloween Treats Recipe are not only adorable but also a breeze to make, even if you’re new to crafting sweet little monsters. I remember the first time I made these with my kids — their eyes lit up, and so did mine, especially when they realized how simple it was to whip them up! Stick around, and I’ll walk you through everything you need to know to make the cutest marshmallow ghosts ever.
Why This Recipe Works
- Simplicity at Its Best: With just a few ingredients and simple steps, this recipe delivers maximum Halloween fun without the fuss.
- Visual Impact: The white fondant and marshmallow combo creates the perfect ghostly canvas that kids (and adults) adore.
- Customizable: Whether you want to make them spooky, silly, or sweet, you can easily tweak the decorating details to fit your vibe.
- Kid-Friendly Assembly: Great for getting the whole family involved in the kitchen — plus, the design is forgiving so even little hands can nail it!

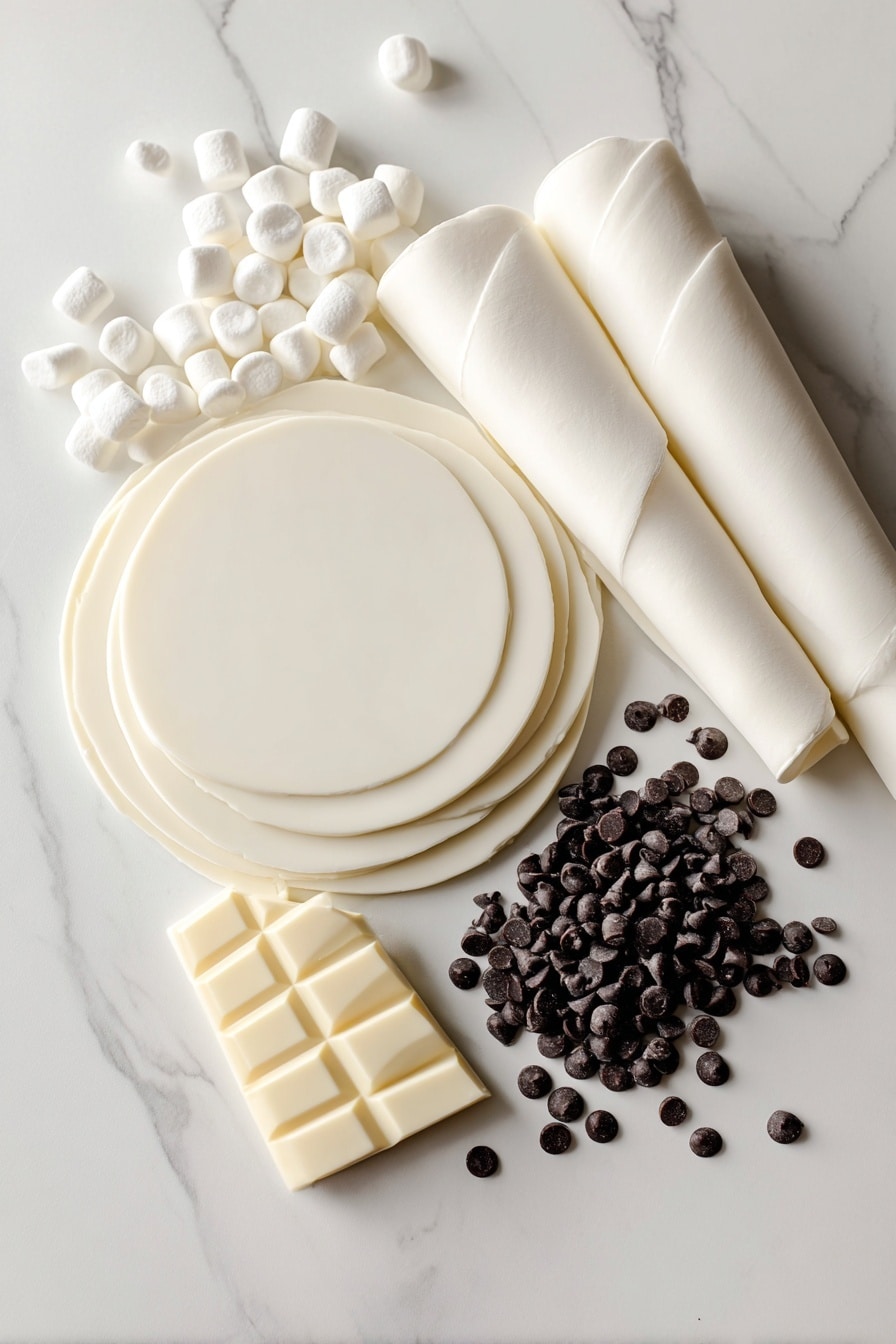
Ingredients & Why They Work
Each ingredient in this Marshmallow Ghosts: Easy Halloween Treats Recipe plays a key role — from the soft fondant that forms the ghostly cloaks, to the marshmallows that give them a fluffy lift. Picking quality ingredients will make your ghosts look and taste fantastic. Here’s a quick rundown:
- Fondant: It shapes the ghost’s “cloak” perfectly because it’s pliable but firm, letting you roll it thin without tearing.
- Marshmallows: The ghosts’ bodies — fresh, squishy, and sweet, they provide the perfect base.
- Mini Chocolate Chips: These tiny darlings are perfect as ghostly eyes, adding just the right touch of expression.
- Standard Chocolate Chips: Great for the mouth, giving your ghost personality and charm.
- White Chocolate: Acts as the “glue” to hold everything together and blend seamlessly with the ghost’s pale palette.
Tweak to Your Taste
I love how easy it is to get creative with these marshmallow ghosts! Sometimes I add a little sparkle dust or edible glitter to give them a magical glow. You can really make this recipe your own by playing with expressions or even colors!
- Variation: Once, I tried using colored fondant to make ghosts in pastel shades, and it was such a hit at a friend’s Halloween party – adds a whimsical twist if you want something less traditional.
- Dietary Modification: Use gluten-free fondant (available at specialty stores) if you or your family need gluten-free treats.
- Difficulty Level: If you’re short on time, you can simplify by skipping the white chocolate “glue” step by carefully pressing the fondant and marshmallow together, but the chocolate definitely helps it last longer.
Step-by-Step: How I Make Marshmallow Ghosts: Easy Halloween Treats Recipe
Step 1: Gather and Prep Your Ingredients
Get all your ingredients ready on the counter — fondant, marshmallows, chocolate chips, and white chocolate. If you’re making your own fondant, do that ahead of time following your favorite recipe. I like to keep everything within arm’s reach to keep the flow smooth once I start assembling.
Step 2: Melt and Keep the White Chocolate Warm
Melt some white chocolate in a small bowl. Here’s a trick I learned: place the bowl over a pot of hot water or in a larger bowl filled with hot water to keep that chocolate melty and smooth as you work. If the chocolate cools, it hardens and makes assembly tricky — so keep topping up the hot water as needed.
Step 3: Roll and Cut the Fondant
Roll your fondant out to about 2 or 3 millimeters thick. Use a medium-sized round cutter — I usually pick one about the diameter of the marshmallow plus double the marshmallow’s height to ensure good coverage. The goal is to have the fondant drape over the marshmallow nicely with a little “frilly” edge.
Step 4: Assemble Your Ghosts
Pop a dab of the melted white chocolate in the center of each fondant circle, then place a marshmallow right in the middle. Flip the whole thing over and gently adjust the fondant edges to cover the marshmallow fully, creating those cute ghostly frills. I always handle this part with clean, dry fingers — trust me, any moisture can make the fondant less flexible.
Step 5: Add the Eyes and Mouth
Using a toothpick or skewer, dot two spots of white chocolate for the eyes. Quickly place mini chocolate chips on those wet spots before the chocolate sets. Do the same for the mouth with the standard-sized chocolate chip. Don’t rush this part — it’s what really brings your ghosts to life!
Step 6: Store Safely
Once your marshmallow ghosts are set, keep them in an airtight container away from humid spots. I like to place a sheet of parchment between layers if stacking, to avoid sticking. This simple step helps them stay fresh and picture-perfect for your celebrations.
Pro Tips for Making Marshmallow Ghosts: Easy Halloween Treats Recipe
- Keep White Chocolate Warm: Use a double boiler or warm water bath to prevent the chocolate from hardening mid-assembly.
- Right Cutter Size: Picking a cutter that matches your marshmallow size is key to the perfect fondant fit—neither too tight nor bulky.
- Gentle Hands: Fondant can be delicate, so handle it carefully when forming the ghost frills to avoid cracks or tears.
- Avoid Humidity: Store in a dry spot to keep the marshmallow and fondant from getting sticky or soggy.
How to Serve Marshmallow Ghosts: Easy Halloween Treats Recipe
Garnishes
For garnishes, I like sprinkling a little edible glitter or popping in crushed candy corn around the plate to amp up the festive look. Sometimes I also dust the tray lightly with powdered sugar to mimic a “foggy Halloween night” — it’s such a fun touch!
Side Dishes
These marshmallow ghosts pair wonderfully with a hot chocolate station or a batch of pumpkin-spiced cookies. The creamy, sweet marshmallow vibe complements warm drinks and autumnal treats perfectly for a cozy Halloween gathering.
Creative Ways to Present
One of my favorite presentation ideas is to arrange the ghosts popping out of mini “cauldron” bowls filled with black licorice or gummy worms—like they’re bubbling up from a spooky brew! You can also skewer a few marshmallow ghosts on sticks to create edible ghost “pops” that kids absolutely love.
Make Ahead and Storage
Storing Leftovers
I’ve found storing these marshmallow ghosts in an airtight container on the counter works best. Avoid refrigeration as the moisture can make the fondant sticky. They keep well for a couple of days, perfect if you’re prepping ahead for a party.
Freezing
Freezing isn’t the best option here because marshmallows and fondant don’t always thaw well together — the texture can get a bit weird. I generally recommend making these fresh, but if you must freeze, pop them in a single layer wrapped tightly and thaw slowly at room temperature.
Reheating
There’s no need to reheat marshmallow ghosts; they’re best enjoyed as-is. However, if the fondant gets a little stiff, just bring them to room temperature before serving for the best texture.
FAQs
-
Can I use regular chocolate instead of white chocolate for this recipe?
While you can technically use dark or milk chocolate, white chocolate is preferred because it blends seamlessly with the fondant and marshmallows, preserving the ghostly white appearance. Dark or milk chocolate might be too contrasting and could show through the fondant if rolled thin.
-
What type of cutter should I use for fondant circles?
I recommend using a medium-sized round cutter whose diameter equals the marshmallow’s diameter plus twice its height. This ensures that the fondant covers the marshmallow nicely without too much excess or being too tight.
-
How do I keep the white chocolate from hardening too quickly?
Keep your melted white chocolate warm by placing the bowl over a pot of hot water or a larger bowl with hot water. This warm water bath prevents the chocolate from cooling and solidifying prematurely, allowing for smooth assembly.
-
Can kids help make Marshmallow Ghosts?
Absolutely! This recipe is very kid-friendly, and little helpers will enjoy assembling and decorating the ghosts. Just make sure adults handle the melted chocolate for safety and keep an eye on sticky fingers near hot water baths.
Final Thoughts
This Marshmallow Ghosts: Easy Halloween Treats Recipe holds a special place in my heart because it brings out the kid in all of us — playful, creative, and just a little spooky. Whether it’s a last-minute party treat or a fun afternoon project, these little ghosts never fail to make me smile. So go ahead, gather your ingredients, get a little messy, and make some ghostly magic of your own. Trust me, your Halloween celebrations will thank you!
Print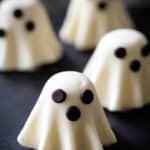
Marshmallow Ghosts: Easy Halloween Treats Recipe
- Prep Time: 1 hour
- Cook Time: 0 minutes
- Total Time: 1 hour
- Yield: 10 marshmallow ghosts
- Category: Snack
- Method: No-Cook
- Cuisine: American
Description
Create adorable and spooky Marshmallow Ghosts using fondant, marshmallows, and white chocolate. These easy Halloween treats are perfect for festive parties and fun family activities, combining simple ingredients to craft delightful ghostly sweets.
Ingredients
Fondant Layer
- 300 g fondant
- White chocolate (amount as needed for melting and decorating)
Marshmallow Ghosts
- 10 marshmallows
- 20 mini chocolate chips
- 10 standard chocolate chips
Instructions
- Prepare Ingredients: Gather all the ingredients. If you prefer homemade fondant, prepare it beforehand by following a trusted fondant recipe.
- Melt White Chocolate: Melt white chocolate in a small bowl and keep it warm by placing the bowl over a pot of hot water or inside a larger bowl with hot water to prevent it from hardening as you work.
- Roll Fondant: Roll out the fondant to about 2mm to 3mm thickness using a rolling pin on a clean surface, ensuring even thickness for easy cutting.
- Cut Fondant Circles: Use a medium-sized round cutter, approximately the size of the marshmallow plus twice its height, to cut out fondant circles that will fully cover the marshmallows.
- Attach Marshmallows: Apply a small amount of melted white chocolate in the center of each fondant circle, then place a marshmallow firmly in the middle to secure it.
- Form Ghost Shape: Flip the marshmallow and fondant over and gently adjust the edges of the fondant to cover the marshmallow well, creating ruffled ghostly frills around the edges.
- Add Facial Features: Using a skewer or toothpick, dot two small spots of melted white chocolate on the marshmallow sides for eyes; quickly stick two mini chocolate chips onto these spots before the chocolate sets. Repeat the process to add a mouth using a standard-sized chocolate chip.
- Repeat Assembly: Continue assembling the rest of the marshmallow ghosts using the above steps until all are completed.
- Storage: Store the marshmallow ghosts in an airtight container, keeping them away from humidity to maintain freshness and texture.
Notes
- Keep the white chocolate warm while assembling by placing the bowl in hot water; replace the water when it cools to avoid the chocolate hardening prematurely.
- White chocolate works best for these treats because it blends visually with the white fondant and marshmallows, avoiding visible contrast that dark or milk chocolate might create.
- Choose a cutter size that closely matches the marshmallow’s diameter plus twice its height to ensure the fondant covers the marshmallow perfectly without excessive excess fondant.
- Store completed marshmallow ghosts in an airtight container away from moisture to prevent them from becoming sticky or losing shape.
Nutrition
- Serving Size: 1 ghost
- Calories: 90 kcal
- Sugar: 12 g
- Sodium: 10 mg
- Fat: 2 g
- Saturated Fat: 1.5 g
- Unsaturated Fat: 0.5 g
- Trans Fat: 0 g
- Carbohydrates: 18 g
- Fiber: 0 g
- Protein: 0.5 g
- Cholesterol: 0 mg
