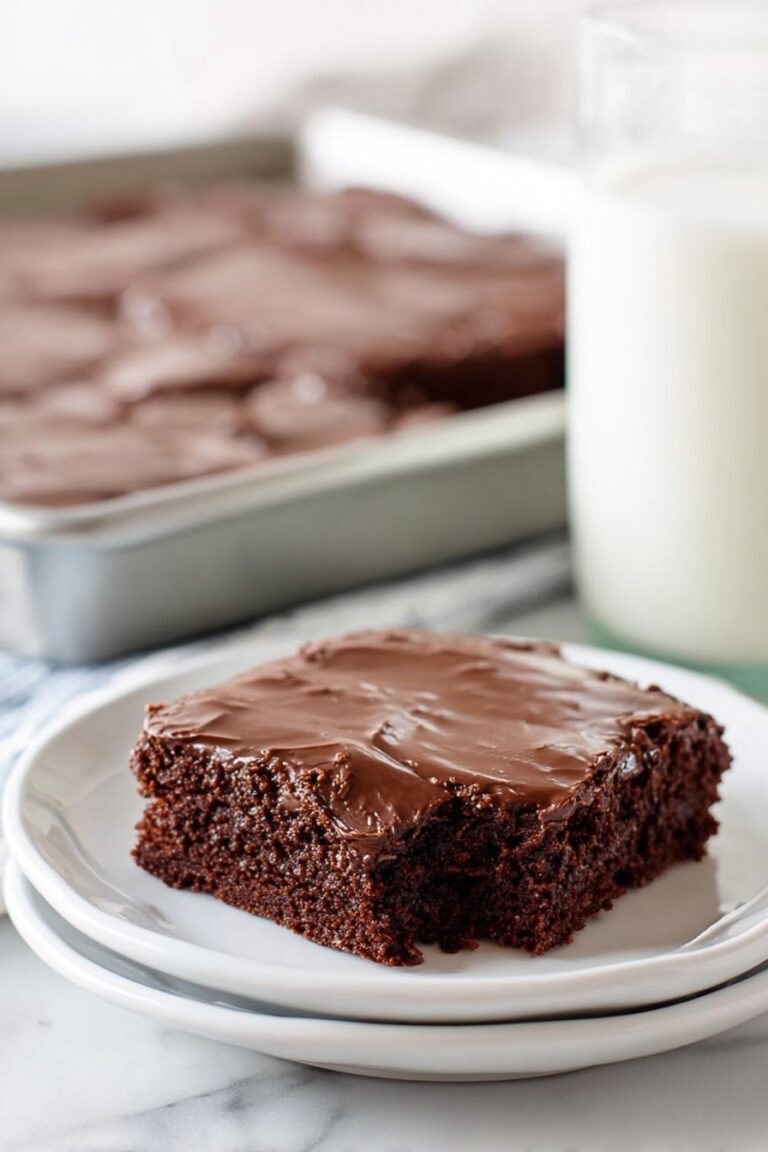
No-Bake Fudgy Chocolate Squares Recipe
If you’re craving a rich, chocolatey treat but don’t want to fuss with the oven, this No-Bake Fudgy Chocolate Squares Recipe is your new best friend. I’ve made these squares countless times when friends pop over unexpectedly, and they always impress with that perfect balance of fudgy, sweet, and just a hint of saltiness. The ease of skipping the baking means you can have a decadent dessert ready without the wait or the heat in the kitchen.
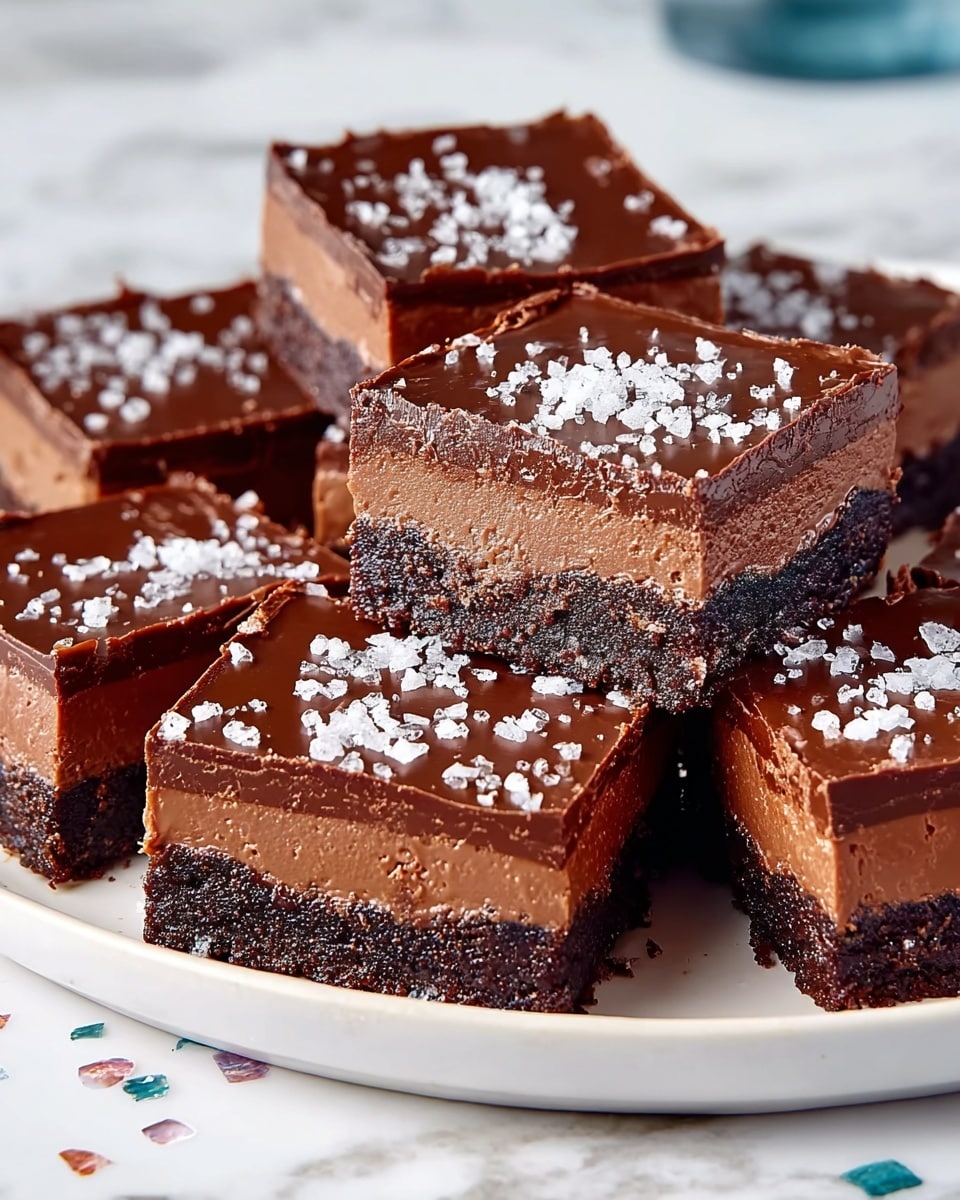
What makes this recipe truly special is the texture — super fudgy yet with a slight crisp from the cookie crust that keeps each bite interesting. Plus, the espresso powder subtly amps up the chocolate flavor, making these squares taste like a gourmet treat. Whether it’s for a last-minute dessert or a thoughtful homemade gift, the No-Bake Fudgy Chocolate Squares Recipe checks all the boxes for satisfying chocolate lovers and busy home cooks alike.
Why This Recipe Works
- No-Bake Convenience: Skip the oven and save time while still enjoying a luscious dessert.
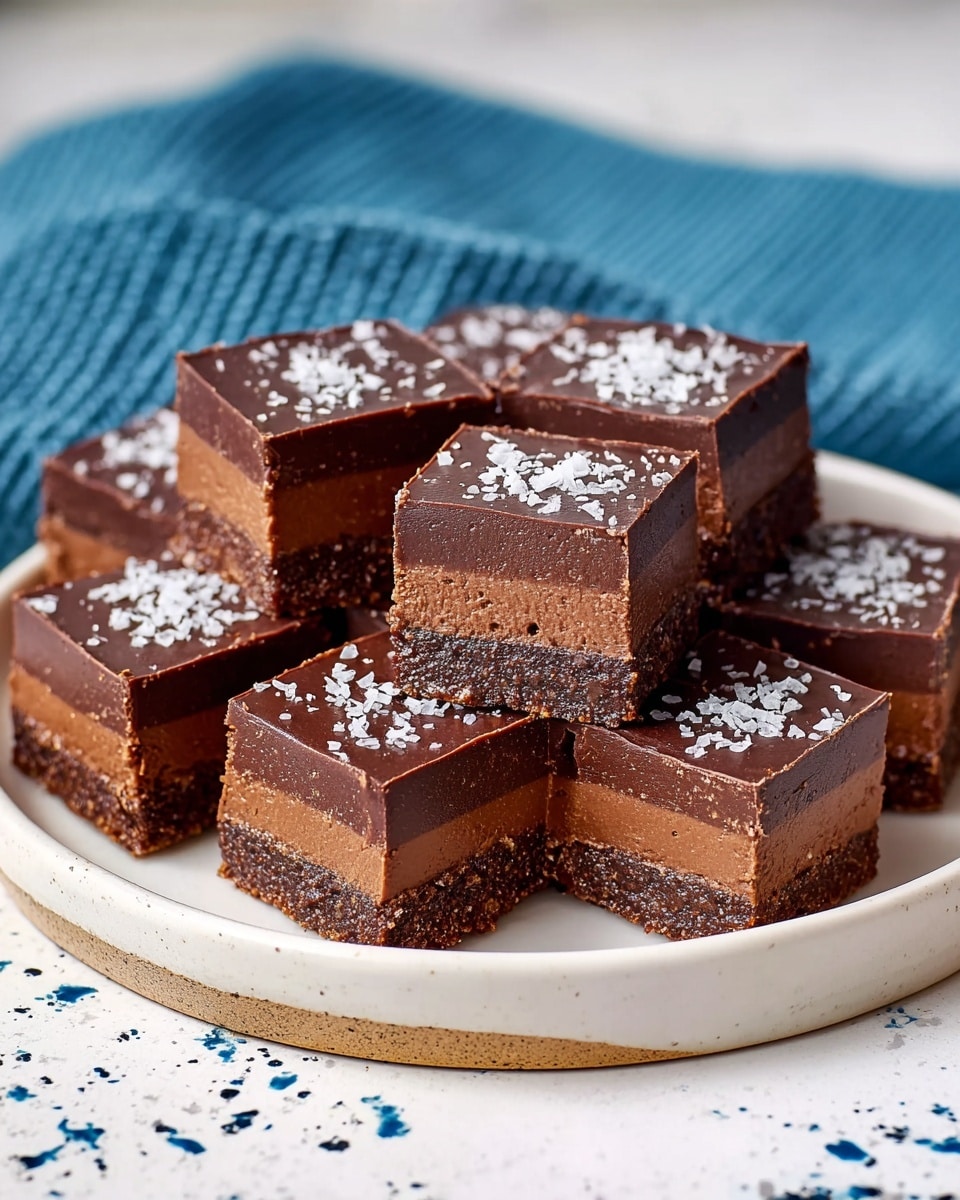
- Fudgy, Layered Texture: A crisp cookie crust topped with a rich, melt-in-your-mouth chocolate layer creates irresistible contrast.
- Enhanced Chocolate Flavor: Espresso powder intensifies the cacao notes for deeper, more sophisticated taste.
- Adaptable & Crowd-Pleasing: Easy to customize and perfect for potlucks, gifts, or anytime chocolate cravings hit.
Ingredients & Why They Work
The ingredients in this No-Bake Fudgy Chocolate Squares Recipe come together beautifully to create that perfect balance of textures and flavors. Each plays its part—from the buttery cookie crust that holds the squares together to the bittersweet chocolate that gives them that deep, indulgent taste you want in a fudge treat.
- Chocolate wafer cookies: These create a sturdy yet crumbly base — choose your favorite brand for best results.
- Unsalted butter: Helps bind the crust and adds richness to the chocolate layers without overpowering the chocolate flavor.
- Granulated sugar: Balances the bitterness of the dark chocolate just right.
- Kosher salt: Enhances all the flavors, and I love sprinkling flaky sea salt on top for a final pop.
- Bittersweet chocolate (70% cacao): Provides that deep, complex chocolate flavor essential to fudgy desserts.
- Sweetened condensed milk: The secret behind the creamy, smooth texture without needing to cook a custard.
- Instant espresso powder: Boosts the chocolate flavor—don’t worry, it won’t make these taste like coffee, just richer.
- Vanilla extract: Adds warmth and rounds out all the flavors to perfection.
- Flaky sea salt: Optional, but highly recommended for contrast and a gourmet touch.
Tweak to Your Taste
I love making this recipe my own by adjusting the flavor mix or switching up the toppings. It’s a super adaptable dessert—feel free to sprinkle nuts on top, swap bittersweet for milk chocolate for a sweeter bite, or add a pinch of cayenne if you’re feeling adventurous.
- Nutty Crunch: I sometimes add toasted pecans or almonds between the layers for added texture, and it’s a game-changer.
- Dairy-Free Version: Replacing butter with coconut oil works well, though the flavor shifts slightly; still delicious!
- Spiced:** If you like a little warmth, cinnamon or a dash of chili powder adds a lovely twist that complements the chocolate.
Step-by-Step: How I Make No-Bake Fudgy Chocolate Squares Recipe
Step 1: Prep Your Pan and Cookie Crust
Start by lightly spraying an 8- by 8-inch baking pan and lining it with parchment paper—make sure to leave an overhang on two sides for easy removal later. It’s a little extra work upfront but trust me, it’s worth it to get those neat squares. Then, pulse your chocolate wafer cookies in a food processor until finely crushed. Mixing in the melted butter, sugar, and a pinch of salt turns those crumbs into a pressable crust. Firmly press it into the pan using a flat-bottom glass—a trick I use for even compaction. Pop it into the freezer for about 15 minutes until set.
Step 2: Melt Chocolate and Make the Fudge Layer
Microwave 2 cups of bittersweet chocolate with 4 tablespoons butter, stirring every 30 seconds so it melts smoothly without scorching. Stir in the sweetened condensed milk, espresso powder, vanilla, and the rest of the salt. Pour this velvety mixture over your chilled crust and spread it evenly with an offset spatula. This fudge layer sets once refrigerated for about an hour, giving you that luscious, fudgy texture we’re after.
Step 3: Top it Off with a Glossy Chocolate Finish
Finally, melt the remaining chocolate and butter together and pour it over the fudge layer, smoothing it out carefully. Chill again for about 30 minutes until firm. I always sprinkle flaky sea salt on top once it’s set, which makes the flavors sing. Use the parchment overhang to lift the whole slab out of the pan, then slice into squares. For the cleanest cuts, I dip my knife in warm water before slicing and dry it off—this prevents sticking and keeps edges neat.
Pro Tips for Making No-Bake Fudgy Chocolate Squares Recipe
- Press the Crust Firmly: Use a flat-bottomed glass and apply steady pressure to avoid a crumbly base.
- Microwave in Short Bursts: Always stir chocolate often and microwave in 20-30 second intervals to prevent burning.
- Warm Knife for Clean Cuts: Running your knife under hot water before slicing keeps edges smooth and pretty.
- Don’t Skip the Salt: The flaky sea salt sprinkled on top perfectly contrasts the sweet fudge—trust me, it’s a must.
How to Serve No-Bake Fudgy Chocolate Squares Recipe
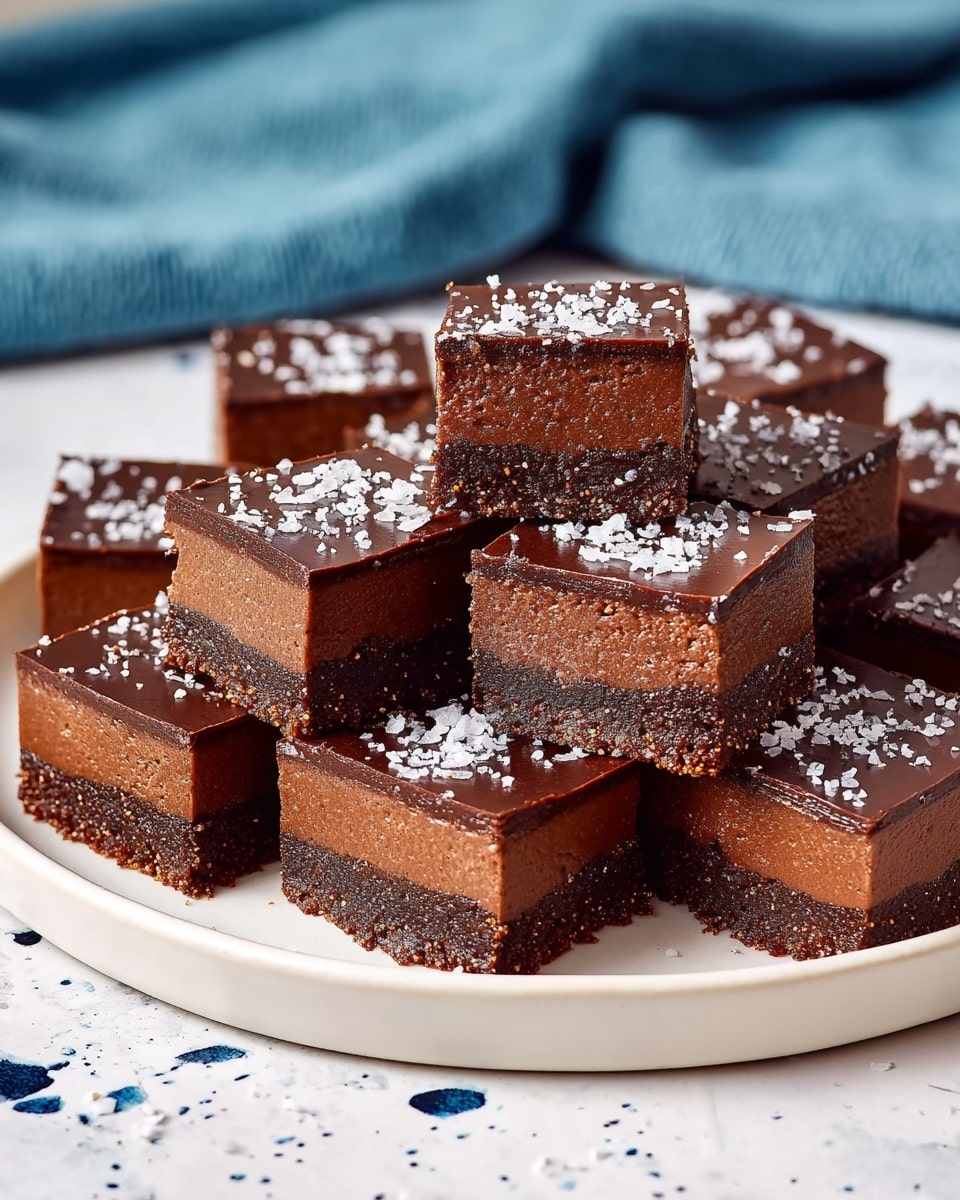
Garnishes
I love adding a sprinkle of flaky sea salt right on top for that mouthwatering salty-sweet combo. Occasionally, I’ll dust a tiny bit of cocoa powder or even some crushed espresso beans for an added crunch and aroma. These little finishing touches make serving the squares feel extra special and sophisticated.
Side Dishes
Pair these squares with a scoop of vanilla ice cream or some fresh raspberries to cut through the richness. A hot cup of coffee or espresso is also one of my favorite companions for these bites—it really complements the chocolate and espresso hints perfectly.
Creative Ways to Present
For parties, I like arranging the squares on a pretty platter dusted with cocoa powder and decorated with fresh mint leaves for a pop of green. Wrapping individual squares in parchment squares and tying with twine makes lovely, edible gifts. Once, I even layered them in a glass trifle dish with whipped cream for an elegant dessert display.
Make Ahead and Storage
Storing Leftovers
I store leftover squares in an airtight container in the fridge—they keep their fudgy texture and taste beautifully for up to a week. Make sure they’re well covered to avoid absorbing other fridge odors.
Freezing
These squares freeze wonderfully too. I wrap them tightly in plastic wrap, then place in a freezer bag or airtight container for up to a month. When I want a treat, I just thaw them in the refrigerator overnight for the best texture and flavor.
Reheating
Since these are best served chilled, I usually don’t reheat them, but if you want a softer melt-in-your-mouth texture, leaving them out at room temperature for 15-20 minutes works well. Avoid microwaving as it can change the texture of the chocolate layer.
FAQs
-
Can I use a different type of cookie for the crust?
Absolutely! While chocolate wafer cookies provide the perfect flavor and texture, you can swap in graham crackers or even crushed pretzels for a salty crunch. Just make sure they’re finely crushed so the crust binds properly.
-
Is the espresso powder necessary in this recipe?
It’s not mandatory, but I highly recommend it. The espresso powder intensifies the chocolate flavor without making the squares taste like coffee. If you prefer to skip it, just omit it—the recipe will still be delicious!
-
Can I make this recipe vegan or dairy-free?
You can make some substitutions, like using coconut oil in place of butter and a vegan sweetened condensed “milk” alternative. However, the texture and flavor might vary slightly, so it may take some trial and error to perfect.
-
How do I get clean cuts when slicing the squares?
I dip my sharp knife in hot water before each cut and then dry it with a towel—this prevents sticking and helps make each square neat and pretty. It’s a simple trick that really works!
Final Thoughts
Honestly, this No-Bake Fudgy Chocolate Squares Recipe has become one of my go-to comfort desserts because it’s effortless yet so decadently satisfying. I love how it comes together quickly without heating up the kitchen, and the flavors always get rave reviews. If you’re looking for a fail-proof dessert that feels indulgent without fuss, this recipe is exactly what you need. Go ahead and give it a try—you’re going to love having this in your dessert rotation!
Print
No-Bake Fudgy Chocolate Squares Recipe
- Prep Time: 20 minutes
- Cook Time: 5 minutes
- Total Time: 2 hours 10 minutes
- Yield: 36 squares
- Category: Dessert
- Method: No-Cook
- Cuisine: American
Description
These No-Bake Fudgy Chocolate Squares are a decadent treat featuring a crunchy chocolate cookie crust topped with layers of creamy, rich bittersweet chocolate ganache. Ready in just over two hours including chilling time, they are perfect for an easy dessert that impresses with bold chocolate flavor and a hint of espresso.
Ingredients
Crust
- 1 (9-ounce; 255 g) package chocolate wafer cookies (about 72 cookies), such as Dewey’s, Oreos, or Goya Chocolate Maria Cookies
- 8 tablespoons unsalted butter (113 g; 1 stick), cut into 1 tablespoon pieces
- 1/2 ounce granulated sugar (13 g; 1 tablespoon)
- 1/4 teaspoon Diamond Crystal kosher salt (or 1/8 teaspoon table salt)
Filling
- 12 ounces chopped bittersweet chocolate (340 g; 2 1/2 cups), 70% cacao, divided
- 8 tablespoons unsalted butter (113 g; 1 stick), cut into 1 tablespoon pieces, divided
- 1 (14-ounce) can sweetened condensed milk
- 2 teaspoons instant espresso powder
- 2 teaspoons vanilla extract
- 1/2 teaspoon Diamond Crystal kosher salt (or 1/4 teaspoon table salt)
Garnish
- Flaky sea salt, to garnish
- Cooking spray
- Parchment paper
Instructions
- Prepare Pan: Lightly spray an 8- by 8-inch baking pan with cooking spray and line the bottom and sides with parchment paper, leaving a 2-inch overhang on two sides. Lightly spray the parchment paper; set aside.
- Make Crust: Pulse the chocolate wafers in a food processor about 15 times until finely ground, scraping down the sides as needed. Microwave 8 tablespoons butter in a microwave-safe bowl for about 1 minute, stirring occasionally until melted. Stir in sugar and 1/4 teaspoon salt into the melted butter, then add to the cookie crumbs. Press this mixture firmly and evenly into the prepared pan using a flat-bottomed glass or measuring cup. Freeze uncovered until firm, about 15 minutes.
- Prepare Filling: In a large microwave-safe bowl, combine 2 cups of the chopped chocolate and 4 tablespoons butter. Microwave on high, stirring every 30 seconds until completely melted and smooth, about 2 minutes. Stir in the sweetened condensed milk, instant espresso powder, vanilla extract, and the remaining 1/2 teaspoon salt until fully combined.
- Assemble Layers: Pour the chocolate mixture over the chilled crust, spreading an even layer with an offset spatula. Refrigerate uncovered until set, about 1 hour.
- Prepare Topping: In a medium microwave-safe bowl, combine remaining 1/2 cup chocolate and remaining 4 tablespoons butter. Microwave on high for about 1 minute, stirring occasionally until melted and smooth. Pour over the chilled chocolate layer and spread evenly with an offset spatula. Refrigerate uncovered until set, about 30 minutes.
- Finish and Serve: Sprinkle the top with flaky sea salt. Use the parchment overhang to lift the bars from the pan to a cutting board. Using a sharp knife warmed under hot water and dried between cuts, slice into 36 squares. Serve chilled.
Notes
- Oreo wafers or similar chocolate wafer cookies can be found at specialty grocery stores or online.
- For cleaner cuts, warm and dry your knife between slices to avoid cracking the chocolate.
- These squares can be stored in an airtight container in the refrigerator for up to 1 week.
- They can also be tightly wrapped and frozen for up to 1 month. Thaw in the refrigerator overnight before serving.
Nutrition
- Serving Size: 1 square
- Calories: 180 kcal
- Sugar: 16 g
- Sodium: 70 mg
- Fat: 12 g
- Saturated Fat: 7 g
- Unsaturated Fat: 4 g
- Trans Fat: 0 g
- Carbohydrates: 18 g
- Fiber: 2 g
- Protein: 2 g
- Cholesterol: 30 mg

