No Bake Halloween Cheesecake Cups Recipe
Hey, if you’re looking for a fun, festive, and downright delicious treat for Halloween that’s super easy to whip up, you’re going to love this No Bake Halloween Cheesecake Cups Recipe. These little cups pack all the creamy, dreamy cheesecake flavor, with creepy-cute layers that look perfect for your spooky celebrations. Plus, no oven needed—so you can skip the heat and just have fun creating the sweet layers together. Stick around because I’ve got all the tips to make sure your cheesecake cups turn out show-stopping and seriously tasty!
Why This Recipe Works
- No Oven Required: Being no bake means it’s perfect for warm weather or when you want a quick dessert without heating up the kitchen.
- Halloween-Themed Beauty: The orange and white cheesecake layers look festive and fun, making them a showstopper at any party.
- Simple, Store-Bought Ingredients: Using Oreos and Cool Whip keeps things easy but delicious—you don’t have to hunt down anything fancy.
- Flexible and Customizable: You can swap out crusts, colors, and toppings, letting you put your own spin on this classic treat.

Ingredients & Why They Work
This No Bake Halloween Cheesecake Cups Recipe is all about simple ingredients that come together in perfect harmony—creamy, crunchy, sweet, and just a touch spooky. I love how the cream cheese and Cool Whip create that silky, fluffy texture everyone craves in cheesecake, while the Oreo crumbs add a chocolatey crunch. When shopping, go for good-quality cream cheese and fresh Cool Whip to keep things smooth and light.

- Oreo cookies: The perfect base layer with chocolate richness and a built-in frosting flavor that makes your crust extra tasty.
- Cream cheese: Use full-fat and room temperature cream cheese for a silky smooth filling without lumps.
- Powdered sugar: Easily blends into cream cheese, giving sweetness without gritty texture.
- Vanilla extract: Adds depth and warms up the cheesecake flavor beautifully.
- Cool Whip: Keeps the filling light and airy, balancing the richness of the cream cheese.
- Orange gel coloring: No ordinary food dye here; gel colors are vibrant and won’t water down your mixture.
- Ghost Peeps and Halloween sprinkles: This is where you get your festive touch—adds spooky fun and texture.
- Candy pumpkins: A seasonal classic that’s the cherry (or should I say candy) on top.
Tweak to Your Taste
One of the best parts of this No Bake Halloween Cheesecake Cups Recipe is how flexible it is. I often switch up the colors or crusts depending on the mood or what’s in my pantry, and trust me, it never loses its charm. Don’t be shy—make it your own by adding your favorite twists!
- Variation: I once used crushed Biscoff cookies for the crust, and it added this amazing caramelized flavor that everyone raved about. Totally worth trying.
- Dietary tweak: For a lighter version, swap Cool Whip for a whipped coconut cream—great for dairy-free friends.
- Color play: I love making a green layer with gel food coloring for a Frankenstein twist—kids go wild for it!
Step-by-Step: How I Make No Bake Halloween Cheesecake Cups Recipe
Step 1: Crush and Layer Your Oreo Crust
Start by crushing half the Oreos until fine crumbs. I find using a food processor is the easiest way to get even crumbs without bites of big chunks—just pulse a few times and watch the magic happen. Divide these crumbs evenly into your cups to create the base layer. This gives a crunchy contrast to the creamy filling, so don’t skimp on this step!
Step 2: Make Your Creamy Cheesecake Filling
Beat the softened cream cheese with powdered sugar and vanilla extract until smooth and fluffy. Make sure your cream cheese is room temperature—it saves so much frustration and results in a smooth batter with no lumps. Then gently fold in 2 cups of Cool Whip to keep it light as air.
Step 3: Split and Tint Your Cheesecake Mixture
Divide the batter evenly into two bowls. Now for the fun part: add orange gel coloring to one bowl. I add the gel a little at a time, mixing as I go, to achieve the perfect Halloween orange glow—you want it bright but not too neon. The other bowl stays white—these contrasting layers make the cups look super festive.
Step 4: Assemble Your Layers Neatly
Spoon or pipe a layer of white cheesecake over the Oreo crust in each cup. To keep things tidy and pretty, I use a piping bag with a round tip—if you don’t have one handy, a ziplock bag with a small corner snipped off works just as well. Then, sprinkle the remaining crushed Oreos on top for the trick-or-treat effect.
Step 5: Add the Orange Cheesecake Layer
Next, spoon or pipe the orange cheesecake layer over the Oreo crumbs. The layers look so inviting when you get this neat contrast between white and orange. This is where patience pays off—take your time or use a steady hand to keep it clean and vibrant.
Step 6: Top It Off With Cool Whip and Decorations
Put the remaining Cool Whip into a piping bag fitted with a 1M tip and swirl a generous cloud on top of each cup—this finishes it off like a fluffy ghost’s puff. Right before serving, add your ghost Peeps, Halloween sprinkles, and candy pumpkins. I don’t add these too early because I like to keep them fresh and colorful until the very last moment.
Pro Tips for Making No Bake Halloween Cheesecake Cups Recipe
- Room Temperature Cream Cheese: Always let your cream cheese sit out for at least 30 minutes before mixing to avoid lumps and ensure a smooth filling.
- Use Gel Food Coloring: Liquid dyes dilute your mixture—gels give vibrant colors without thinning the batter.
- Piping Bag Trick: If you don’t have a piping bag, a ziplock with a small corner cut works great for neat layering and swirls.
- Add Toppings Last Minute: To keep Peeps and sprinkles looking fresh and not soggy, add them right before serving or after transport.
How to Serve No Bake Halloween Cheesecake Cups Recipe
Garnishes
I absolutely love topping these cheesecake cups with ghost Peeps because they’re adorable and iconic for Halloween. The Halloween sprinkles add just the right pop of festive color and a little crunch, while the candy pumpkins bring that classic fall flavor and look. Feel free to swap in gummy worms or edible googly eyes for an extra scary vibe if that’s your thing!
Side Dishes
When I serve these cheesecake cups, I usually pair them with simple fall-themed snacks like spiced nuts or caramel apples. They’re sweet enough to be the star of the show but a little salty or crisp on the side rounds out the whole treat table beautifully.
Creative Ways to Present
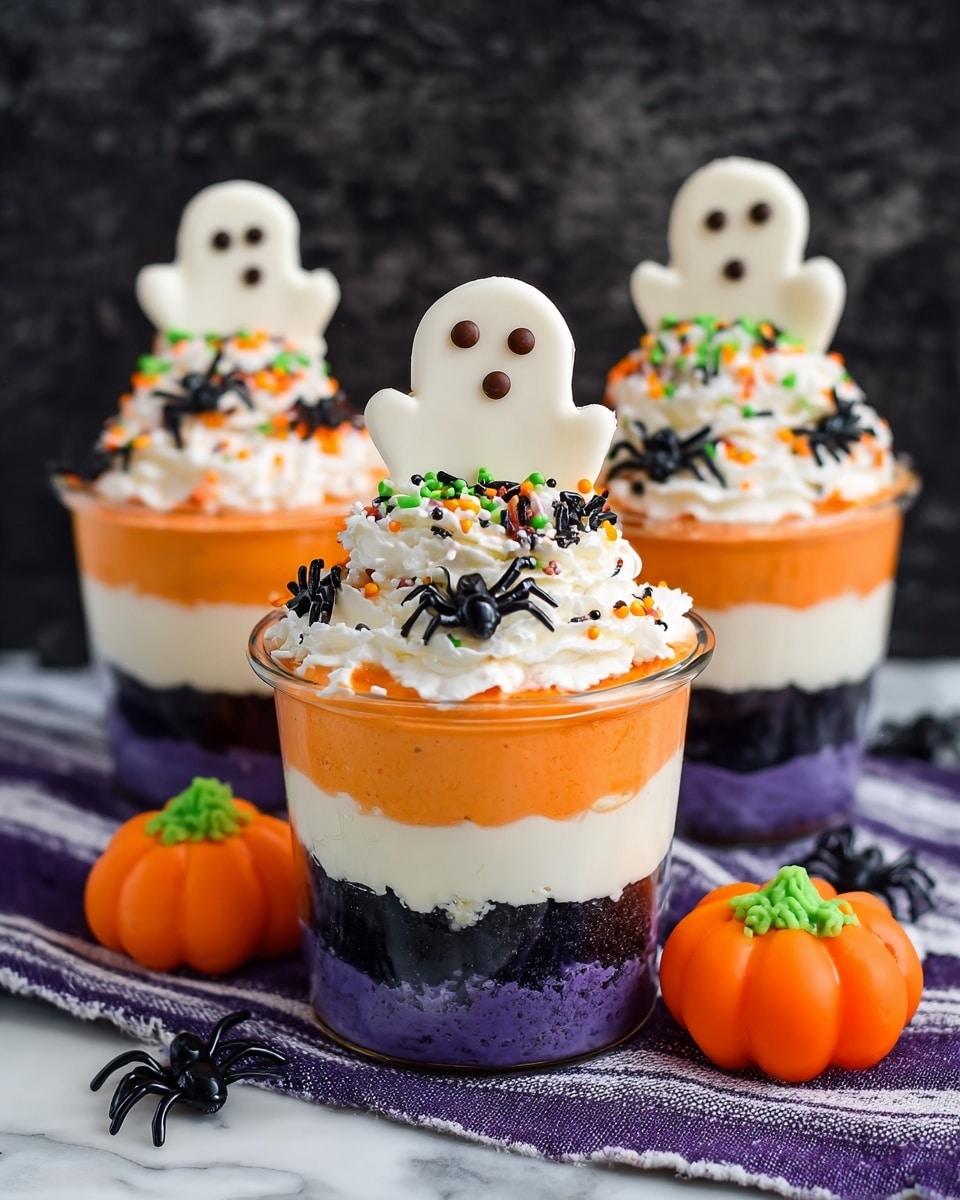
For parties, I like to serve these cheesecake cups in clear mini mason jars or clear plastic cups with Halloween-themed napkins underneath. Sometimes I add a spooky little plastic spider or a mini bat toothpick stuck in the Cool Whip for a surprise scare factor. It makes the whole dessert table extra memorable and fun.
Make Ahead and Storage
Storing Leftovers
I store these cheesecake cups in the fridge covered tightly with plastic wrap or in an airtight container. Because they’re no bake, the texture stays wonderfully creamy for up to 3 days, but honestly, they rarely last that long around here!
Freezing
I’ve frozen the no bake cheesecake cups before, and they do well if you skip adding the toppings first. Freeze them uncovered on a tray initially to keep their shape, then store in an airtight container. When ready to serve, thaw overnight in the fridge and add your Halloween decorations fresh to keep things looking perfect.
Reheating
Because this is a no bake cheesecake, reheating isn’t necessary or recommended—you want to enjoy it chilled. Just take it out of the fridge a few minutes before serving so the flavors can shine and the texture softens slightly.
FAQs
-
Can I make these No Bake Halloween Cheesecake Cups Recipe dairy-free?
Yes! Simply swap out the cream cheese for a dairy-free cream cheese alternative and use coconut whipped cream instead of Cool Whip. This keeps the texture creamy and fluffy while making it safe for dairy-free diets.
-
How long do these cheesecake cups need to chill before serving?
While you can eat them right away, chilling for at least 1-2 hours helps the layers firm up a bit and the flavors meld together for the best taste and texture.
-
Can I prepare these in larger cups or a single dish?
Absolutely! You can layer everything in a trifle bowl or larger glasses to make a shared dessert. The layering technique remains the same, just adjust quantities accordingly.
-
What should I do if my cream cheese isn’t soft enough?
To quickly soften cream cheese, microwave it in short 10-second bursts, checking regularly to avoid melting. Alternatively, leave it out at room temperature for about 30 minutes before baking.
Final Thoughts
I have to say, this No Bake Halloween Cheesecake Cups Recipe has become my go-to for Halloween parties because it’s easy, looks adorable, and tastes like a little slice of heaven in every spoonful. If you try it, I bet you’ll keep making it year after year. It’s a guaranteed crowd-pleaser that’s as fun to make as it is to eat, and I can’t wait to hear what Halloween twist you’ll add to make it uniquely yours!
Print
No Bake Halloween Cheesecake Cups Recipe
- Prep Time: 15 minutes
- Cook Time: 0 minutes
- Total Time: 15 minutes
- Yield: 7 parfaits
- Category: Dessert
- Method: No-Cook
- Cuisine: American
Description
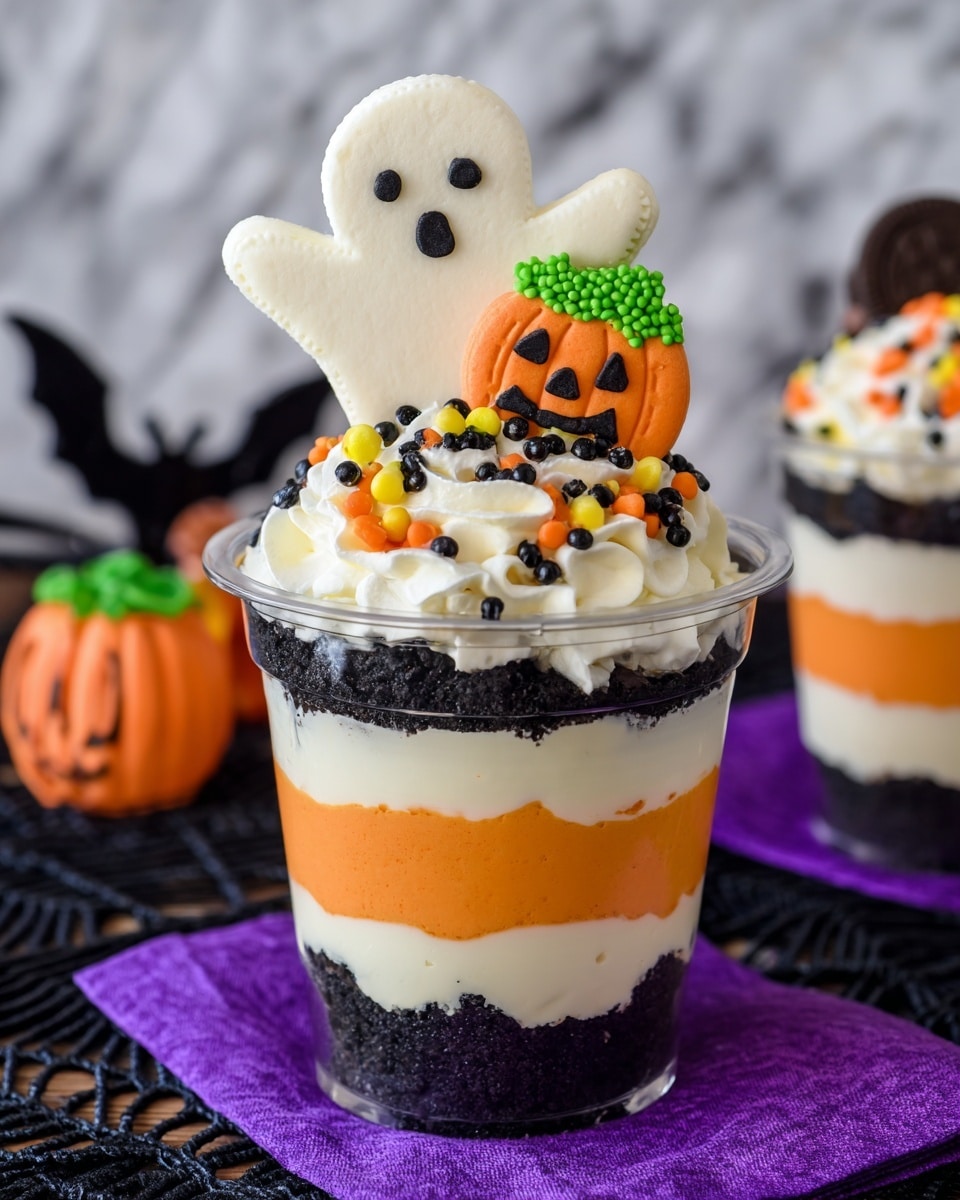
These No Bake Halloween Cheesecake Cups are a festive and delicious treat perfect for fall celebrations. Layers of Oreo cookie crumbs, creamy cheesecake filling tinted with orange gel coloring, and topped with whipped cream and spooky Halloween decorations make these parfaits a fun and easy dessert to enjoy without turning on the oven.
Ingredients
Crust
- 14 Oreo cookies
Cheesecake Filling
- 2 – 8 ounce packages cream cheese, softened
- ½ cup powdered sugar
- 2 teaspoons vanilla extract
- 1 – 8 ounce container Cool Whip, thawed and divided
- Orange gel coloring
Toppings
- Ghost Peeps
- Halloween sprinkles
- Candy pumpkins
Instructions
- Prepare Crust: Crush 7 Oreo cookies into fine crumbs and evenly divide the crumbs into 7 – 5 ounce cups, creating the base layer for each parfait.
- Make Cheesecake Filling: Beat the softened cream cheese, powdered sugar, and vanilla extract until creamy and smooth. Gently fold in 2 cups of the thawed Cool Whip to create a light and fluffy cheesecake filling.
- Divide and Tint Filling: Evenly divide the cheesecake filling into two bowls. Add orange gel coloring to one bowl and mix until the color is bright and uniform.
- Add White Filling: Spoon or pipe the white cheesecake filling evenly over the Oreo crust layer in each cup.
- Add Second Crust Layer: Crush the remaining 7 Oreo cookies and evenly distribute the crumbs over the white cheesecake layer in each cup.
- Add Orange Filling: Spoon or pipe the orange cheesecake filling evenly on top of the second layer of crumbs in each cup.
- Top with Whipped Cream: Using a piping bag fitted with tip 1M, swirl the remaining Cool Whip on top of the parfaits to create a decorative whipped cream topping.
- Decorate: Add ghost Peeps, Halloween sprinkles, and candy pumpkins on top just before serving for a festive finish.
Notes
- Use room temperature ingredients, especially cream cheese, to achieve a smooth and creamy filling.
- For finer cookie crumbs, pulse Oreos in a food processor without removing the frosting.
- Try different crust flavors such as graham cracker crumbs or Biscoff cookies instead of Oreos for variation.
- Experiment with coloring by tinting the cheesecake filling green or other colors to match your theme.
- Use a piping bag or a ziplock bag with a corner cut off to neatly fill the cups with cheesecake filling for a cleaner presentation.
- Add toppings right before serving or at your destination if transporting, to keep them looking fresh.
Nutrition
- Serving Size: 1 parfait
- Calories: 350 kcal
- Sugar: 30 g
- Sodium: 210 mg
- Fat: 22 g
- Saturated Fat: 12 g
- Unsaturated Fat: 8 g
- Trans Fat: 0 g
- Carbohydrates: 30 g
- Fiber: 1 g
- Protein: 5 g
- Cholesterol: 45 mg


