
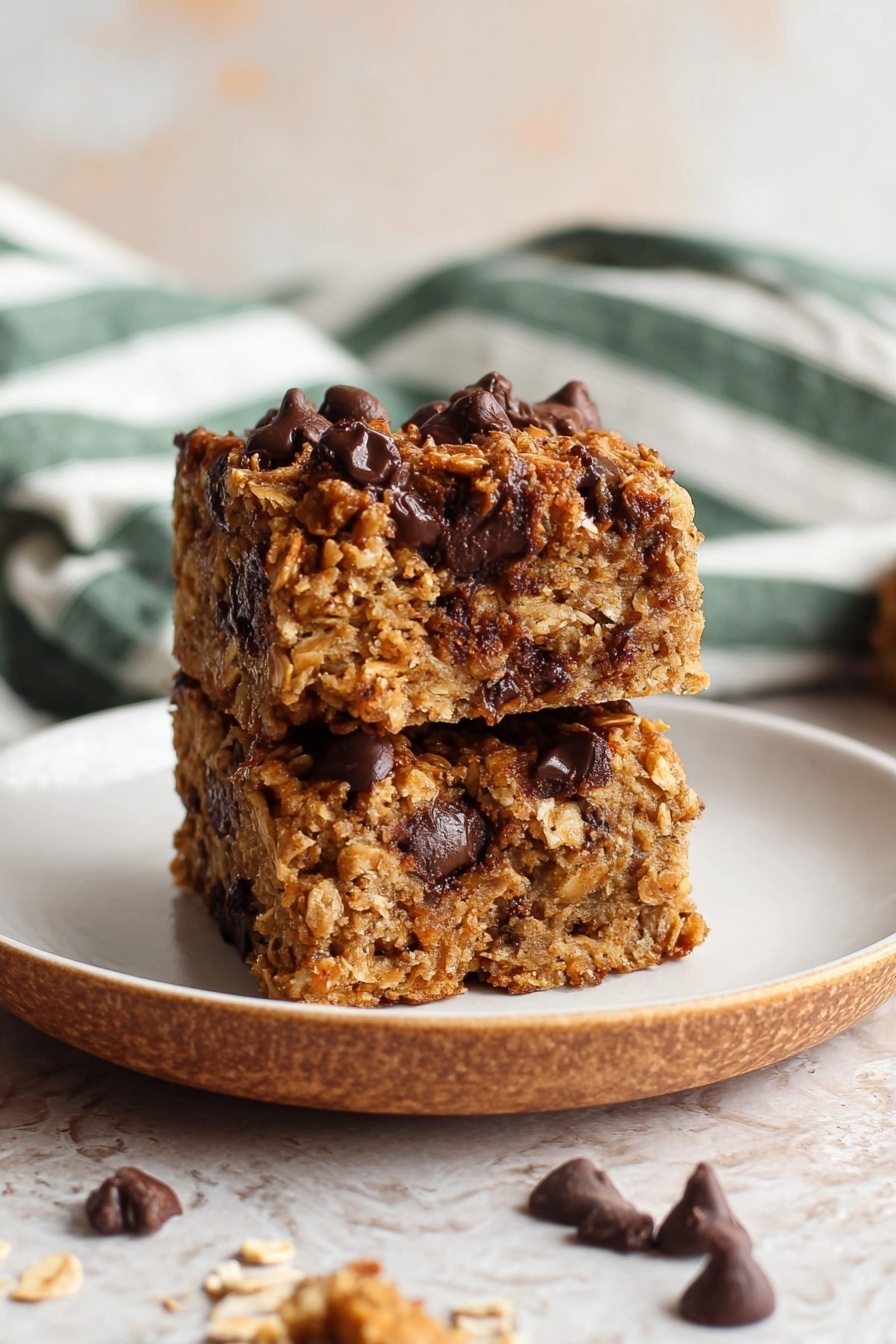
Peanut Butter Banana Bars Recipe
If you’re craving a snack that’s both wholesome and downright delicious, then you’re going to love this Peanut Butter Banana Bars Recipe. It’s ridiculously easy with just a handful of ingredients, but the flavor combo of ripe bananas and peanut butter, plus a touch of chocolate, will honestly blow your mind. Perfect for breakfast on-the-go, an afternoon pick-me-up, or even a guilt-free dessert—stick around, and I’ll walk you through every step to nail these bars perfectly!
Why This Recipe Works
- Simple & Quick: Just a few pantry staples come together in under 40 minutes—no fancy equipment needed.
- Naturally Sweetened: Ripe bananas provide the perfect natural sweetness, cutting down on added sugars.
- Balanced Texture: The oats add chewiness while peanut butter keeps the bars moist and rich.
- Customizable: You can easily swap or add mix-ins to fit your taste or dietary needs.

Ingredients & Why They Work
Each ingredient in this Peanut Butter Banana Bars Recipe plays a crucial role, from texture to flavor. Using ripe bananas is key to natural sweetness and moisture, and the oats create a hearty bite. Choosing smooth natural peanut butter gives the bars that classic creamy nutty base without too much added sugar or oil.
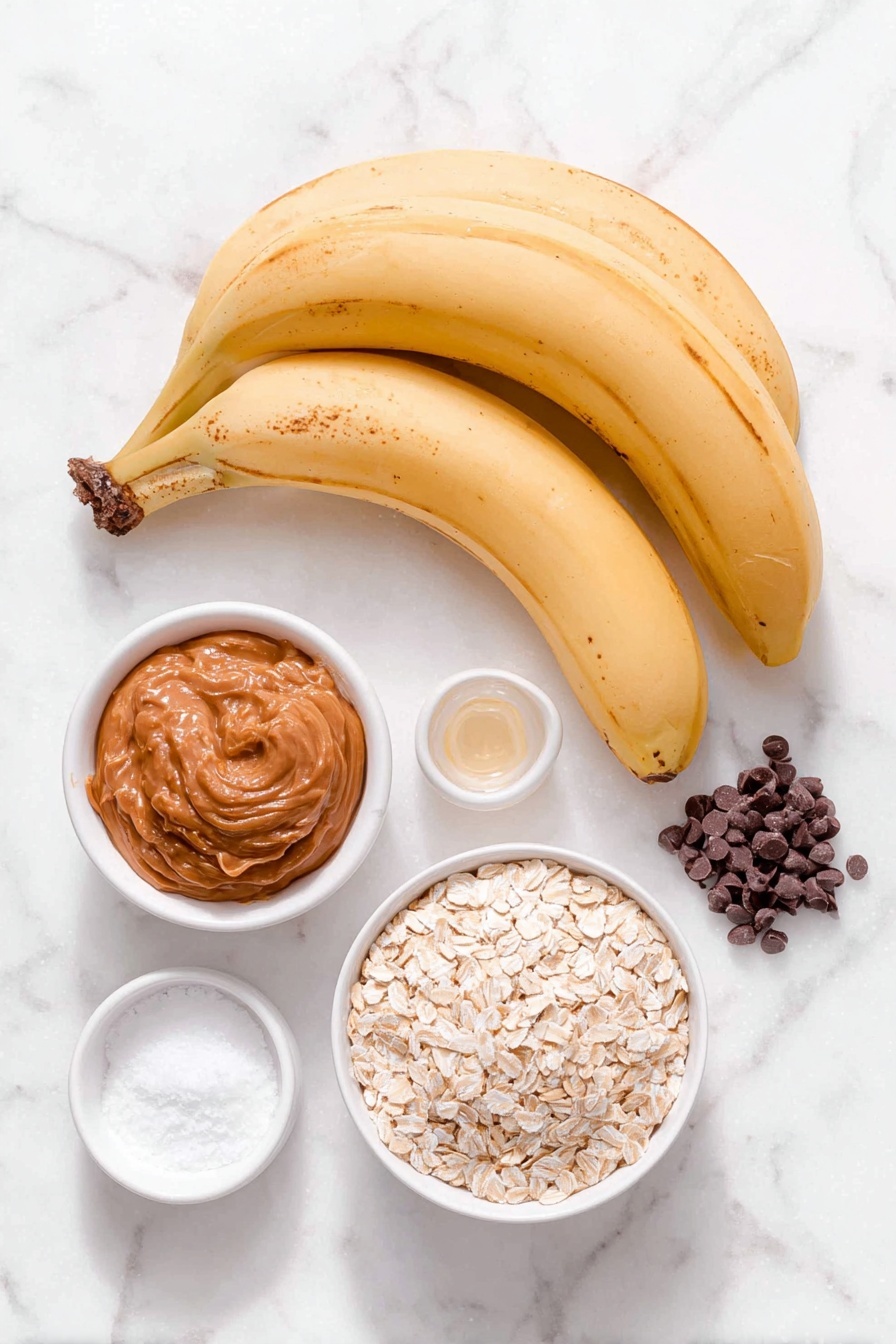
- Very Ripe Bananas: The riper, the better! They bring sweetness and keep the bars moist so you don’t need extra sugar.
- Smooth Natural Peanut Butter: Adds rich flavor and helps bind everything together for chewiness without heaviness.
- Vanilla Extract: A simple flavor booster that makes everything taste homemade and comforting.
- Instant or Quick Cooking Oats: These break down slightly during baking for soft bars that still have texture.
- Salt: Enhances all the flavors, especially the sweetness of bananas and richness of peanut butter.
- Baking Powder: Helps give just a tad of lift so bars aren’t dense.
- Chocolate Chips: Because adding chocolate to peanut butter and bananas is always a good idea—plus it adds a melty, indulgent touch.
Tweak to Your Taste
One of the things I love most about this Peanut Butter Banana Bars Recipe is how easy it is to personalize. Whether you want to make it gluten-free, vegan, or add a little crunch, these bars are a fantastic base for creativity. Don’t be shy—trust me, experimenting here pays off!
- Add-ins: I sometimes throw in chopped walnuts or shredded coconut for a textural surprise that’s heaven in every bite.
- Dairy-Free Version: Use dairy-free chocolate chips to make this recipe vegan and allergy-friendly.
- Spices: A sprinkle of cinnamon or nutmeg amps up the warmth and makes these bars feel like a cozy treat.
- Swap Oats: Gluten-free rolled oats work great if you’re avoiding gluten.
Step-by-Step: How I Make Peanut Butter Banana Bars Recipe
Step 1: Prep Your Pan and Mash Bananas
Start by preheating your oven to 350°F (175°C). I like to grease my loaf pan lightly or line it with parchment paper—it makes getting the bars out a breeze. Then, grab those super ripe bananas and mash them up in a big bowl until smooth with just a few small lumps. Overripe bananas are perfect here—they’re sweet and super soft, which gives that moist texture we want.
Step 2: Mix in Peanut Butter and Vanilla
Once mashed, stir in the natural peanut butter and vanilla extract. I always use natural peanut butter without added sugar or oils—it keeps the flavor pure and avoids greasiness. Mix until everything is well combined.
Step 3: Combine Dry Ingredients and Fold in Chocolate Chips
Next, add your oats, salt, and baking powder to the bowl. Stir everything together gently until just mixed—don’t over-stir or you might end up with tough bars. Then fold in about one-third of the chocolate chips so they’re nicely distributed throughout the batter.
Step 4: Bake and Cool
Pour the mixture into your prepared pan and smooth the top with a spatula or the back of a spoon. Scatter the remaining chocolate chips on top to give that pretty, melty finish. Bake for 25-30 minutes, or until a knife inserted in the center comes out mostly clean (a few crumbs are okay!). Once done, let the bars cool completely in the pan before slicing them into 6 to 8 pieces.
Pro Tips for Making Peanut Butter Banana Bars Recipe
- Choose Overripe Bananas: The sweeter and softer your bananas, the better texture and flavor your bars will have—don’t even think about pale yellow ones here!
- Don’t Overmix: Stir the dry ingredients in gently to keep the bars tender instead of dense or tough.
- Watch Your Oven: Depending on your oven, baking time can vary—start checking around 25 minutes to avoid drying out your bars.
- Let Them Cool Completely: Bars hold together much better and slice cleaner when fully cooled, so be patient even if you’re eager to eat!
How to Serve Peanut Butter Banana Bars Recipe
Garnishes
I love dusting these bars lightly with a bit of powdered sugar or even a drizzle of melted peanut butter or honey to add that little touch of fancy. For a fresh twist, a sprinkle of chopped peanuts or toasted coconut flakes on top makes them look gorgeous and adds extra crunch.
Side Dishes
Serve your bars alongside a cup of black coffee or a creamy latte for a perfect morning boost. They also pair beautifully with a dollop of Greek yogurt or a side of fresh berries if you’re having them as a post-workout snack or light dessert.
Creative Ways to Present
For parties or picnic treats, try cutting these into bite-sized squares and stacking them on a pretty platter lined with banana leaves or parchment paper. You can even drizzle some melted chocolate over the top or add a sprinkle of sea salt to make them look extra special—you’ll wow your guests without much effort!
Make Ahead and Storage
Storing Leftovers
These bars keep wonderfully in an airtight container at room temperature for about 2 days, but I find storing them in the fridge helps them last up to a week without losing their delightful texture and flavor.
Freezing
I often freeze leftover bars by wrapping each piece individually in plastic wrap and popping them into a sealed freezer bag. They freeze really well for up to 3 months, making them a fantastic make-ahead snack when you’re in a hurry.
Reheating
To reheat, I just pop a bar in the microwave for 20-30 seconds—you want it warm but not hot, so the peanut butter stays creamy and the chocolate melts nicely. You can also enjoy them cold straight from the fridge or freezer for a refreshing, fudgy bite.
FAQs
-
Can I use crunchy peanut butter instead of smooth?
Absolutely! Crunchy peanut butter will give your bars a bit of extra texture and nutty bites throughout. Just keep in mind that it might make the batter a little thicker, but the baked bars taste deliciously nutty.
-
Are these bars gluten-free?
The original recipe uses instant or quick oats, which can sometimes contain gluten. If you need a gluten-free version, be sure to pick certified gluten-free oats to make the bars safe for gluten-sensitive diets.
-
Can I substitute the bananas with applesauce?
While applesauce can be used as a substitute in some baking recipes, for this Peanut Butter Banana Bars Recipe, bananas provide not only sweetness but also texture and moisture that applesauce won’t fully replicate. The bars might turn out less flavorful and more crumbly.
-
How do I know when the bars are done baking?
Insert a toothpick or knife into the center of the bars—if it comes out clean or with just a few moist crumbs, the bars are ready. Don’t wait until it’s completely dry, or the bars might become too dry themselves.
Final Thoughts
This Peanut Butter Banana Bars Recipe is one of those rare gems I keep coming back to whenever I want something wholesome, comforting, and ridiculously easy. It’s like a warm hug in bar form—sweet, nutty, and just a little chocolatey. I hope you enjoy making and eating these as much as I do. Grab those ripe bananas and get baking—you absolutely deserve this tasty treat!
Print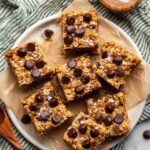
Peanut Butter Banana Bars Recipe
- Prep Time: 5 minutes
- Cook Time: 30 minutes
- Total Time: 35 minutes
- Yield: 8 servings
- Category: Snack
- Method: Baking
- Cuisine: American
- Diet: Vegetarian
Description
Delicious and easy 4 Ingredient Peanut Butter Banana Bars made with ripe bananas, natural peanut butter, oats, and chocolate chips. These bars are perfect for a quick snack or a healthy dessert option, combining natural sweetness and wholesome ingredients into a moist, chewy treat.
Ingredients
Wet Ingredients
- 3 very ripe bananas
- 1/4 cup smooth natural peanut butter
- 1 teaspoon vanilla extract
Dry Ingredients
- 1 1/4 cup instant or quick cooking oats
- 1/4 teaspoon salt
- 1/2 teaspoon baking powder
Add-ins
- 1/2 cup chocolate chips
Instructions
- Preheat and Prepare Pan: Preheat the oven to 350 F. Grease a loaf pan or line it with parchment paper to prevent sticking.
- Mash Bananas and Mix Wet Ingredients: In a large bowl, mash the ripe bananas until almost smooth. Add the peanut butter and vanilla extract, then mix well to combine.
- Add Dry Ingredients: Stir in the oats, salt, and baking powder until everything is evenly mixed.
- Fold in Chocolate Chips: Gently fold in one-third of the chocolate chips, reserving the remainder for topping.
- Pour Batter into Pan: Transfer the mixture to the prepared loaf pan, smoothing the top with a spoon or spatula.
- Add Topping: Sprinkle the remaining chocolate chips evenly over the top of the batter.
- Bake: Place the loaf pan in the oven and bake for 30 minutes, or until a knife inserted into the center comes out clean.
- Cool and Serve: Allow the bars to cool completely in the pan, then cut into 6 to 8 pieces and serve.
Notes
- Make sure to use very ripe bananas for the best natural sweetness and texture.
- For a nuttier flavor, use natural peanut butter without added sugar or oils.
- You can substitute chocolate chips with raisins or chopped nuts if preferred.
- To make the bars gluten-free, use certified gluten-free oats.
- Store bars in an airtight container at room temperature for up to 3 days or refrigerate for up to a week.
Nutrition
- Serving Size: 1 bar
- Calories: 180 kcal
- Sugar: 8 g
- Sodium: 90 mg
- Fat: 7 g
- Saturated Fat: 2 g
- Unsaturated Fat: 5 g
- Trans Fat: 0 g
- Carbohydrates: 25 g
- Fiber: 3 g
- Protein: 5 g
- Cholesterol: 0 mg
