Peanut Butter Spider Cookies Recipe
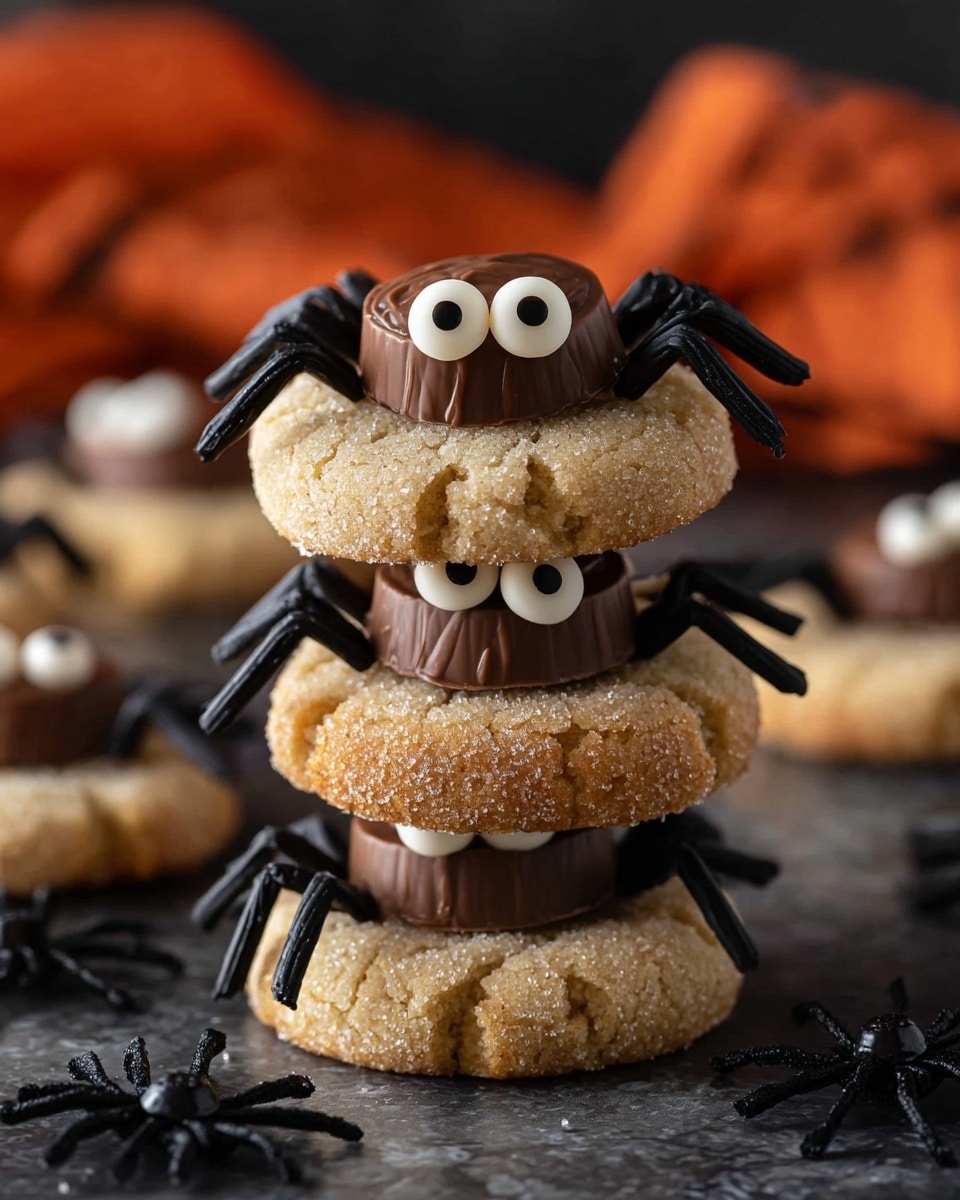
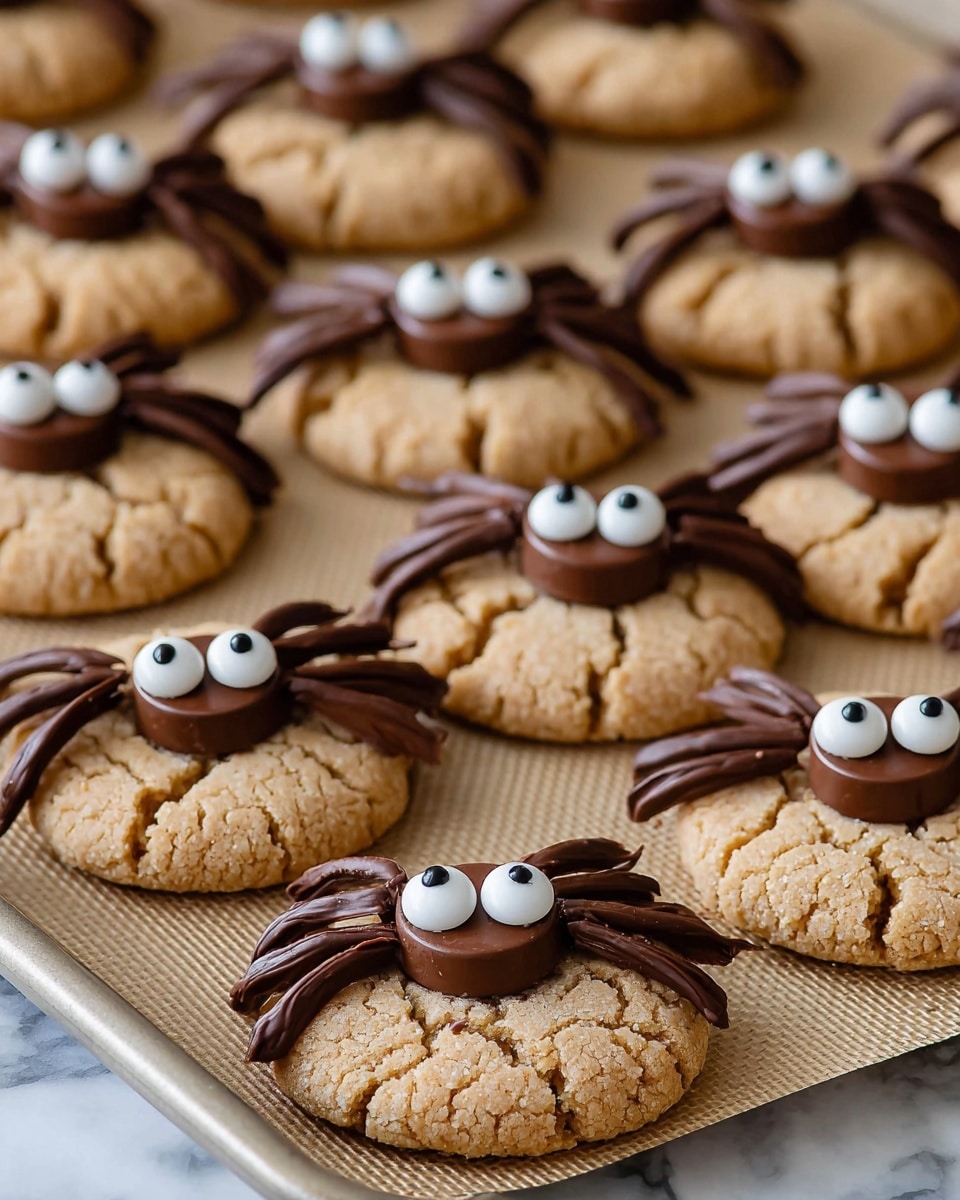
If you’re hunting for a fun and festive treat that brings a smile to every face, you’re going to love this Peanut Butter Spider Cookies Recipe. These aren’t your ordinary peanut butter cookies – they’re cute little spider-shaped delights topped with mini Reese’s Peanut Butter Cups and candy eyes that are perfect for Halloween or any spooky occasion. Trust me, once you try this recipe, you’ll wonder why you ever made plain old peanut butter cookies before!
Why This Recipe Works
- Texture Balance: The combination of creamy peanut butter with fluffy butter-sugar creaming gives the cookies a perfect, tender bite with a slight chew.
- Perfect Spider Look: Freezing the mini Reese’s cups before baking helps them keep their shape instead of melting into a blob—making your spider designs pop!
- Simple yet Eye-Catching: Using melted chocolate as legs and candy eyeballs creates a fun visual treat that’s surprisingly easy to pull off.
- Time-Efficient: With just around 26 minutes total time, including baking, you can whip these up quickly even on a busy afternoon.
Ingredients & Why They Work
Each ingredient in the Peanut Butter Spider Cookies Recipe plays a pivotal role to create that classic peanut butter cookie flavor and keep everything held together beautifully. Choosing the right type of peanut butter and prepping your mini Reese’s cups properly makes a huge difference in both taste and appearance.
- Unsalted butter: Using room temperature butter ensures easy creaming with sugars, creating a tender and fluffy cookie base.
- Brown sugar: Adds moisture and depth with its molasses content, complementing the peanut butter’s richness.
- Granulated sugar: Balances out the brown sugar by adding just the right amount of sweetness and light crispness.
- Creamy peanut butter (not natural): Creamy texture blends better than natural nut butters that separate, and non-natural brands often give a classic, familiar peanut butter cookie flavor.
- Egg: Provides structure and moisture, helping the cookies hold together without being dry.
- Vanilla extract: Enhances overall flavor with a lovely warm note that complements peanut butter beautifully.
- All-purpose flour: The classic flour for cookies, balances tenderness and structure.
- Baking soda and baking powder: Work together to give a nice lift and light texture without making the cookies cakey.
- Salt: Essential to balance the sweetness and bring out the peanut butter’s full flavor.
- Granulated sugar (for rolling): Adds a sparkly coating and a little extra crunch on the outside.
- Mini Reese’s Peanut Butter Cups: These are the ‘spider body’ – freezing them first stops them from melting into your cookie dough.
- Semi-sweet chocolate chips: Melted to create spider legs and attach candy eyes.
- Candy eyeballs: The whimsical finishing touch that really brings the spider effect to life.
Tweak to Your Taste
I love these Peanut Butter Spider Cookies just as they are, but feel free to customize the recipe to fit your mood or pantry. Whether you like things a bit more chocolatey or want to tweak sweetness, there’s a way to make this recipe your own.
- Double Chocolate: Once, I swapped half the flour for cocoa powder and added extra chocolate chips for a spider cookie with rich chocolate punch — totally delicious and fun for chocolate lovers.
- Crunchy Peanut Butter: For a bit of texture, try crunchy peanut butter instead of creamy; your cookies will have little peanut bits for added crunch.
- Nut-Free Variation: Swap peanut butter for sunflower seed butter if you or your guests have allergies — the recipe still works wonderfully.
- Healthier Swaps: I experimented once by reducing granulated sugar slightly and adding a touch of honey, which mellowed the sweetness perfectly.
Step-by-Step: How I Make Peanut Butter Spider Cookies Recipe
Step 1: Chill the Mini Reese’s Cups to Keep Their Shape
Start by unwrapping about 24 mini Reese’s Peanut Butter Cups and pop them in the freezer while you prepare the dough. This simple step was a game-changer for me: it prevents those adorable spider bodies from melting and blending into the cookie, keeping them perfectly round and defined.
Step 2: Cream Butter and Sugars Until Fluffy
In a mixing bowl, beat together the room temperature butter, brown sugar, and granulated sugar for about a minute with an electric mixer. You’re looking for a smooth and fluffy texture—this is where your cookies get their tender crumb from. If your butter is too cold, the mixture won’t fluff up well, so be patient and let it soften properly beforehand.
Step 3: Add Peanut Butter, Egg, and Vanilla
Add the creamy peanut butter, one large egg, and a splash of vanilla extract to your fluffy butter and sugar mixture. Beat again for less than a minute until everything is incorporated. Don’t overmix here; just combine so your cookies stay tender and not tough.
Step 4: Mix in Dry Ingredients
Now, in goes the all-purpose flour, baking soda, baking powder, and salt. Mix on low speed or fold with a spatula just until everything is combined. Be careful not to overwork the dough! Overmixing can make your cookies tough, and you want them soft and chewy for that ideal peanut butter cookie texture.
Step 5: Shape and Sugar-Coat the Cookies
Use a small cookie scoop or a tablespoon to portion out dough balls – I find that about a tablespoon-sized scoop makes perfectly sized cookies. Roll each ball between your hands to smooth out the shape, then roll them in some granulated sugar before placing them onto a silicone-lined baking sheet, about 2 to 3 inches apart. This sugary coating adds a delightful little crunch and sparkle to your cookies.
Step 6: Bake and Add Reese’s Cup
Bake the cookies in a 350ºF preheated oven for 8 to 11 minutes or until the edges start cracking and turn golden. Immediately after taking the cookies out, press a frozen mini Reese’s cup into the center of each cookie. This step needs to be done while the cookie is still warm but not piping hot, or the Reese’s may sink too much—and we want our spiders looking great!
Step 7: Melt Chocolate and Add Legs & Eyes
While cookies cool, melt the semi-sweet chocolate chips gently in the microwave at 50% power, stirring every minute until smooth. Transfer your melted chocolate into a squeeze bottle or a plastic sandwich bag and snip off a tiny corner. Draw four spider legs on each side of the Reese’s cup on your cooled cookies, and use a small dab of melted chocolate to glue candy eyeballs to the top. Let the chocolate set before serving.
Pro Tips for Making Peanut Butter Spider Cookies Recipe
- Room Temperature Butter: Make sure your butter is softened but not melted—it creams better and creates fluffier cookies.
- Freezing Reese’s Cups: This little trick helps maintain the spider’s body shape, so don’t skip this step!
- Watch Baking Time Closely: Pull cookies as soon as edges start cracking to avoid overbaking, keeping them tender inside.
- Use a Piping Bag for Chocolate Legs: It gives you greater control than a spoon and creates neater spider legs.
How to Serve Peanut Butter Spider Cookies Recipe
Garnishes
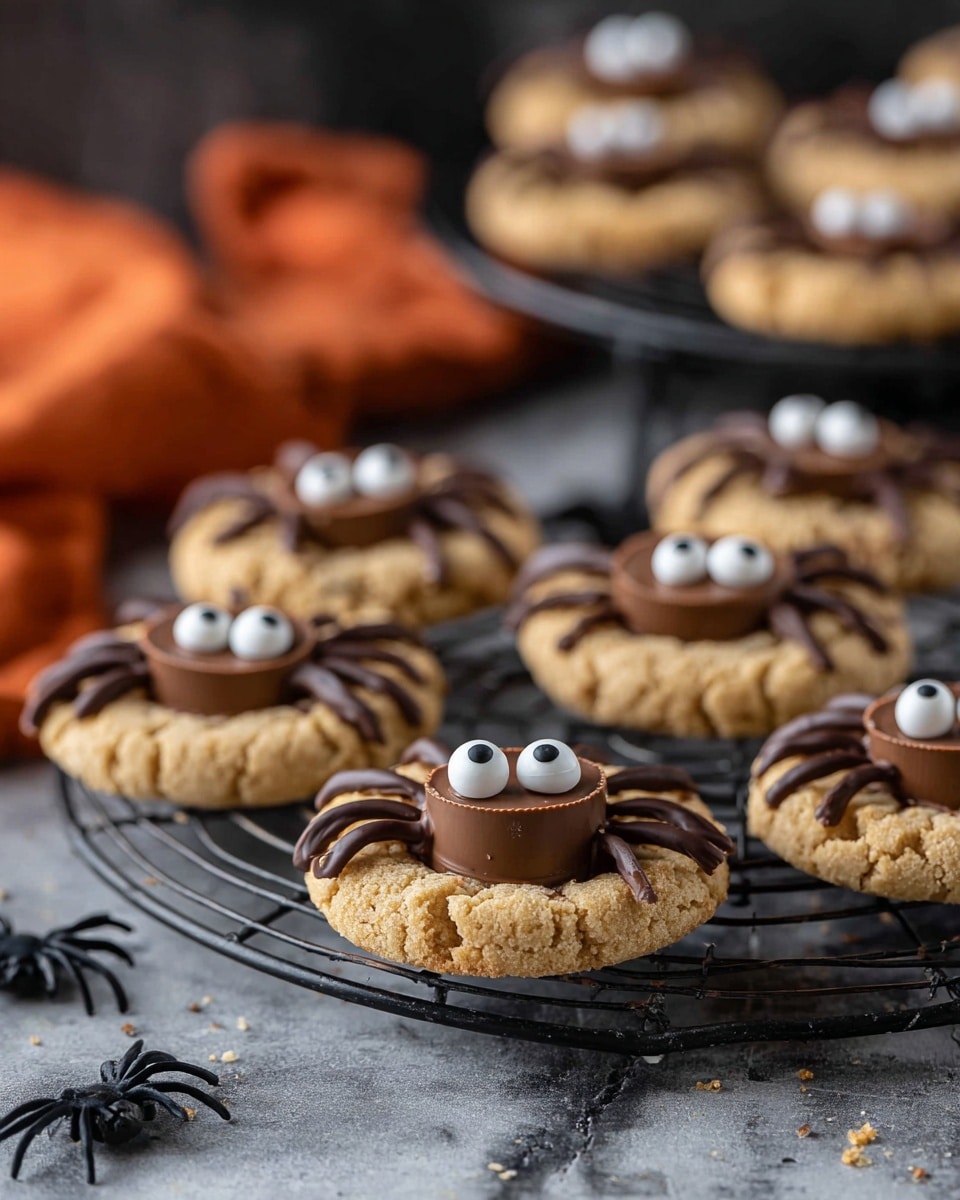
I like to keep the garnishes simple and fun: candy eyeballs are non-negotiable in my house—they bring the whole spider to life and are super easy to attach. Sometimes, I sprinkle a tiny pinch of flaky sea salt on the melted legs before the chocolate sets for a subtle flavor pop that contrasts with the sweet peanut butter. It’s a small detail but totally worth it.
Side Dishes
These cookies are a star on their own, but if you want to build a spooky snack platter, pair them with a bowl of fresh apple slices or some salty popcorn to balance the sweetness. For a festive vibe, I also love serving them alongside a warm cup of milk or spiced hot chocolate.
Creative Ways to Present
For Halloween parties, I’ve arranged these spider cookies crawling out of cupcake “webs” made from white frosting and thin licorice strands. Another time, I presented them in little spooky boxes with fake spider webs and mini pumpkins for an adorable treat bags. Decorating the tray with autumn leaves or setting them on a black platter really amps up the effect!
Make Ahead and Storage
Storing Leftovers
I usually store leftover Peanut Butter Spider Cookies in an airtight container at room temperature. They keep nicely for about 3 to 4 days. Just make sure they’re completely cool before sealing them up to avoid moisture buildup and soggy cookies.
Freezing
If I need to stash some for later, I freeze the unbaked dough balls covered tightly in plastic wrap and then in a freezer bag. When I’m ready to bake, I let them thaw in the fridge overnight. You can also freeze baked cookies layered between parchment paper for up to 2 months—it’s so handy for prepping ahead of a big event.
Reheating
To refresh frozen or leftover cookies, I pop them in a 300°F oven for 5 minutes—this warms them through without drying them out, and the peanut butter flavor really shines. Avoid microwaving as it can make the cookie edges chewy and the chocolate melt messily.
FAQs
-
Can I use natural peanut butter in this Peanut Butter Spider Cookies Recipe?
Natural peanut butter has a thinner consistency and tends to separate, which can affect the dough’s texture and baking results. For best outcomes, I recommend using creamy, non-natural peanut butter to maintain the right structure and classic flavor.
-
Why do I need to roll the cookie dough balls in granulated sugar?
Rolling the dough in granulated sugar before baking adds a delightful sparkling crunch to the cookie’s exterior, making their texture more interesting and visually appealing.
-
How do I prevent the mini Reese’s cups from melting into the cookie?
Freezing the mini Reese’s cups before pressing them into the warm cookies helps them hold their shape and prevents them from melting diffusing into the dough. It’s a simple step that gives the spider cookies their iconic look.
-
Can I make these cookies gluten-free?
Yes! Substitute the all-purpose flour with a 1:1 gluten-free baking flour blend. Make sure your baking powder and other add-ins are also gluten-free to keep the recipe safe for allergies.
-
What’s the best way to draw the spider legs?
Melt the semi-sweet chocolate and use a squeeze bottle or a plastic bag with a tiny tip cut off for precision. This allows you to draw thin, straight legs quickly without a mess.
Final Thoughts
This Peanut Butter Spider Cookies Recipe is one of my all-time favorite ways to create something playful and delicious with a peanut butter twist. I love how easy it is, how charming they look, and the fact that they’re just downright tasty. So next time you want a cookie that’s both fun and fabulous, grab your mixing bowl and give this recipe a try—you won’t regret it. I promise your friends and family will ask you to make these again and again!
Print
Peanut Butter Spider Cookies Recipe
- Prep Time: 15 minutes
- Cook Time: 11 minutes
- Total Time: 26 minutes
- Yield: 24 cookies
- Category: Dessert
- Method: Baking
- Cuisine: American
Description
Peanut Butter Spider Cookies are a fun and festive treat perfect for Halloween or any playful occasion. Creamy peanut butter cookie dough is rolled in sugar, baked until crackly and golden, then topped with a mini Reese’s Peanut Butter Cup to create the spider body. Melted chocolate is piped on to form spider legs, and candy eyeballs complete the spooky look. These cookies are easy to make and delightful for kids and adults alike.
Ingredients
Cookie Dough
- ½ cup (113g) unsalted butter, room temperature
- ½ cup (107g) brown sugar
- ⅓ cup (66g) granulated sugar
- ¾ cup (201g) creamy peanut butter, not natural
- 1 large egg
- 1 tsp vanilla extract
- 1 ½ cups (180g) all purpose flour
- 1 tsp baking soda
- ½ tsp baking powder
- ½ tsp salt
- Granulated sugar, for rolling the cookies
Toppings and Decoration
- Mini Reese’s Peanut Butter Cups (about 24)
- ½ cup (85g) semi-sweet chocolate chips, for melting
- Candy eye balls
Instructions
- Prepare Reese’s Cups: Unwrap about 24 mini Reese’s Peanut Butter Cups and place them in a bowl. Put the bowl in the freezer to firm up the candies so they maintain their shape when added to the hot cookies later.
- Preheat Oven: Preheat your oven to 350ºF (177ºC) and line a baking sheet with a silicone mat or parchment paper.
- Mix Butter and Sugars: In a mixing bowl, combine the room temperature unsalted butter, brown sugar, and granulated sugar. Beat using an electric mixer for 1 minute until the mixture is smooth and fluffy.
- Add Wet Ingredients: Add the creamy peanut butter, large egg, and vanilla extract to the sugar mixture. Beat again for less than 1 minute until well incorporated.
- Add Dry Ingredients: Stir in the all-purpose flour, baking soda, baking powder, and salt. Mix on low speed or fold in with a spatula just until combined. Avoid over mixing to keep the cookies tender.
- Form and Sugar Roll Cookies: Use a small cookie scoop or tablespoon to portion out tablespoon-sized balls of dough. Roll each ball between your hands to create a smooth sphere, then roll it in granulated sugar to coat evenly.
- Bake Cookies: Place the sugared dough balls 2-3 inches apart on the prepared baking sheet. Bake in the preheated oven for 11 minutes or until the cookie edges crack and turn golden brown.
- Add Reese’s Cups: Remove cookies from the oven and immediately press a frozen mini Reese’s Peanut Butter Cup into the center of each cookie gently. This forms the spider’s body.
- Cool Cookies: Allow the cookies to cool on the baking sheet for 15-20 minutes before transferring them to a wire rack. This prevents the Reese’s cups from sinking and losing shape.
- Melt Chocolate: Place the semi-sweet chocolate chips in a microwave-safe bowl. Microwave on 50% power for 3 minutes, stirring every minute until fully melted and smooth.
- Create Spider Legs: Transfer the melted chocolate to a squeeze bottle or a plastic sandwich bag with a small corner cut off. Pipe four legs on each side of the Reese’s cups on every cookie to resemble spider legs.
- Attach Eyes: Using a small dab of melted chocolate, attach candy eyeballs to the Reese’s cups. Let the chocolate set completely so the eyes stay in place.
- Serve and Enjoy: Once the chocolate has hardened, arrange your peanut butter spider cookies on a serving platter and enjoy your spooky, delicious treat!
Notes
- Freezing the mini Reese’s cups before use helps them keep their shape when pressed into warm cookies.
- Use creamy peanut butter rather than natural for better texture and flavor in the cookies.
- Don’t over mix the dough after adding flour to avoid tough cookies.
- Cookies can be stored in an airtight container for up to 3 days at room temperature.
- For a dairy-free version, substitute butter with a plant-based alternative and check for vegan chocolate chips and candy eyes.
Nutrition
- Serving Size: 1 cookie
- Calories: 180 kcal
- Sugar: 15 g
- Sodium: 120 mg
- Fat: 11 g
- Saturated Fat: 3 g
- Unsaturated Fat: 7 g
- Trans Fat: 0 g
- Carbohydrates: 18 g
- Fiber: 1 g
- Protein: 4 g
- Cholesterol: 25 mg

