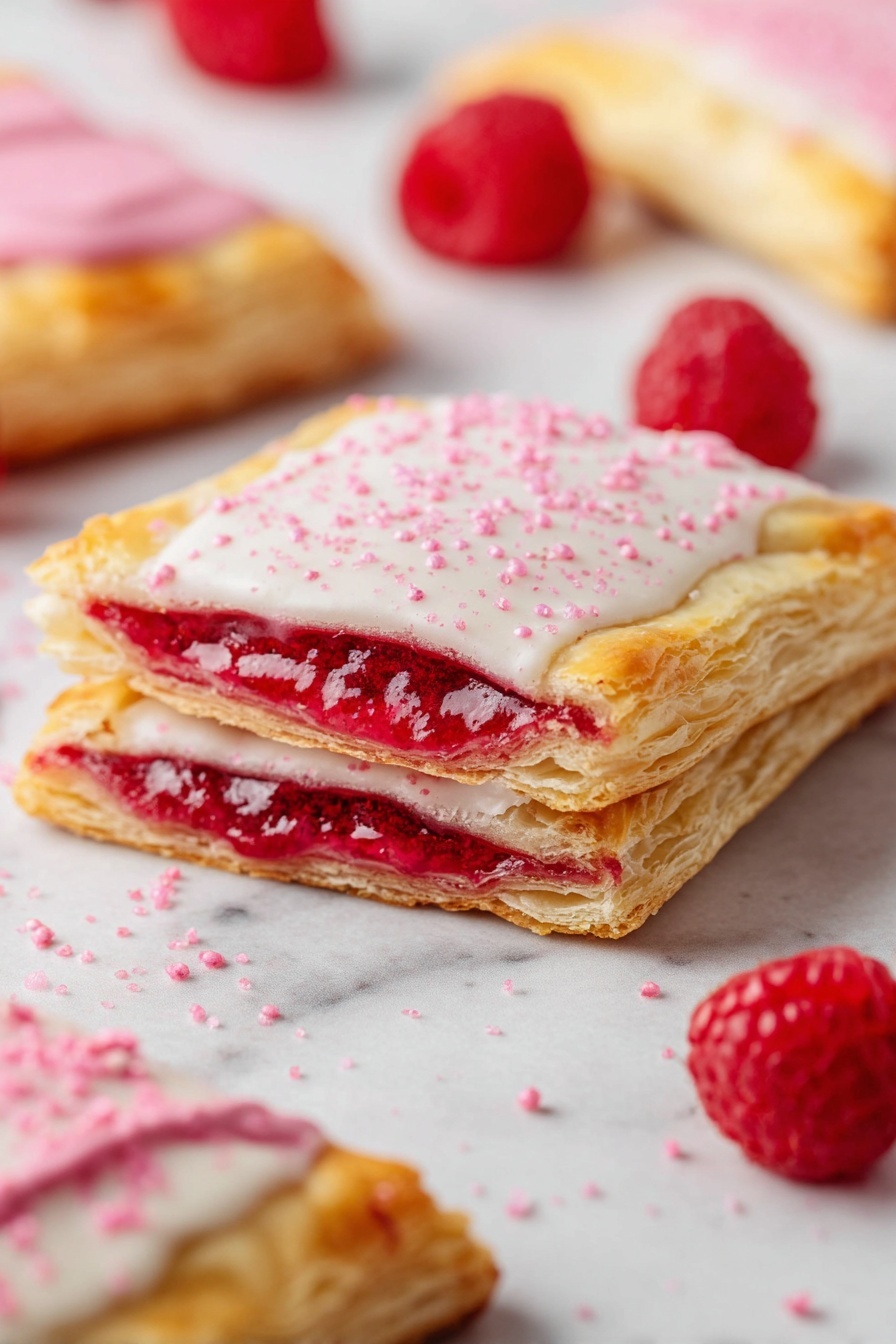
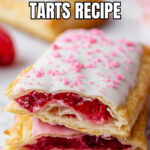
Raspberry Pop Tarts with Vanilla Icing Recipe
If you’ve ever wished you could capture that nostalgic breakfast treat with a homemade twist, I’m about to make your day. This Raspberry Pop Tarts with Vanilla Icing Recipe is my absolute go-to when I want something sweet, flaky, and bursting with fresh fruit flavor. Trust me, once you try these, you might never buy boxed pop tarts again — they’re just that fan-freaking-tastic!
Why This Recipe Works
- Flaky, buttery crust: Using refrigerated pie crust saves time while giving you that perfect tender texture every time.
- Homemade raspberry filling: Fresh or frozen raspberries cooked down with just the right amount of sugar and lemon juice to cut sweetness.
- Creamy vanilla icing: A simple powdered sugar glaze with real vanilla extract that’s thick enough to drizzle but not overwhelm.
- Easy assembly: Step-by-step instructions make these approachable even if you’re not a pro baker.

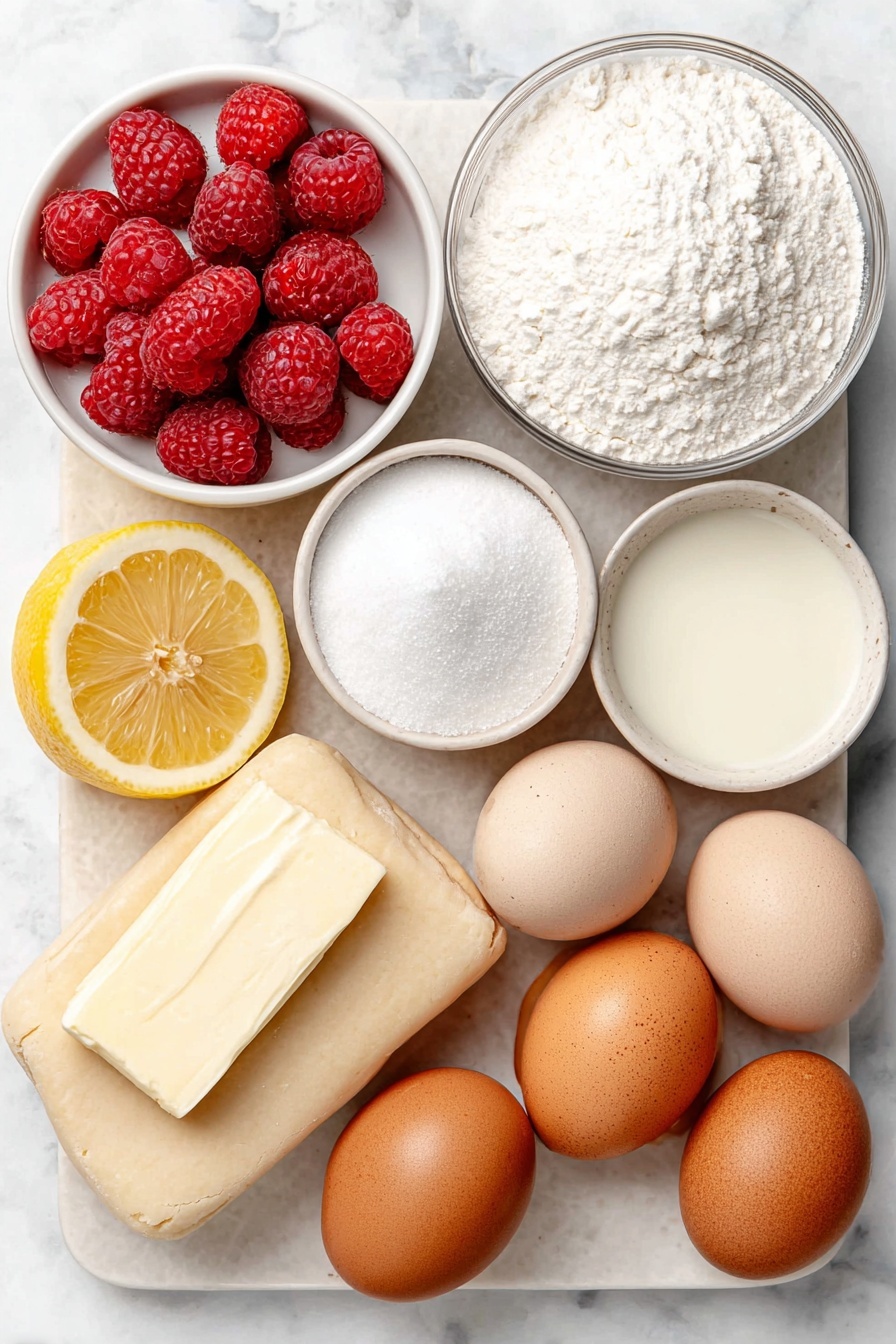
Ingredients & Why They Work
This recipe leans on a balance of simplicity and quality ingredients that really shine together. The refrigerated pie crust provides a shortcut for flaky pastry, while the fresh raspberry filling brings brightness and texture. Also, that vanilla icing isn’t just decoration—it adds a sweet layer that complements the tangy filling beautifully.
- Refrigerated pie crust: Ideal for hassle-free flakiness without rolling out dough from scratch, plus it browns beautifully.
- Raspberries: Fresh or frozen both work—just thaw them completely if frozen to avoid excess water in the filling.
- Sugar: Balances raspberry tartness perfectly; I like to keep it moderate so the fruit flavor shines.
- Corn starch: Acts as a thickening agent, stopping that filling from turning into a runny mess.
- Lemon juice: Boosts brightness; it’s a small addition but makes a big difference in flavor.
- Egg: Used for the egg wash to create a shiny, golden crust that seals the pop tarts.
- Powdered sugar: For the icing — it dissolves effortlessly and creates that perfect smooth glaze.
- Milk: Used to adjust icing consistency; I usually add it bit by bit so it’s just right for drizzling.
- Vanilla extract: Adds depth and warmth to the icing—don’t skip it!
- Red sprinkles: Optional, but I love how they add a festive, fun pop of color on top.
Tweak to Your Taste
One of my favorite things about this Raspberry Pop Tarts with Vanilla Icing Recipe is how easy it is to make your own. Depending on what you like or have on hand, there’s room to customize and make it totally your own.
- Different fillings: While raspberry is divine, I’ve swapped in blueberry or mixed berry jams before, and they all work beautifully. Try fresh peaches for summer too!
- Gluten-free crust: I’ve experimented with gluten-free refrigerated dough, which works well but can be a bit more fragile—just handle gently.
- Dairy-free icing: Using a plant-based milk like almond or oat milk keeps this recipe friendly for dairy-free friends without sacrificing flavor.
- Less sweet: Feel free to cut back on sugar in the filling if you prefer a more tart breakfast treat.
Step-by-Step: How I Make Raspberry Pop Tarts with Vanilla Icing Recipe
Step 1: Perfect the Raspberry Filling
Start by combining fresh or thawed raspberries, sugar, corn starch, and lemon juice in a medium saucepan. Stir gently over medium heat, and soon you’ll see the mixture bubble and thicken—this means your filling is coming together! Don’t rush it; stirring every now and then keeps it from sticking or burning. Once thick, take it off the heat and pop it into the freezer. Stir it every 10 minutes until cool—this prevents condensation from making your dough soggy later.
Step 2: Shape Your Dough
Roll out your refrigerated pie crust on a lightly floured surface to a nice rectangle shape. Use a pizza cutter and a ruler to trim it into neat 3″x4½” rectangles. You’ll get about 12 total—that’s 6 pop tarts. Keep your dough chill but pliable so it’s easy to work with but seals well.
Step 3: Assemble Your Pop Tarts
Place one rectangle on a baking sheet lined with parchment or a silicone mat. Brush the edges lightly with egg wash, then spoon about 1 to 1 ½ tablespoons of the cooled raspberry filling right in the center. Top it with another rectangle and crimp the edges firmly with a fork to seal everything inside—this is key to prevent leaking. Repeat with the remaining pieces. Pop the tray into the freezer to chill while your oven preheats; this helps the dough keep its shape.
Step 4: Bake to Golden Perfection
Preheat your oven to 400°F (200°C). Just before baking, poke holes in the tops of your pop tarts with a toothpick or knife—this helps steam escape so they don’t burst. Give them a final brush with egg wash and then bake for 15-20 minutes until beautifully golden brown. Watching them closely towards the end ensures they don’t over-brown.
Step 5: Whip Up That Vanilla Icing
While your pop tarts cool, mix powdered sugar, vanilla extract, and 2-3 tablespoons of milk in a small bowl. I start with 2 tablespoons of milk and add more if necessary until the icing is thick but still spreadable. Drizzle it generously over the cooled pastries, then sprinkle with red sprinkles for that pop of fun. Let it harden for a bit so you don’t end up with sticky fingers.
Pro Tips for Making Raspberry Pop Tarts with Vanilla Icing Recipe
- Chill the Filling: Cooling your raspberry filling thoroughly before assembling prevents soggy crusts and keeps the pop tarts crisp.
- Seal It Well: Press the edges firmly with a fork and brush with egg wash to create a beautiful golden seal that won’t leak.
- Icing Consistency: Add milk slowly to avoid making the vanilla icing too runny—too thin and it just slides right off those delicate pastries.
- Bake on Middle Rack: Placing your pan in the oven’s middle rack ensures even heat distribution for perfectly baked pop tarts every time.
How to Serve Raspberry Pop Tarts with Vanilla Icing Recipe
Garnishes
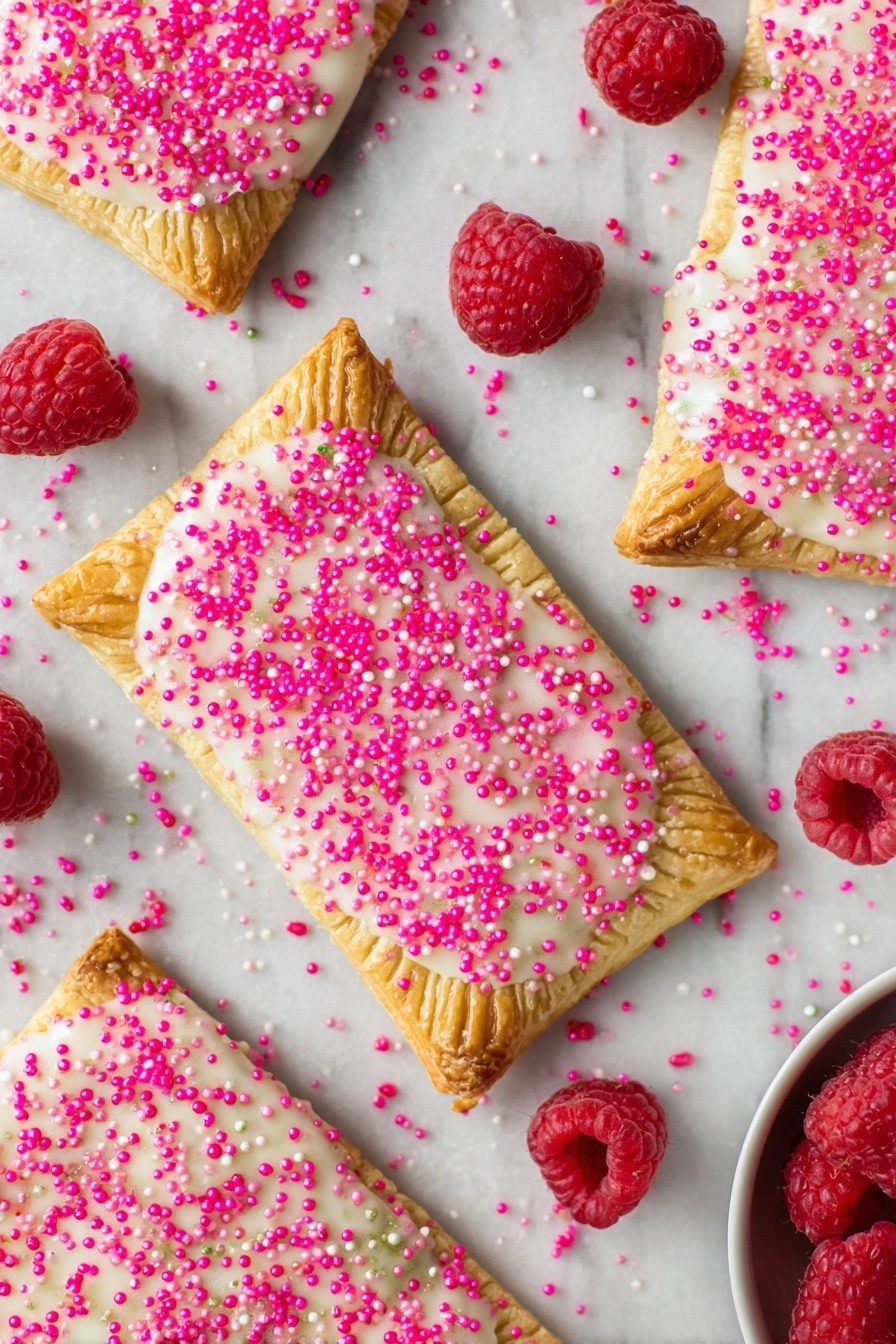
I personally adore topping mine with a sprinkle of natural freeze-dried raspberry powder or some finely chopped fresh mint leaves for a subtle herbal contrast. The red sprinkles are also great if you want a cheerful, festive look—perfect for kids or brunch with friends!
Side Dishes
Pair these pop tarts with a simple bowl of Greek yogurt or fresh fruit salad for a more balanced breakfast. On special weekends, I like to serve them alongside scrambled eggs for a sweet-and-savory spread that’s always a crowd-pleaser.
Creative Ways to Present
I’ve found that arranging these raspberry pop tarts on a tiered dessert tray makes them perfect for brunch gatherings or baby showers. Drizzling a bit more vanilla icing over the edges and adding fresh raspberries around the base always gets compliments. For a fun twist, you can even cut smaller square versions for bite-sized treats at parties!
Make Ahead and Storage
Storing Leftovers
I store any leftover Raspberry Pop Tarts with Vanilla Icing in an airtight container in the fridge, where they last for up to 3 days. I’ve noticed they hold their flavor well but the icing can soften a bit, which I actually don’t mind—a slightly gooey glaze is pretty irresistible!
Freezing
Freezing works like a charm for these pop tarts. I freeze them un-iced on a parchment-lined tray first, then transfer them into a freezer bag. When you’re ready, thaw at room temp and add the vanilla icing fresh for the best texture and taste.
Reheating
I reheat leftovers gently in a toaster oven for about 3-5 minutes to bring back that flaky crust warmth. Be careful with the icing; if it softens too much, just let it set a little at room temperature before digging in.
FAQs
-
Can I use frozen raspberries for this Raspberry Pop Tarts with Vanilla Icing Recipe?
Absolutely! Just make sure you thaw and drain them well before making the filling to avoid excess moisture that can make your pop tarts soggy.
-
Can I make the raspberry filling ahead of time?
Yes, you can prep the filling the night before and keep it refrigerated. Cool it completely before assembling your pop tarts for best results.
-
How do I know when the filling is thick enough?
The filling should bubble and look glossy, thick enough to coat the back of a spoon without running off quickly. If it’s still liquidy, just cook it a few more minutes.
-
Can I make this recipe gluten-free?
Definitely! Using a gluten-free refrigerated pie crust substitute works well, although you may need to handle the dough gently as it can be more fragile.
-
What’s the best way to store leftover pop tarts?
Store them in an airtight container in the fridge for up to three days. You can also freeze them (without icing) for longer storage.
Final Thoughts
This Raspberry Pop Tarts with Vanilla Icing Recipe holds a dear place in my kitchen rituals—it’s quick enough for a weekend treat but special enough to share with family or friends. Baking your own pop tarts is not only satisfying, but the layers of buttery crust, tart raspberry filling, and sweet vanilla glaze come together to make a little bite of morning magic. Give it a try, and I promise you’ll find it hard to stop at just one!
Print
Raspberry Pop Tarts with Vanilla Icing Recipe
- Prep Time: 30 minutes
- Cook Time: 20 minutes
- Total Time: 1 hour
- Yield: 6 pop tarts
- Category: Breakfast
- Method: Baking
- Cuisine: American
- Diet: Vegetarian
Description
Delicious homemade Raspberry Pop Tarts featuring a flaky pie crust filled with sweet-tart raspberry filling, baked to golden perfection, and topped with a smooth vanilla icing and festive red sprinkles.
Ingredients
Pie Crust
- 1 box refrigerated pie crust (2-count)
Raspberry Filling
- 2 cups raspberries, fresh or frozen
- ½ cup sugar
- 2 tablespoons corn starch
- 2 teaspoons lemon juice
Egg Wash
- 1 large egg with a splash of water
Vanilla Icing
- 1 cup powdered sugar
- 2-3 tablespoons milk
- ½ teaspoon vanilla extract
- red sprinkles
Instructions
- Prepare Raspberry Filling: In a medium saucepan over medium heat, combine raspberries, sugar, corn starch, and lemon juice. Stir occasionally with a rubber spatula until the mixture boils and thickens. Remove from heat and transfer to a heat-safe bowl. Place in the freezer and stir every 10 minutes until cooled.
- Roll and Cut Dough: On a lightly floured surface, roll out the pie dough into a rectangle shape. Use a pizza cutter and ruler to cut the dough into twelve 3″x4½” rectangles.
- Assemble Pop Tarts: On a baking sheet lined with silicone mat or parchment paper, place one dough rectangle and lightly brush with egg wash. Add 1 to 1½ tablespoons of cooled raspberry filling in the center. Place another rectangle on top and use a fork to crimp all edges to seal. Repeat for all six pop tarts. Place the baking sheet in the freezer while preheating the oven.
- Preheat Oven and Prepare for Baking: Preheat oven to 400 degrees Fahrenheit. Once heated, poke holes gently on top of dough with a toothpick or knife, and brush lightly with egg wash.
- Bake Pop Tarts: Bake in the oven for 20 minutes or until golden brown on top.
- Make Vanilla Icing: While pop tarts cool, whisk powdered sugar, 2 tablespoons of milk, and vanilla extract in a small bowl until slightly thick but spreadable. Add milk ½ tablespoon at a time as needed to adjust consistency.
- Ice and Garnish: Once pop tarts have cooled, drizzle vanilla icing over the center and top with red sprinkles. Allow icing to harden before serving.
- Storage: Store leftover pop tarts in an airtight container in the refrigerator for up to 3 days.
Notes
- If making your own pie dough, chill it in the refrigerator for at least 40 minutes covered with plastic wrap.
- If using storebought pie crust, follow box instructions on when to bring it to room temperature before rolling.
- Cut dough rectangles precisely to 3″x4½” using a pizza cutter and ruler for even pop tarts.
- The raspberry filling can be made the night before to save preparation time.
- Wait until pop tarts are completely cooled before icing to ensure the frosting sets properly.
Nutrition
- Serving Size: 1 pop tart
- Calories: 280 kcal
- Sugar: 20 g
- Sodium: 230 mg
- Fat: 14 g
- Saturated Fat: 5 g
- Unsaturated Fat: 7 g
- Trans Fat: 0 g
- Carbohydrates: 33 g
- Fiber: 2 g
- Protein: 3 g
- Cholesterol: 40 mg