
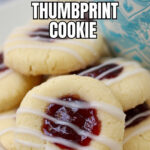
Raspberry Thumbprint Cookies Recipe
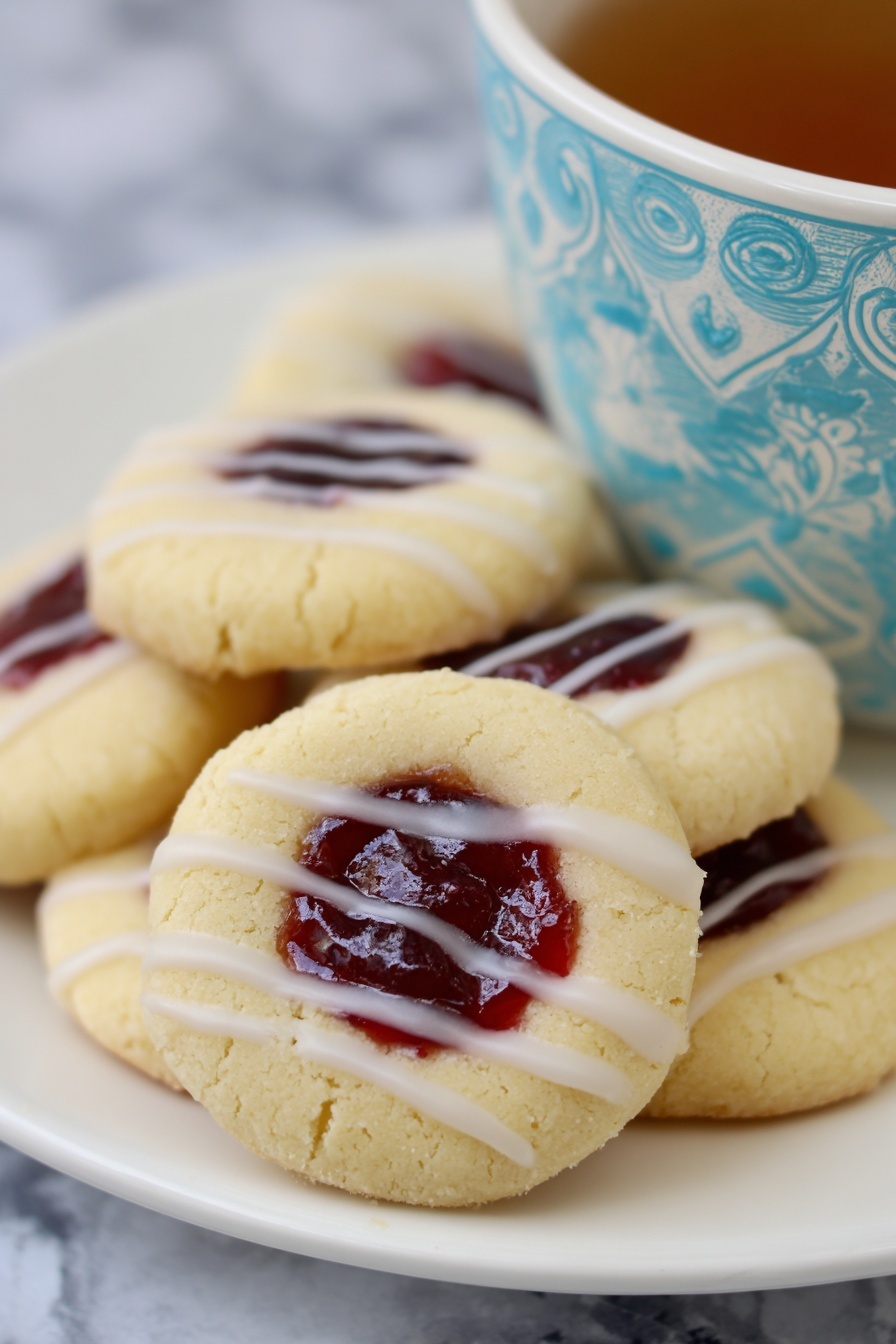
If you’re a fan of little bites that pack a flavorful punch, you’re going to adore this Raspberry Thumbprint Cookies Recipe. These cookies are not only fun to make but also absolutely scrumptious — buttery, with a touch of crunch, counters a sweet and tangy raspberry jam center, all finished with a lovely glaze that looks as good as it tastes. Trust me, once you try these, they’ll quickly become your go-to cookie for any occasion!
Why This Recipe Works
- Perfect Texture: The balance of buttery dough with a slightly crunchy edge makes for an unforgettable cookie bite.
- Easy Assembly: Simple steps and common ingredients mean you can whip these up without fuss but with fantastic results.
- Jam Magic: Melting the raspberry jam before adding it creates a beautiful, glossy center that stays moist and flavorful.
- Glaze Finish: The sweet vanilla glaze ties all the flavors together and adds a touch of elegance to your cookies.

Ingredients & Why They Work
The ingredients in this Raspberry Thumbprint Cookies Recipe come together to create a simple yet irresistible treat. I love how the butter and sugar create that tender crumb, while just the right touch of baking powder lightens the dough. And of course, a good quality raspberry jam is essential — it really makes the cookie shine!

- Butter: Using softened butter helps cream it smoothly with sugar, yielding that melt-in-your-mouth texture.
- Sugar: Divided sugar creates sweetness and a slight crunch when rolling the dough balls.
- Egg: Adds richness and helps bind everything together for a tender cookie.
- Vanilla Extract: Brings warmth and depth, rounding out the flavors perfectly.
- Flour: The backbone of your cookie dough, providing structure; all-purpose works just fine.
- Baking Powder: Adds a touch of lift so your cookies aren’t too dense.
- Salt: Balances the sweetness and enhances flavor—don’t skip this little hero.
- Seedless Raspberry Jam: Using seedless jam means no bits get stuck in your teeth and ensures a smooth, pretty center.
- Confectioners’ Sugar (for icing): Quickly turns into a sweet, thick glaze that clings beautifully to the cookies.
Tweak to Your Taste
One of the joyful things about the Raspberry Thumbprint Cookies Recipe is how easily you can make it your own. I often swap out raspberry for other jams depending on the season or what’s in my pantry, and it never disappoints. I encourage you to play around to find your favorite twist!
- Jam Variety: I’ve tried strawberry, apricot, and even blackberry jam — and each variation brings its own delicious flair.
- Gluten-Free Option: Subbing the flour for a gluten-free blend works well; the key is to gently mix to prevent toughness.
- Adding Nuts: If you like a little crunch, try rolling the dough balls in finely chopped nuts before baking — I love pistachios for a fun color pop!
Step-by-Step: How I Make Raspberry Thumbprint Cookies Recipe
Step 1: Mix the Dry Ingredients
Start by stirring together the flour, baking powder, and salt in a medium bowl. This helps evenly distribute the leavening and salt, so your cookies bake consistently.
Step 2: Cream Butter, Sugar, and Vanilla
In a large bowl, cream the softened butter with half the sugar and the vanilla extract. I use an electric mixer around speed 3 for 2 to 3 minutes until it’s light and fluffy—that’s the secret to that tender texture.
Step 3: Add the Egg and Combine Dry Ingredients
Beat in the egg thoroughly to incorporate moisture and richness. Then add the flour mixture gradually, beating just until combined — you don’t want to overmix, or the cookies can become tough.
Step 4: Chill the Dough
This part is key: chill your dough in the fridge for an hour. It firms up the dough, making it easier to roll into even balls, and helps keep the cookies from spreading too much during baking.
Step 5: Shape, Sugar Coat, and Make Thumbprints
Preheat your oven to 350°F and prepare baking sheets with parchment or silicone mats. Roll the dough into 1-inch balls, then roll each in the remaining sugar so they get a subtle, sparkly crunch. Place them 2 inches apart so they have room to bake. Use your thumb or the end of a wooden spoon handle to press a gentle indentation in the center of each ball—trust me, this is the fun part!
Step 6: Bake and Add Jam
Bake for 13 to 16 minutes until the edges just turn golden. Pull them out and let cool on wire racks. While they’re cooling, microwave your raspberry jam for a few seconds to make it more spreadable. Spoon a nice dollop into each indentation — I like how the melted jam gives these cookies a lovely, glossy look.
Step 7: Glaze and Store
Mix the confectioners’ sugar with vanilla extract and water to make a thick glaze. Drizzle it over the jam-filled cookies for a pretty finishing touch. Let the glaze set completely before popping them in an airtight container with parchment paper between layers to keep them fresh.
Pro Tips for Making Raspberry Thumbprint Cookies Recipe
- Don’t Skip Chilling: I’ve learned chilling the dough is essential—it maintains cookie shape and texture beautifully.
- Sugar Coating Adds Crunch: Rolling the dough balls in sugar before baking creates a delightful texture contrast I always appreciate.
- Melt Jam for a Polished Look: Warming the jam helps it fill the indentations smoothly and stay luscious without running off.
- Use Parchment for Easy Cleanup: I always line baking sheets with parchment or silicone mats to prevent sticking and make cleanup a breeze.
How to Serve Raspberry Thumbprint Cookies Recipe
Garnishes
I love topping these cookies with a tiny fresh raspberry or a light dusting of extra confectioners’ sugar on special occasions; it adds a fresh pop and looks so festive. Sometimes I also use a few finely chopped fresh mint leaves for a subtle aromatic twist.
Side Dishes
These cookies pair wonderfully with a simple cup of tea or coffee. For brunches or afternoon tea parties, I often serve them alongside lemon bars or delicate almond biscotti to keep the flavor profile balanced and exciting.
Creative Ways to Present
For gifting or parties, I arrange these cookies in decorative tins lined with parchment, separated by layers of wax paper to keep them intact. Another fun idea is placing them on cupcake stands or tiered trays to add a touch of elegance to your dessert table.
Make Ahead and Storage
Storing Leftovers
I store leftover Raspberry Thumbprint Cookies in an airtight container with parchment paper between layers, right in a cool pantry spot. They hold up well for up to a week, and the jam stays moist without making the cookie soggy.
Freezing
If I’m making these ahead for a party, I freeze the unbaked dough balls on a baking sheet first. Once frozen, I transfer them to a freezer bag—when I’m ready, I pop them straight into the oven, adding a couple extra minutes to baking time. The finished cookies also freeze well if wrapped tightly.
Reheating
To revive leftover cookies, I warm them gently in a 300°F oven for about 5 minutes. This crisps the edges back up without melting the glaze or drying out the jam filling—a total game changer when you want that fresh-baked feel!
FAQs
-
Can I use store-bought jam for this Raspberry Thumbprint Cookies Recipe?
Absolutely! Store-bought seedless raspberry jam works perfectly here; I just recommend warming it slightly to make it easier to spoon into the indentations and get that pretty glossy finish.
-
Can I make the dough ahead of time?
Yes, the dough can be prepared and chilled for up to 24 hours before baking. Just make sure it’s tightly wrapped so it doesn’t dry out, and bring it back to room temperature briefly if it’s too hard to shape.
-
Why do the cookies have a slightly crunchy edge?
The crunchiness comes from rolling the dough balls in granulated sugar before baking and the natural caramelization of butter in the oven edges. It’s my favorite texture contrast in this recipe!
-
Can I skip the glaze?
You can, but I highly recommend it. The glaze adds a subtle sweetness and beautiful finish that lifts these cookies from simple to special, especially if you’re gifting or serving at a party.
Final Thoughts
This Raspberry Thumbprint Cookies Recipe holds a special place in my heart — it’s a nostalgic treat my family adores, and I bet once you try it, it will become a staple in your baking repertoire too. From the buttery, flavorful dough to the bright raspberry center and that elegant icing drizzle, each bite feels like a mini celebration. So go ahead, grab your mixing bowl, and start making memories with these delightful cookies. You won’t regret it!
Print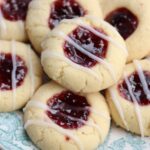
Raspberry Thumbprint Cookies Recipe
- Prep Time: 40 minutes
- Cook Time: 16 minutes
- Total Time: 1 hour 56 minutes
- Yield: 42 cookies
- Category: Dessert
- Method: Baking
- Cuisine: American
- Diet: Vegetarian
Description
These Raspberry Thumbprint Cookies are buttery, flavorful, and delightfully crunchy with a sweet raspberry jam center and a drizzle of vanilla glaze. Perfect for dessert or a snack, these cookies feature a tender dough chilled before baking and finished with a glossy, sweet icing for a beautiful presentation.
Ingredients
Cookie Dough
- 1 cup butter softened
- 3/4 cup sugar divided
- 1 egg
- 1 teaspoon vanilla extract
- 2 cups flour
- 1 teaspoon baking powder
- 1/4 teaspoon salt
- 2/3 cup seedless raspberry jam
Icing
- 1/2 cup confectioners’ sugar
- 1/2 teaspoon vanilla extract
- 1 1/2 teaspoons water
Instructions
- Prepare Dry Ingredients: In a medium bowl, stir together the flour, baking powder, and salt until well combined.
- Cream Butter and Sugar: In a large bowl, cream the softened butter, 1/2 cup granulated sugar, and vanilla extract for about 2 to 3 minutes on medium speed until light and fluffy.
- Add Egg and Flour Mixture: Beat in the egg thoroughly. Gradually add the flour mixture, mixing just until incorporated. Avoid overmixing.
- Chill Dough: Cover the dough and chill in the refrigerator for 1 hour to firm up for easier handling and better texture.
- Prepare for Baking: Preheat the oven to 350°F. Line baking sheets with parchment paper, silicone baking mats, or lightly grease the pans. Pour the remaining 1/4 cup sugar into a small dish.
- Shape Cookies: Roll chilled dough into 1-inch balls. Roll each ball in the sugar to coat, then place them 2 inches apart on the prepared baking sheets.
- Create Indentations: Using your thumb, a 1/2 teaspoon rounded measuring spoon, or the end of a wooden spoon handle, make an indentation in the center of each ball to hold the jam.
- Bake: Bake the cookies for 16 minutes or until the edges are lightly browned and the cookies are set. Remove from oven and transfer to wire racks to cool slightly.
- Add Jam: Melt the raspberry jam in a small bowl in the microwave until softened. Spoon the melted jam into the indentations of each cookie evenly.
- Cool Completely: Allow the cookies to cool completely on wire racks so the jam sets properly.
- Make and Add Icing: In a small bowl, combine the confectioners’ sugar, vanilla extract, and water. Mix until the icing is fairly thick and smooth. Drizzle the icing over the cooled cookies for a decorative finish.
- Storage: Store the cookies in an airtight container layered with parchment paper between them in a cool place to keep them fresh and prevent sticking.
Notes
- You may add jam before baking or after baking without melting, based on preference. Melted jam offers a prettier appearance and easier stacking.
- Over time, the white icing may become tinted by the raspberry jam.
- The cookies have a crunchy texture rather than chewy, as received positive feedback from family taste testers.
- Chilling the dough helps maintain cookie shape and texture during baking.
- Use seedless raspberry jam for a smoother filling that stays in place.
Nutrition
- Serving Size: 1 cookie
- Calories: 120 kcal
- Sugar: 10 g
- Sodium: 75 mg
- Fat: 7 g
- Saturated Fat: 4 g
- Unsaturated Fat: 3 g
- Trans Fat: 0 g
- Carbohydrates: 14 g
- Fiber: 0.5 g
- Protein: 1 g
- Cholesterol: 20 mg
