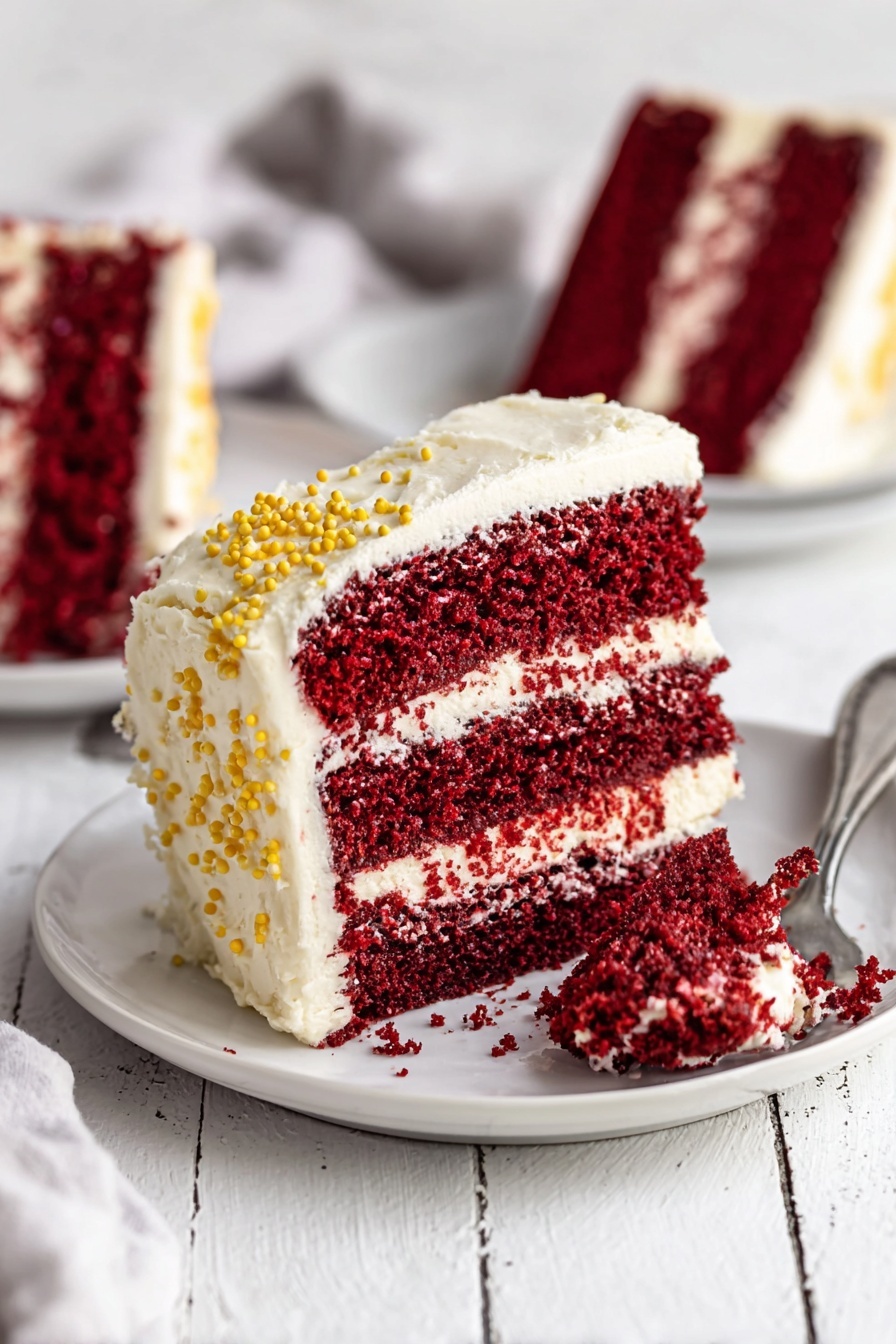
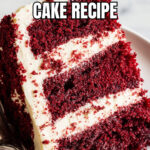
Red Velvet Cake with Cream Cheese Frosting Recipe
If you’ve been searching for that show-stopping dessert, let me introduce you to my favorite Red Velvet Cake with Cream Cheese Frosting Recipe that never fails to impress. Whether it’s a birthday, a holiday, or just a day that deserves a little celebration, this cake’s moist, tender layers paired with tangy, creamy frosting always steal the spotlight. Stick around—I’m sharing all my secret tips so you can nail this recipe with ease and wow your friends and family!
Why This Recipe Works
- Balanced Moisture: The combination of hot coffee, buttermilk, and oil keeps the cake incredibly moist without being greasy.
- Classic Tangy Frosting: Cream cheese and butter blend perfectly for that signature frosting that’s rich but not overpowering.
- Perfect Red Hue: Using gel food coloring gives the vibrant red that everyone expects without altering the cake’s texture.
- Simple Steps, Stunning Results: Clear instructions and easy techniques make this recipe approachable for home bakers of all levels.

Ingredients & Why They Work
Each ingredient in this Red Velvet Cake with Cream Cheese Frosting Recipe plays a crucial role, and knowing why helps you bake confidently. For example, the hot coffee intensifies the cocoa flavor, while buttermilk reacts with baking soda for that tender crumb you love. Let me walk you through each key player.

- Plain hot coffee or boiling water: It deepens the chocolate notes without adding bitterness; don’t skip it, even if you’re not a coffee drinker!
- Unsweetened natural cocoa powder: Gives that faint chocolate backbone essential to red velvet.
- All-purpose flour: The base of your cake’s structure, ideally sifted to keep things light.
- Baking powder & baking soda: Work together to leaven the cake and keep it airy.
- Fine sea salt: Balances the sweetness and enhances other flavors.
- Ground cinnamon (optional): Adds a subtle warmth that’s a nice touch if you want a little spice.
- Granulated sugar: Sweetens and helps with the cake’s tenderness.
- Vegetable oil: Ensures moistness over a drier butter-only cake.
- Unsalted butter, melted: Adds richness and depth to the flavor.
- Eggs and egg yolk: Provide structure and contribute to density—but in good proportion for softness.
- Buttermilk: Reacts with baking soda for leavening and imparts a slight tang.
- Vanilla extract: Elevates the flavor and balances the cocoa.
- Red gel food coloring: This is the star for that iconic red color without watering down the batter.
- Distilled white vinegar: Brightens flavors and reacts with baking soda to lift the cake.
- Cream cheese: The tangy base for your frosting, lending creaminess and flavor.
- Butter (for frosting): Helps the frosting become fluffy and spreadable.
- Powdered sugar: Sweetens the frosting and adds structure.
Tweak to Your Taste
I love making this Red Velvet Cake with Cream Cheese Frosting Recipe my own by playing around with a few tweaks, depending on the occasion or mood. Feel free to customize—you’ll soon find your perfect version!
- Less Food Coloring: I’ve tried reducing the amount, but honestly, the vibrant classic red is worth it! If you prefer a milder shade, adjust gradually.
- Spice It Up: I once added a touch more cinnamon and a pinch of nutmeg for a fall spin—it was surprisingly delightful.
- Dairy-Free Frosting: For friends with allergies, substituting with vegan cream cheese and butter alternatives still yields a tasty frosting, though texture varies slightly.
- Chocolate Chips in the Batter: For added texture and surprise bites, some mini chocolate chips work beautifully!
Step-by-Step: How I Make Red Velvet Cake with Cream Cheese Frosting Recipe
Step 1: Prepare Your Pans and Preheat
First things first, preheat your oven to 325°F (160°C). Line your three 8-inch cake pans with parchment rounds and generously spray the parchment and sides with nonstick spray. This little prep step makes removing the cakes later a breeze—you’ll thank me for this when your layers come out perfectly intact!
Step 2: Mix the Coffee and Cocoa
In a glass measuring cup, whisk together the hot coffee and cocoa powder. Cover it and let it rest about 5 minutes. This step might seem odd if you’re not used to it, but trust me, it deepens that chocolate flavor and helps create that luscious red velvet taste we’re after.
Step 3: Combine Dry Ingredients
Meanwhile, in a medium bowl whisk your flour, baking powder, baking soda, salt, and optional cinnamon. Sifting these together ensures your batter stays smooth and free of clumps, which makes a difference in the texture.
Step 4: Make the Batter
In a large bowl, whisk sugar, vegetable oil, and melted butter until combined. Add eggs plus the extra yolk and whisk for about 20 seconds until everything’s blended well and silky. Then add buttermilk, vanilla, red gel food coloring, vinegar, and your coffee-cocoa mixture. Give that a good stir!
Now comes a crucial technique—using a fine mesh sieve, sift your dry flour mixture into the wet ingredients in three batches. After each addition, whisk just until blended. Don’t overmix here; a few lumps are okay, but you want a smooth batter that’s a bit thick.
Step 5: Divide and Bake
Pour the batter evenly into the three pans, about the same level in each. Tap the pans on your counter a few times to pop air bubbles that might cause holes or uneven baking. Bake for 25 to 30 minutes until a toothpick inserted in the center comes out clean. The tops might look a little spongy—that’s normal.
Step 6: Cool the Cakes
Once baked, transfer the pans to cooling racks. When cool enough to handle, run a thin knife gently around the edges, then invert the cakes onto your racks so they cool completely. Full cooling is key before frosting, or your cream cheese frosting might melt and slide off.
Step 7: Make the Cream Cheese Frosting
Using a stand mixer fitted with the paddle attachment, beat cream cheese and butter on medium-high speed until super creamy and smooth. Scrape the bowl to keep it even. Add vanilla, then slowly add sifted powdered sugar on low speed until fluffy, about 3 minutes. If it’s too thick, a splash of milk smooths it out; if too thin, add more powdered sugar.
Step 8: Assemble and Frost
Place one cake layer flat-side up on your serving plate or cake stand. I like to tuck strips of parchment around the edges to keep things neat. Spread about a third of your frosting evenly over the top, then stack the next layer and repeat. Finish with the last layer right side up, then coat the entire cake with the remaining frosting. Smooth or swirl—it’s your call!
Pro Tips for Making Red Velvet Cake with Cream Cheese Frosting Recipe
- Don’t Skip the Coffee: It amplifies the cocoa flavor, making your red velvet taste richer and deeper.
- Use Gel Food Coloring: Liquid coloring waters down your batter; gel packs a punch with no compromise on texture.
- Cool Cakes Completely: Cream cheese frosting melts easily, so let cakes cool fully before frosting.
- Avoid Overmixing: Mix dry ingredients in slowly and only until just combined for a tender cake crumb.
How to Serve Red Velvet Cake with Cream Cheese Frosting Recipe

Garnishes
I like to keep garnishes simple—some freshly grated white chocolate or a few red velvet crumbs sprinkled on top adds a pretty, rustic touch without overshadowing the classic look. Sometimes, edible flowers or fresh berries can bring a pop of freshness and color for special occasions.
Side Dishes
Pair this cake with a light cup of coffee or tea to balance the richness. For a party, I sometimes serve it alongside a fresh fruit salad or a scoop of vanilla bean ice cream for an extra indulgent treat.
Creative Ways to Present
One of my favorite tricks is making this cake as mini layered cupcakes for individual servings, great for gatherings. Another idea: drizzle a bit of melted white chocolate over the frosting or sandwich some fresh strawberries between the layers for a fun twist that guests always comment on.
Make Ahead and Storage
Storing Leftovers
I keep leftovers covered tightly in the refrigerator—using a cake dome or wrapping with plastic wrap—to maintain moisture. The cake stays delicious for up to 3 days like this. If you want to enjoy it over longer, freezing is your friend.
Freezing
I’ve frozen entire frosted cakes wrapped carefully in several layers of plastic and aluminum foil with great results. You can also freeze the unfrosted layers wrapped well, then frost them fresh when ready. Just thaw overnight in the fridge before serving.
Reheating
Because this cake is so moist, I rarely reheat it, but if you want to warm a slice, a few seconds in the microwave (10-15 seconds) is enough. This gently softens the cream cheese frosting without melting it completely.
FAQs
-
Can I make this Red Velvet Cake with Cream Cheese Frosting Recipe without buttermilk?
Yes, you can substitute buttermilk with regular milk plus a tablespoon of lemon juice or vinegar. Let it sit for 5-10 minutes to curdle before using. This mimics the acidity and helps achieve the cake’s tender texture.
-
Why is my Red Velvet Cake dense instead of light and fluffy?
Density often results from overmixing the batter or not using fresh leavening agents like baking powder or soda. Mixing just until combined and checking ingredient freshness usually solves this problem.
-
How do I get that vibrant red color without artificial food coloring?
Natural alternatives include beet juice or powder, but the color won’t be as vivid. Using red gel food coloring, as in this recipe, gives the classic bold appearance ideal for red velvet cake.
-
Can I bake this as cupcakes instead of layers?
Absolutely! Bake in lined muffin tins for about 18-22 minutes, checking doneness with a toothpick. Cupcakes are a fun, portion-friendly way to enjoy this recipe.
Final Thoughts
This Red Velvet Cake with Cream Cheese Frosting Recipe has become my go-to when I want to treat loved ones—and myself—to something truly special. The balance of flavors, gorgeous color, and luscious texture never cease to make me smile. I hope you give it a whirl and experience that joyful moment when everyone takes a bite and says, “Wow!” If you do, please come back and let me know how it turned out—I’d love to hear your stories, too!
Print
Red Velvet Cake with Cream Cheese Frosting Recipe
- Prep Time: 15 minutes
- Cook Time: 30 minutes
- Total Time: 45 minutes
- Yield: 12 servings
- Category: Dessert
- Method: Baking
- Cuisine: American
Description
This classic Red Velvet Cake recipe boasts moist, tender layers with a subtle cocoa flavor enhanced by a hint of cinnamon and rich cream cheese frosting. Perfect for celebrations or any special occasion, it features vibrant red color achieved with gel food coloring, balanced by the tangy buttermilk and white vinegar.
Ingredients
For the Cake:
- 1/2 cup plain hot coffee or boiling water
- 1/4 cup (21 grams) unsweetened natural cocoa powder
- 2 1/4 cups (279 grams) all-purpose flour
- 1/2 teaspoon baking powder
- 1 teaspoon baking soda
- 1 teaspoon fine sea salt
- 1/4 teaspoon ground cinnamon (optional)
- 2 cups (400 grams) granulated sugar
- 1/2 cup (109 grams) fresh vegetable oil
- 1 stick (113 grams) unsalted butter, melted
- 2 large eggs, at room temperature
- 1 large egg yolk, at room temperature
- 1 cup buttermilk, at room temperature
- 2 teaspoons vanilla extract
- 3 teaspoons red gel food coloring, plus more if needed
- 1 teaspoon distilled white vinegar
For the Cream Cheese Frosting:
- 16 ounces (454 grams) cream cheese, at room temperature
- 2 sticks (227 grams) unsalted butter, at room temperature
- 2 teaspoons vanilla extract
- 4 cups (500 grams) powdered sugar, sifted
Instructions
- Preheat and Prepare Pans: Preheat your oven to 325°F. Line three 8-inch cake pans with parchment rounds and spray the parchment and sides generously with nonstick cooking spray to prevent sticking.
- Mix Coffee and Cocoa: In a glass measuring cup, whisk together the hot coffee and cocoa powder well. Cover and let it stand for 5 minutes to allow the cocoa to bloom and deepen the flavor.
- Combine Dry Ingredients: In a medium mixing bowl, whisk together the flour, baking powder, baking soda, salt, and optional cinnamon to ensure even distribution.
- Make Wet Batter: In a large mixing bowl, whisk the sugar, vegetable oil, and melted butter until smooth. Add the eggs and yolk, whisking vigorously for about 20 seconds until very well combined.
- Add Liquids and Color: Stir in the buttermilk, vanilla extract, and red gel food coloring until evenly mixed. Then whisk in the vinegar and the coffee-cocoa mixture for acidity and moisture.
- Incorporate Dry Ingredients: Using a fine mesh sieve, sift the flour mixture into the wet batter in three additions, whisking carefully after each to avoid lumps but without overmixing.
- Divide and Bake: Evenly divide the batter among the prepared pans. Tap the bottoms of the pans on the counter several times to release trapped air bubbles. Bake for 30 minutes or until a cake tester inserted in the center comes out clean.
- Cool the Cakes: Place the pans on cooling racks. When cool enough to handle, run a thin knife around the edges to loosen cakes. Invert onto wire racks and let cool completely before frosting.
- Prepare Frosting: In a stand mixer fitted with a paddle attachment, beat cream cheese and butter on medium-high speed until light and smooth. Scrape down the bowl, then add vanilla and mix until combined.
- Add Powdered Sugar: On low speed, gradually add sifted powdered sugar and beat until fluffy, about 3 minutes. Adjust consistency with a splash of milk or more powdered sugar as needed.
- Assemble the Cake: Place one cake layer flat-side up on a cake stand. Use one third of the frosting to fill the bottom layer evenly. Add the second layer and repeat. Place the final layer and use remaining frosting to ice the entire cake smoothly.
- Store Properly: Cover the assembled cake and refrigerate. It will keep well for up to 3 days, maintaining freshness and flavor.
Notes
- Be generous with the gel food coloring to achieve the classic vibrant red; small bottles may require multiple teaspoons.
- Use room temperature ingredients such as eggs, butter, and cream cheese for smooth batter and frosting textures.
- Allow cakes to cool completely before frosting to avoid melting the cream cheese icing.
- If the frosting is too thick, add a splash of milk or cream to loosen it; if too thin, add more powdered sugar gradually.
- Line cake pans with parchment rounds and spray well to ensure easy cake release.
Nutrition
- Serving Size: 1 slice
- Calories: 350 kcal
- Sugar: 35 g
- Sodium: 250 mg
- Fat: 18 g
- Saturated Fat: 7 g
- Unsaturated Fat: 9 g
- Trans Fat: 0 g
- Carbohydrates: 42 g
- Fiber: 1 g
- Protein: 4 g
- Cholesterol: 65 mg
