S’mores Cookie Bars Recipe
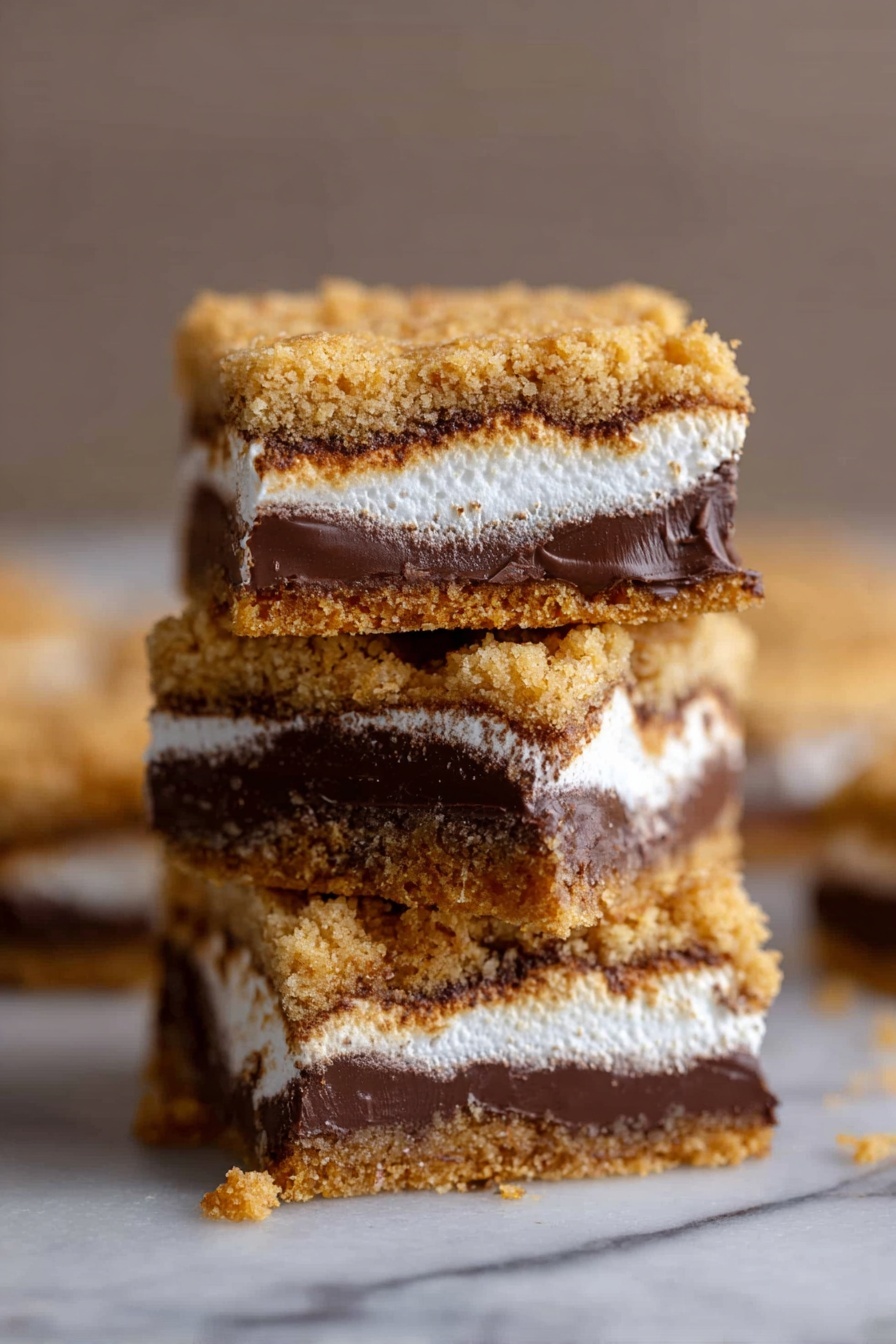
If you’re craving that classic campfire treat but want it in an easy-to-share, oven-friendly form, this S’mores Cookie Bars Recipe is going to be your new obsession. Imagine layers of buttery cookie dough, melty chocolate, and fluffy marshmallow fluff all baked into bars that are easy to slice and impossible to resist. Trust me, once you try these bars, you’ll be making them again and again—perfect for gatherings, dessert cravings, or just because.
Why This Recipe Works
- Layered Texture: The combination of cookie dough, chocolate bars, and marshmallow fluff creates a perfect chewy, gooey bite every time.
- Easy Prep: No complicated steps or specialty ingredients—just familiar pantry staples with a twist.
- Great Crowd-Pleaser: These bars slice into neat squares that everyone can grab, making it ideal for parties or family nights.
- Freezer Friendly: You can prep ahead and freeze, which is a lifesaver if you’re short on time but still want that fresh-from-the-oven vibe.

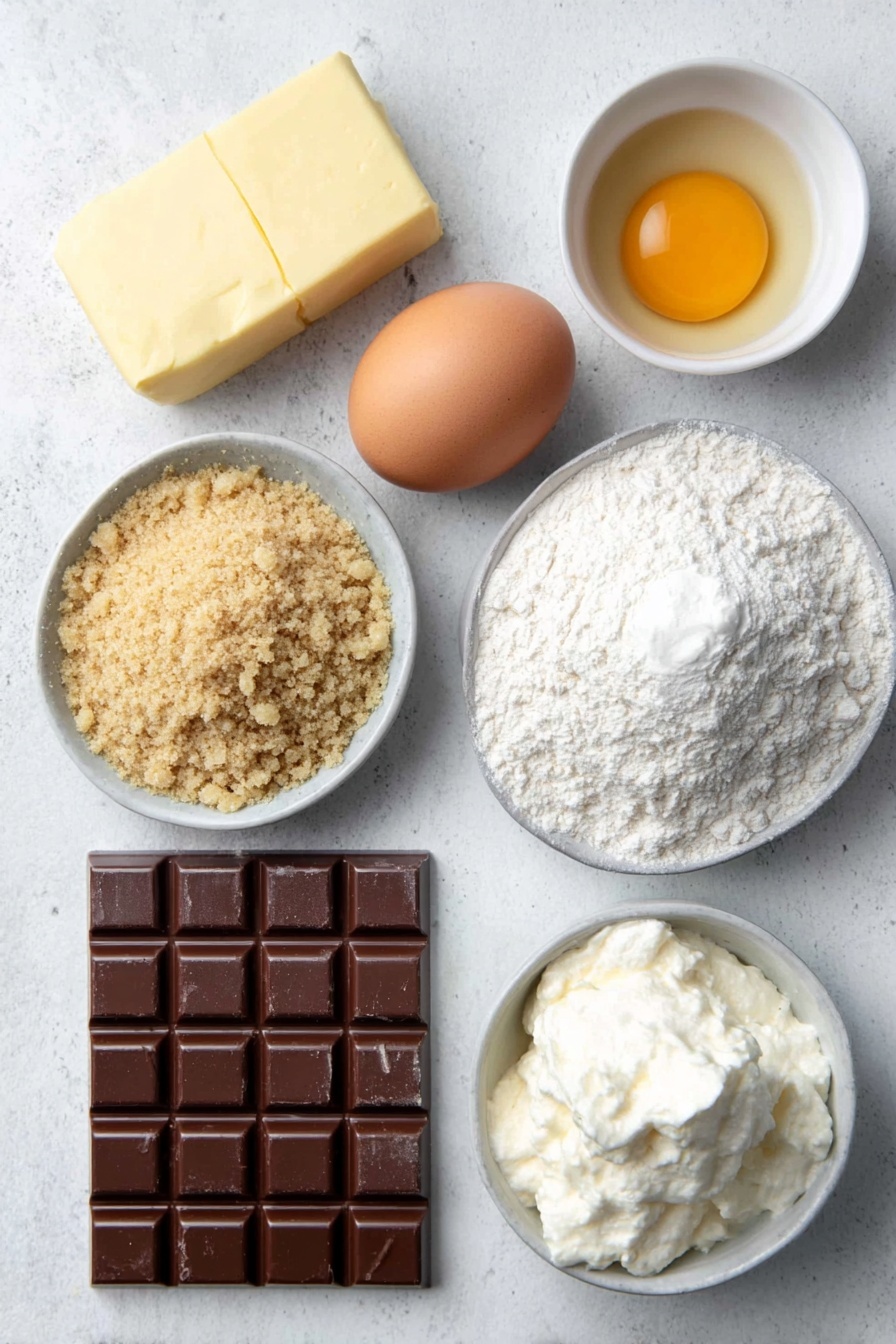
Ingredients & Why They Work
Each ingredient in this S’mores Cookie Bars Recipe contributes both flavor and texture that mimics a traditional s’more but with the convenience of baking indoors. Choosing quality marshmallow fluff and chocolate bars is key here for that luscious gooeyness we all crave. Also, the graham cracker crumbs added to the cookie dough punch up the authenticity while giving a subtle crunch that complements the softness.
- Butter: Using softened butter helps the dough blend smoothly and promises tender bars.
- Brown Sugar: Adds moisture and a deep caramel note that pairs beautifully with chocolate.
- Granulated Sugar: Balances the sweetness and aids in that soft cookie texture.
- Egg: Binds everything together while adding richness.
- Vanilla Extract: Enhances overall flavor and rounds out the sweetness.
- All-Purpose Flour: The base of the cookie dough, offering structure.
- Graham Crackers (finely crushed): Infuses that classic campfire flavor directly into the dough!
- Salt: Essential to balance the sweetness and elevate flavors.
- Baking Soda: Helps the cookie dough rise slightly and become perfectly tender.
- Hershey Bars: The melting chocolate that brings that authentic s’more taste.
- Marshmallow Fluff: Provides the signature gooey marshmallow layer that’s easy to spread and bake without burning.
Tweak to Your Taste
One of the joys of this S’mores Cookie Bars Recipe is how easy it is to make it your own. I’ve played around quite a bit—sometimes swapping the chocolate bars for dark chocolate or mini chocolate chips, or even stirring in some chopped nuts for a bit more crunch. You can totally customize the marshmallow layer too: I’ve used toasted marshmallow fluff once, and it adds a smoky depth that’s divine!
- Chocolate Swap: Using dark or milk chocolate changes the sweetness level, and I find dark chocolate balances the gooey marshmallow nicely.
- Nutty Addition: Adding chopped pecans or walnuts gives an unexpected texture twist that’s really fun.
- Mini Marshmallows: For a fun variation, try layering mini marshmallows instead of fluff for a slightly different gooey texture.
- Gluten-Free Version: Switch to gluten-free flour and gluten-free graham crackers if you’re catering to dietary needs.
Step-by-Step: How I Make S’mores Cookie Bars Recipe
Step 1: Preparing the Base Dough
Start by preheating your oven to 350°F and lining an 8×8 inch pan with parchment paper—you’ll thank me later when it’s time to lift the bars out easily. Then, cream together the softened butter with your granulated and brown sugars until it looks light and fluffy, about 2-3 minutes with a mixer. Add in the egg and vanilla extract, mixing until everything is well combined. This part always reminds me of making traditional cookies with a soft and buttery base that’s hard to resist even before it’s baked.
Step 2: Adding Dry Ingredients and Graham Crackers
To your creamed mixture, gently fold in the flour, finely crushed graham crackers, salt, and baking soda. Be careful not to overmix here; just stir until you no longer see flour streaks. The crushed graham crackers add this fantastic texture and authentic s’mores flavor that makes you feel like you’re beside a campfire even if you’re baking in your kitchen.
Step 3: Creating the First Cookie Layer
Press half of the cookie dough evenly into your prepared pan. Now here’s a trick: lift the parchment paper with the dough on it out of the pan and pop it into the freezer. This firms up the bottom layer, making it easier to flip later without it breaking apart. Meanwhile, line the pan again with fresh parchment and press the remaining dough evenly within the pan.
Step 4: Adding Chocolate and Marshmallow Layers
Once your bottom dough layer is nicely chilled, arrange the Hershey bars evenly on top of the uncooked dough in the pan. Feel free to break them into pieces to cover the entire surface. Then spread the marshmallow fluff generously over the chocolate layer. Here’s where it gets deliciously gooey—don’t be shy with the fluff! Now gently remove the chilled dough square from the freezer and carefully flip it on top of the marshmallow layer. It’s a bit delicate, so work slowly to keep it intact.
Step 5: Baking and Cooling to Perfection
Bake these beauties for about 25 minutes until the edges start to lightly brown. The smell at this point is absolutely irresistible, and it’s tempting to cut right in. Resist the urge! Let the bars cool completely in the pan—that’s essential to let the layers set so your slices come out neat with that ooey-gooey middle visible. I usually wait about an hour, but if you’re impatient like me, a quick chill in the fridge helps speed things up.
Pro Tips for Making S’mores Cookie Bars Recipe
- Freezing the Bottom Layer: Freezing the first cookie dough layer makes flipping and assembling a breeze without cracking.
- Don’t Overmix: Overworking the dough can lead to tough bars, so mix just until combined for tender results.
- Use Parchment Paper: Lining the pan twice simplifies removal and keeps the bars intact.
- Full Cooling is Key: Let bars cool completely before slicing to get clean, beautiful cross-sections and avoid squishing the gooey layers.
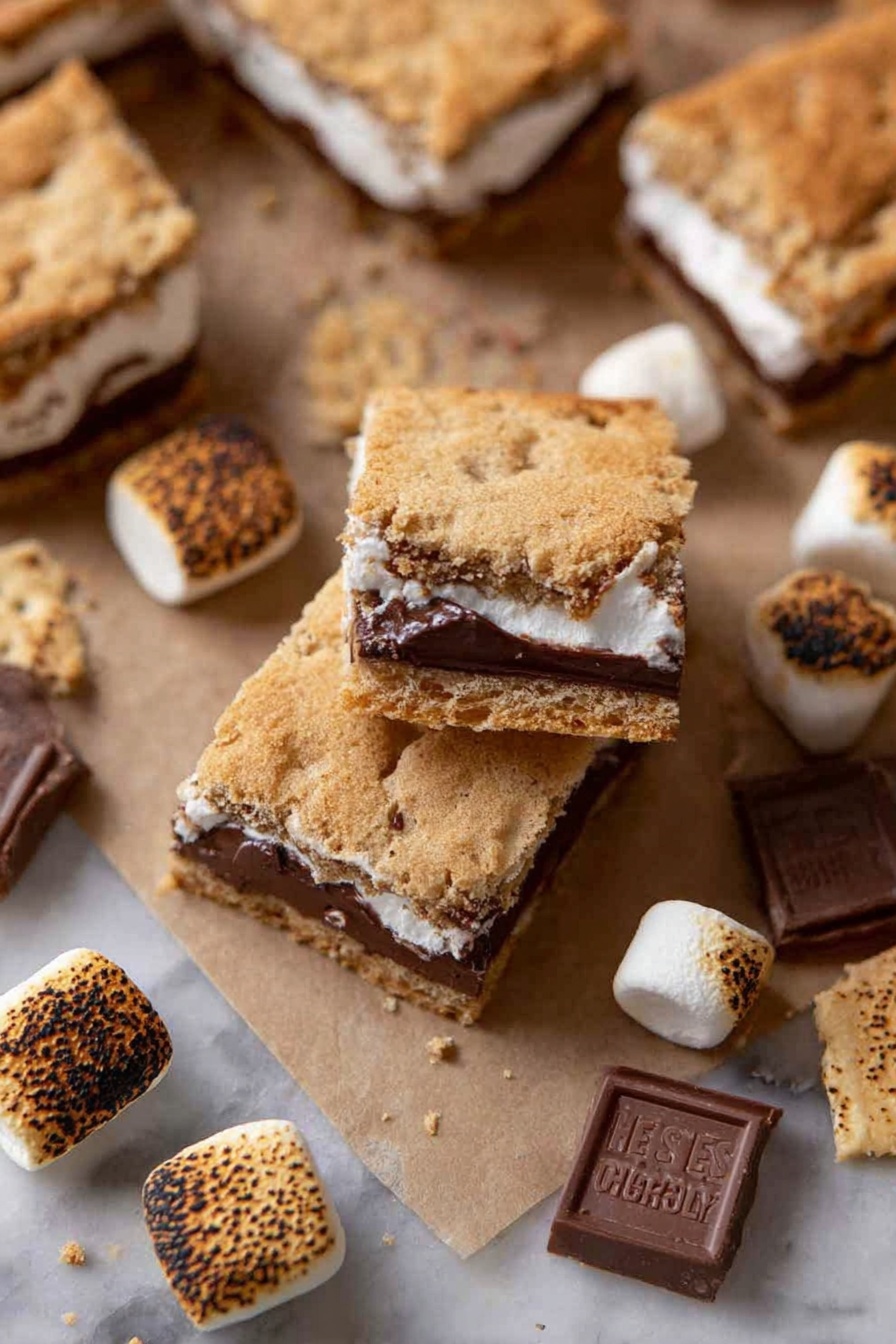
How to Serve S’mores Cookie Bars Recipe
Garnishes
I usually keep it simple and let the bars stand on their own, but garnishing with a sprinkle of crushed graham crackers or mini marshmallows right before serving adds a cute visual touch and extra texture. Sometimes, a drizzle of melted chocolate feels like the cherry on top (or should I say, chocolate on top?).
Side Dishes
Since these bars are rich and sweet, I like pairing them with something fresh and light—like a scoop of vanilla ice cream or a handful of fresh berries to balance the sweetness. A big glass of cold milk or a rich cup of coffee also complements the s’mores flavors perfectly.
Creative Ways to Present
For parties, I’ve served these bars on a wooden platter lined with a rustic tea towel to mimic that campfire vibe indoors. For a kid’s party, wrapping individual bars in parchment paper and tying them with twine made for easy, adorable grab-and-go treats. They also make spectacular gifts—just pop them in a pretty box and watch your friends swoon.
Make Ahead and Storage
Storing Leftovers
I store leftover s’mores cookie bars in an airtight container at room temperature for up to three days. If it’s warm or humid, I prefer the fridge, which keeps them fresh longer but can firm up the marshmallow layer a bit.
Freezing
These bars freeze wonderfully! I wrap individual squares tightly in plastic wrap and then store them in a freezer-safe container. When you want a treat, just thaw overnight in the fridge or pop them on the counter for a couple of hours.
Reheating
To revive that fresh-from-the-oven feeling, warm a bar in the microwave for 15-20 seconds or in a low oven (around 300°F) for 5-7 minutes. This softens the chocolate and marshmallow layers nicely without drying out the cookie dough.
FAQs
-
Can I use mini marshmallows instead of marshmallow fluff?
Yes, mini marshmallows can be used, but they may melt unevenly and won’t spread as smoothly as marshmallow fluff. If using minis, sprinkle them over the chocolate bars and press gently before adding the top cookie layer.
-
Why do I freeze the bottom layer of cookie dough?
Freezing the first cookie dough layer firms it up so you can flip it over without breaking or stretching. This step helps maintain clean layers and makes assembly much easier.
-
Can I use a different chocolate than Hershey bars?
Absolutely! You can swap Hershey bars for any chocolate bars you love, like milk, dark, or even flavored chocolates. Just make sure to cover the cookie base evenly for the best melt.
-
How do I get clean slices with gooey layers?
Let your bars cool completely before slicing. Using a sharp knife dipped in hot water and wiped clean between cuts also helps achieve neat squares without dragging the marshmallow layer.
Final Thoughts
Honestly, this S’mores Cookie Bars Recipe feels like a little slice of summer campfire magic wrapped up in a pan. I love how it’s approachable enough to make on a weeknight but special enough to share at parties. Give it a try—the layers of cookie dough, chocolate, and marshmallow fluff will bring big smiles and even bigger cravings. Once you make them, you’ll see why this recipe quickly became a favorite in my kitchen. Go ahead, bake these bars, and enjoy a cozy treat with absolutely zero fuss!
Print
S’mores Cookie Bars Recipe
- Prep Time: 15 minutes
- Cook Time: 25 minutes
- Total Time: 40 minutes
- Yield: 16 servings
- Category: Dessert
- Method: Baking
- Cuisine: American
Description
Delicious S’mores cookie bars featuring a graham cracker-infused cookie dough layered with rich Hershey chocolate and fluffy marshmallow topping, baked to golden perfection for a gooey and satisfying treat.
Ingredients
Cookie Dough
- 1/2 cup Butter softened, salted or unsalted
- 1/3 cup brown sugar
- 1/4 cup granulated sugar
- 1 egg
- 1 tsp vanilla extract
- 1 1/2 cup all-purpose flour
- 1/2 cup graham crackers finely crushed (about 3.5 sheets)
- 1/4 tsp salt
- 3/4 tsp baking soda
Layers
- 5 standard Hershey bars
- 1 1/2 cup marshmallow fluff
Instructions
- Preheat and prepare pan: Preheat the oven to 350F and line an 8×8 inch baking pan with parchment paper; set aside.
- Cream butter and sugars: In a mixing bowl, cream together the softened butter, granulated sugar, and brown sugar until combined and fluffy. Add the egg and vanilla extract, then mix until fully incorporated.
- Add dry ingredients: Add the all-purpose flour, finely crushed graham crackers, salt, and baking soda to the wet mixture. Stir just until the flour mixture disappears, avoiding overmixing.
- Press and chill the dough layers: Divide the dough in half. Press half of the dough evenly onto the prepared baking pan. Remove the parchment from the pan and place it in the freezer. Re-line the pan with fresh parchment paper and press the remaining dough evenly on it.
- Assemble the bars: Place the Hershey chocolate bars evenly over the dough on the pan, breaking pieces if necessary to cover the surface. Spread the marshmallow fluff evenly over the chocolate layer. Carefully flip the chilled dough layer from the freezer over the marshmallow fluff, pressing gently to keep it intact.
- Bake: Bake in the preheated oven for 25 minutes until golden and cooked through.
- Cool and serve: Allow the cookie bars to cool completely before slicing to achieve clean cross-sections and optimal texture.
Notes
- Use parchment paper for easy removal and clean slices.
- Chilling the dough layer helps prevent tearing when flipping.
- Feel free to swap Hershey bars with your favorite milk or dark chocolate.
- For extra gooeyness, toast the marshmallow fluff slightly under broiler before assembling.
- Ensure bars are fully cooled before slicing to avoid crumbling.
Nutrition
- Serving Size: 1 bar
- Calories: 250 kcal
- Sugar: 18 g
- Sodium: 120 mg
- Fat: 12 g
- Saturated Fat: 7 g
- Unsaturated Fat: 4 g
- Trans Fat: 0 g
- Carbohydrates: 32 g
- Fiber: 1 g
- Protein: 3 g
- Cholesterol: 35 mg

