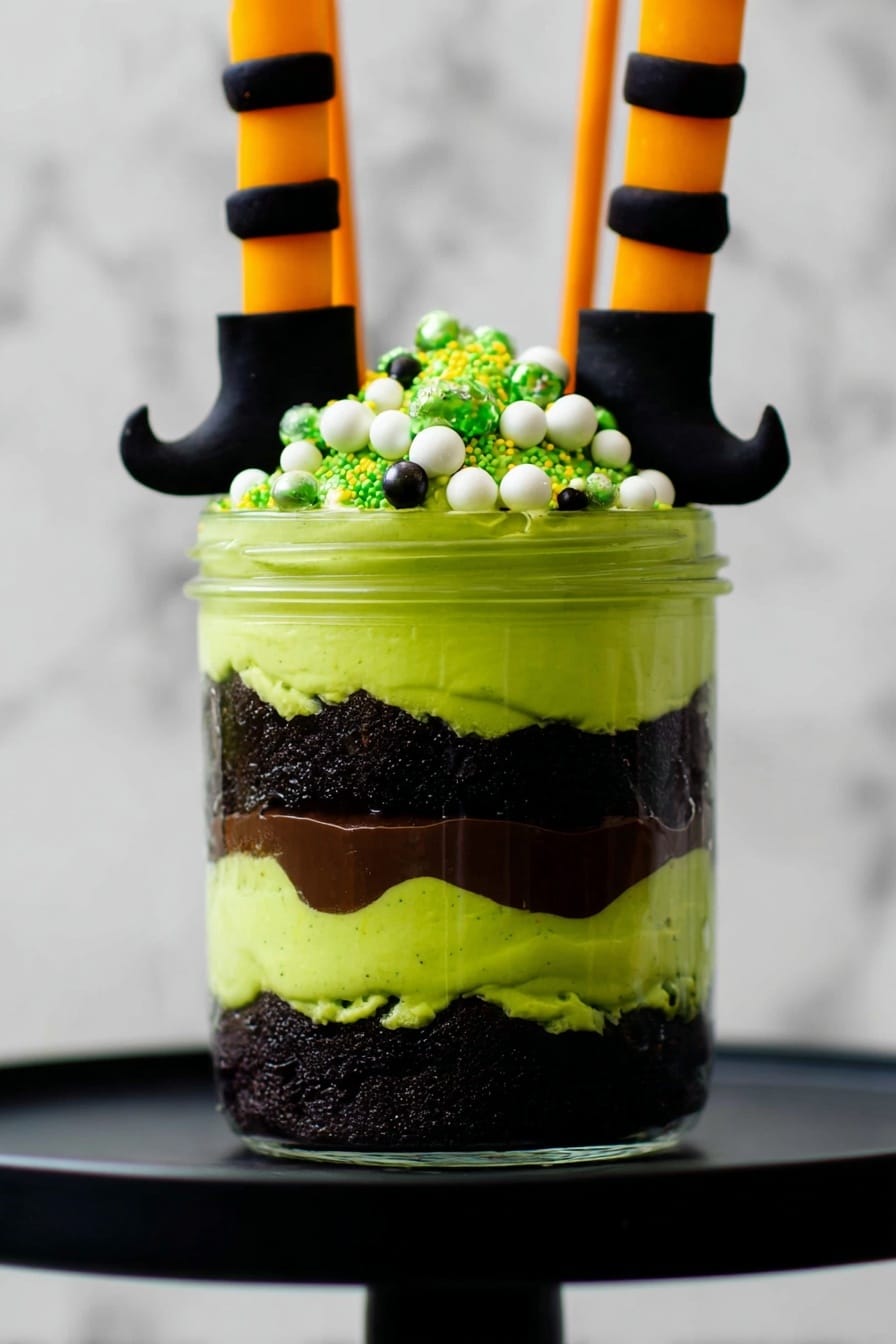
Witches Brew Halloween Cake Jars Recipe
If you’re looking for a show-stopping Halloween treat that’s as fun to make as it is to eat, you’re going to adore this Witches Brew Halloween Cake Jars Recipe. Imagine rich, moist black cocoa cake layered with vibrant green buttercream, all tucked inside cute little jars and crowned with whimsical fondant witch legs and shoes. Trust me, these jars are as delightful to gift as they are to serve at a spooky gathering – and I’m here to walk you through every magical step so your batch turns out perfectly!
Why This Recipe Works
- Perfect Portion Control: The cake jars let you enjoy individual servings that look adorable and eliminate any cake-cutting stress.
- Eye-Catching Presentation: The hand-sculpted fondant witch legs add a unique, playful touch that instantly makes your dessert stand out.
- Rich Chocolate Flavor: Using black cocoa powder gives the cake a deep, intense color and flavor that feels totally indulgent.
- Customizable Buttercream: The electric green buttercream adds a spooky vibe and you can tweak it for either stiffer or softer textures depending on your preference.

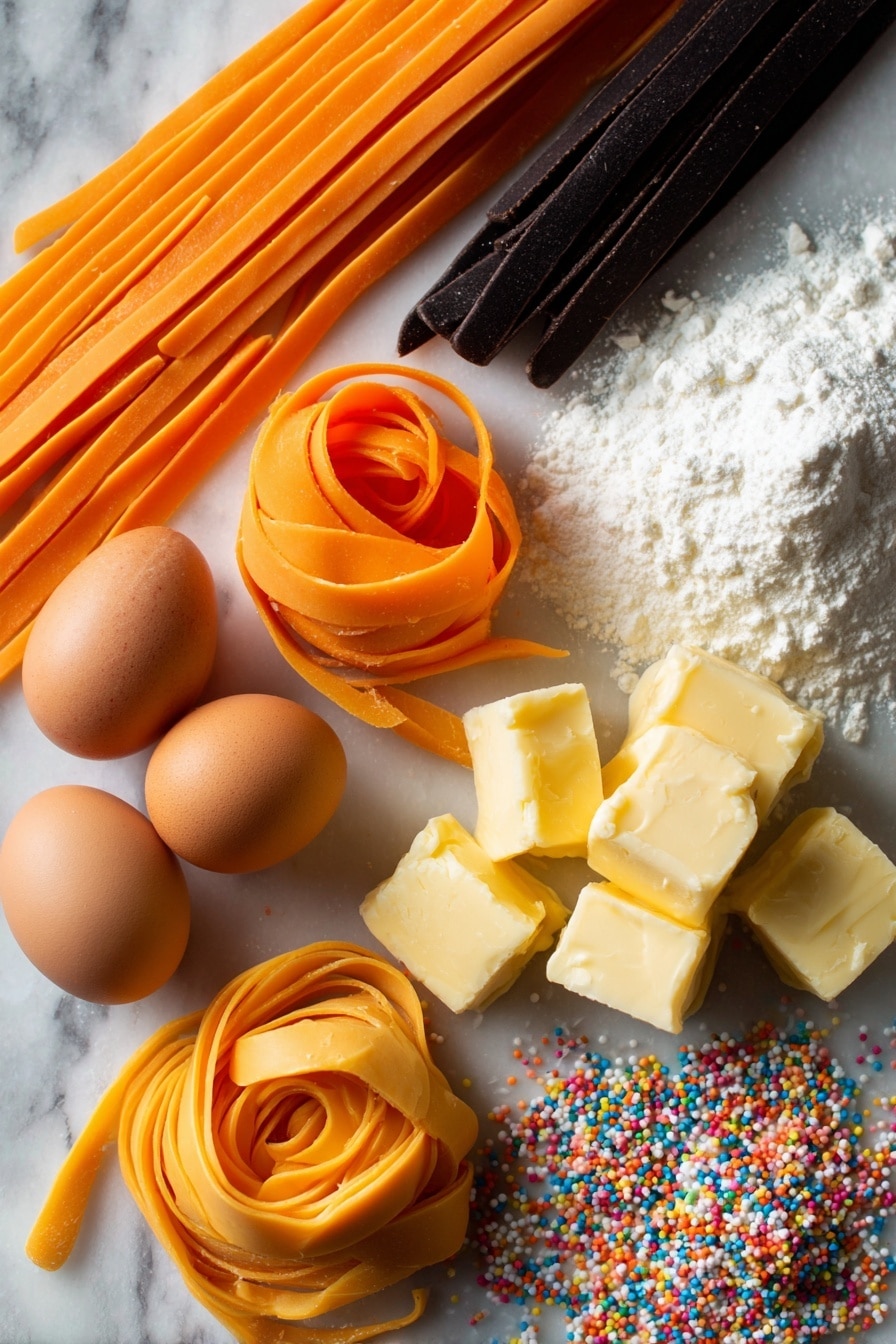
Ingredients & Why They Work
Each ingredient in this Witches Brew Halloween Cake Jars Recipe was chosen to create layers of flavor and texture that complement one another beautifully. Plus, the fondant components add that playful Halloween charm you’ll love showing off.
- Self-raising flour: The leavening already mixed in makes the cake nice and fluffy without needing extra effort.
- Granulated sugar: Gives just the right sweetness and helps with that tender crumb in the cake.
- Butter: Adds rich flavor and moistness; using salted butter for the frosting gives balance to the sweetness.
- Eggs: The key to structure and binding – they keep the cake from falling apart in the jars.
- Unsweetened black cocoa powder: Provides that intense chocolate color and deep flavor perfect for the Halloween theme.
- Baking powder: Gives the cake an extra lift; you’ll notice the perfect crumb thanks to this.
- Salt: Enhances all the other flavors—never skip it!
- Milk: Keeps the batter smooth and helps create a tender crumb.
- Vanilla extract: Rounds out the sweet flavors and pairs beautifully with chocolate.
- Powdered sugar (icing sugar): For that silky smooth buttercream texture.
- Electric green food coloring: Bring your witches’ brew to life with that vivid, magical swirl.
- Orange and black fondant: The stars of the decoration, perfect for creating witch legs and shoes with that spooky vibe.
- CMC powder: Helps make the fondant easier to shape and keeps it firm once dried.
- Sprinkles: Adds fun texture and a festive pop of color inside and atop your jars.
Tweak to Your Taste
One of the things I love most about the Witches Brew Halloween Cake Jars Recipe is how easy it is to make your own. Whether you prefer your buttercream sweeter, less sweet, or want to experiment with different fondant colors, this recipe is a fantastic canvas.
- Variation: I’ve tried swapping out black cocoa for regular cocoa powder when I couldn’t find black, and while the color’s less dramatic, the flavor is still rich and delicious.
- Dairy-Free Option: For a dairy-free treat, substitute the butter with a vegan butter alternative and use oat or almond milk.
- Color Mix-Up: Play with different food coloring in your buttercream—purple or neon orange both make for eerie yet festive twists!
- Sprinkles Swap: Use themed sprinkles—like bats, pumpkins, or stars—to surprise guests with different textures inside each jar.
Step-by-Step: How I Make Witches Brew Halloween Cake Jars Recipe
Step 1: Crafting the Spooky Witch Legs
Begin ahead by kneading a bit of CMC powder into the orange fondant—it makes a world of difference by keeping your fondant soft but sturdy. When rolling out the skinny strips for the legs, I recommend using a fondant smoother if you have one; it helped me get clean, even shapes without finger dents. Remember, keep these legs covered as you go so they don’t dry out too fast. The black stripes are like a fun little detail that truly bring the witch legs to life—just dampen with a brush (don’t overdo on water or the fondant will get soggy!), press the black strips on, and cut away the excess.
Step 2: Shaping the Wicked Witch Shoes
Next up, knead the black fondant with the remaining CMC for pliability, then roll into small sausages. I used a ball tool to make a neat little opening for the legs, but if you don’t have one, a rounded object like the end of a paintbrush or chopstick will do. Attaching the shoes to the legs is a gentle process, so be patient and use a damp brush to help glue them together. Setting them overnight ensures they dry firm, so they stand upright on your finished jars—this little step saved me frustration when my first batch flopped!
Step 3: Baking the Dark Chocolate Cake
The cake is the rich, chocolaty backbone of the whole dessert. I like to cream the butter and sugar until light and fluffy—that’s a game-changer for a moist and tender cake. Adding eggs two at a time prevents breaking the batter, so don’t rush this part. Mixing dry ingredients separately ensures even dispersion, and alternating folding with milk keeps the batter smooth. Baking at 170°C for about 45–50 minutes, keep an eye on the cake and test early with a skewer; no wet batter means you’re good to go. Let it rest a few minutes in the tin before loosening and cooling completely. This cake layers beautifully in your jars without crumbling.
Step 4: Whipping Up That Electric Green Buttercream
Start by creaming your softened butter until smooth, then add the powdered sugar gradually—that little trick stops sugar clouds in your kitchen! Once combined, stir in vanilla, and if it feels sturdy, a splash of milk or cream will help you reach the perfect piping consistency. Adding green food coloring in small doses lets you control that bright witchy hue—you don’t want it too neon! Fit your buttercream into a piping bag with a star tip to get those luscious swirls in your jars.
Step 5: Assembling Your Witches Brew Halloween Cake Jars
Level your cooled cake, then slice it in half horizontally so you have two even layers. Use a round cutter the size of your jars to punch out cake circles—you’ll get 9 from each layer. I like to add a little sprinkle layer at the bottom of the jars—not only does it fill uneven spots, but it adds a fun surprise crunch. Layer cake, buttercream, sprinkles, then cake again, finishing with a big swirl of frosting. The last sprinkle topping adds magic and sparkle. Poke two holes on top of the jars with a skewer, then carefully pop in your dry, firm witch legs—and voilà, your Halloween dessert is alive!
Pro Tips for Making Witches Brew Halloween Cake Jars Recipe
- Fondant Prep in Advance: Make your witch legs and shoes a day ahead to let them dry completely and avoid bending.
- Avoid Water Overload: Use a barely damp brush when applying black stripes to keep fondant from going soggy or colors bleeding.
- Even Cake Layers: Use a serrated knife or cake leveler to ensure smooth slices that fit neatly in your jars.
- Sprinkles as Gap Fillers: If your jars have uneven bottoms, sprinkles can be a charming fix that adds texture and visual interest.
How to Serve Witches Brew Halloween Cake Jars Recipe
Garnishes
I like to garnish the top of mine with festive sprinkles—think little bats, stars, or bright orange confetti. It gives an extra pop of color and whimsy right on top of the luscious green buttercream swirl. Sometimes I add a tiny edible glitter dust for that magical sparkle effect—it’s a crowd-pleaser!
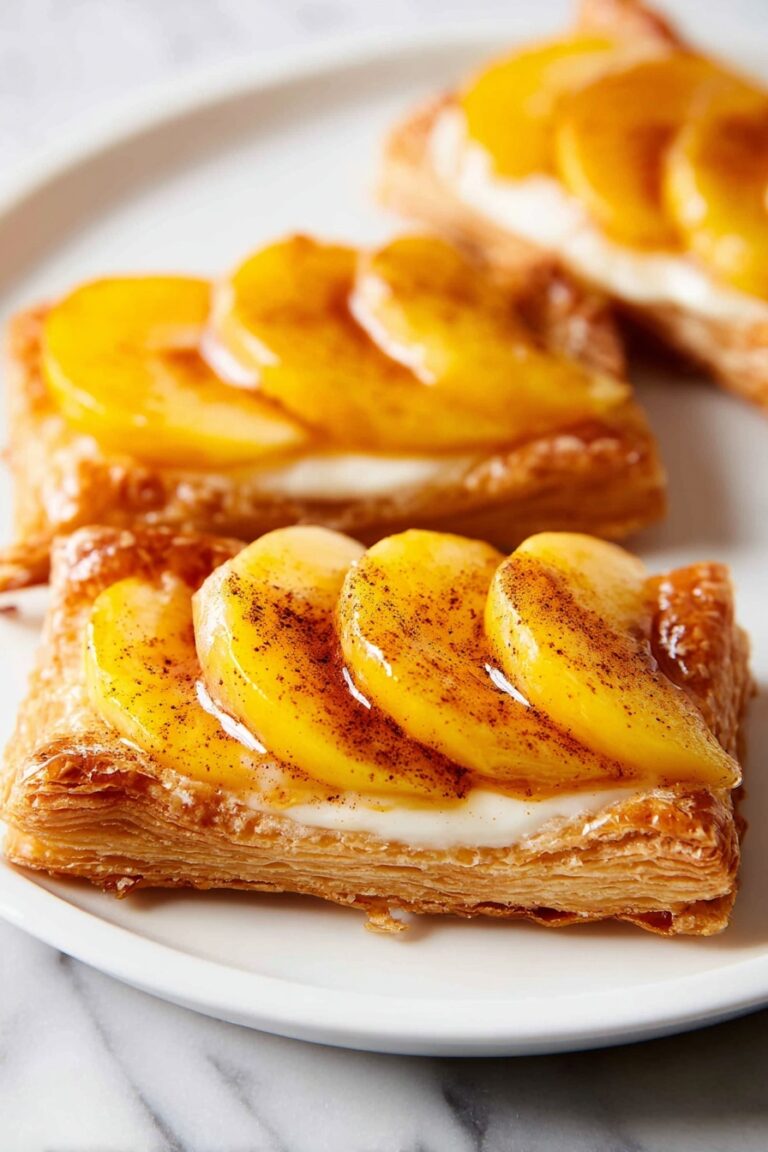
Side Dishes
Since these jars are rich and decadent, I usually keep side dishes light. A fresh autumn fruit salad or spiced apple cider pairs beautifully to balance out the sweetness and keep the Halloween vibe cozy and warm.
Creative Ways to Present
For a Halloween party, I’ve served these jars nestled in a cauldron filled with dry ice for that eerie, misty effect. Another fun idea is tying a little handwritten tag on each jar with spooky names like “Zombie Elixir” or “Vampire’s Delight” to add a personalized, playful touch.
Make Ahead and Storage
Storing Leftovers
Once assembled, cover the jars tightly with lids or plastic wrap and pop them in the fridge. They’ll keep beautifully for up to 3 days. The cake stays moist and the buttercream holds its shape without getting too hard or soggy.
Freezing
I’ve frozen whole baked cake layers before assembling, wrapped tightly in plastic wrap and foil, and they thaw perfectly when brought back to room temperature. For assembled jars, freezing isn’t ideal because the buttercream and fondant decorations can be compromised.
Reheating
Because these are chilled desserts, I actually enjoy them best straight from the fridge—no reheating needed! If you prefer your buttercream softer, take the jars out about 15 minutes prior to serving to let them come closer to room temperature.
FAQs
-
Can I make the witch legs and shoes without CMC powder?
You can, but the fondant will be softer and may not hold its shape as well, especially in humid environments. Adding CMC powder helps the fondant firm up so the decorations stay sturdy and don’t bend after drying.
-
What size jars work best for this recipe?
I find that small 8-10 oz jars work perfectly—they hold just enough cake layers and frosting for an individual portion that feels generous but not overwhelming.
-
How far ahead can I prepare these cake jars?
The fondant decorations benefit from being made a day or two in advance to dry. The cake and buttercream are best assembled the day of serving, but the cake layers can be baked and stored up to 2 days ahead.
-
Can I swap the black cocoa for regular cocoa powder?
Yes, you can! The cake will be lighter in color and slightly less intense in flavor, but still delicious. Just be aware it won’t have the same dramatic black color that makes this recipe unique.
-
What if my buttercream is too thick or too thin?
If it’s too thick, add milk or cream a teaspoon at a time until it softens to piping consistency. If too thin, beat a little more powdered sugar in to thicken it. The key is to take your time and get a texture that holds a nice swirl.
Final Thoughts
Making the Witches Brew Halloween Cake Jars Recipe has genuinely become one of my favorite Halloween projects—it’s part delicious indulgence, part whimsical craft. There’s something so satisfying about layering cake and bright green buttercream in jars, then finishing with those quirky, handmade witch legs sticking out, like mini potions! I hope you enjoy bringing this recipe to life in your kitchen as much as I do. So grab your rolling pin and piping bags, and let’s make some magic happen!
Print
Witches Brew Halloween Cake Jars Recipe
- Prep Time: 20 minutes
- Cook Time: 50 minutes
- Total Time: 3 hours 10 minutes
- Yield: 9 servings
- Category: Dessert
- Method: Baking
- Cuisine: Western
Description
Create spooky and delightful Witches Brew Halloween Cake Jars featuring rich black cocoa chocolate cake layers, vibrant green buttercream frosting, and decorative fondant witch legs and shoes, all assembled in jars for a festive treat perfect for Halloween celebrations.
Ingredients
Cake
- 330 g self raising flour
- 360 g granulated sugar
- 360 g butter
- 6 eggs
- 30 g unsweetened black cocoa powder
- 1½ teaspoon baking powder
- ½ teaspoon salt
- 90 ml milk
- 2 teaspoon vanilla extract
Buttercream Frosting and Decoration
- 400 g salted butter
- 800 g powdered sugar (icing sugar)
- 1¼ teaspoon vanilla extract
- 2 tablespoon milk or cream (optional if buttercream is too stiff)
- Electric green food coloring (a few drops)
- 250 g orange fondant
- 200 g black fondant
- 1 tablespoon CMC powder
- Sprinkles
Instructions
- Prepare Fondant Legs: Knead half a tablespoon of CMC into orange fondant until soft and pliable. Roll into long strips about 5mm in diameter, cut into 10 cm lengths, making 18 pieces. Keep covered to prevent drying.
- Add Black Stripes to Legs: Roll black fondant into thin strips approximately 2-3mm diameter, about 25-30cm long. Lightly dampen orange fondant legs using a brush and attach black stripes, cutting excess. Create 5 stripes per leg. Keep covered while working.
- Make Black Fondant Shoes: Knead remaining ½ tablespoon CMC into black fondant, form 18 balls (~2 cm diameter). Roll each ball into a short sausage, pinch bottom to make heel, press right end to thicken top part, pinch and curl left end for pointed front. Use a ball tool to make an opening for the leg.
- Attach Shoes to Legs: Moisten inside opening of shoe with damp brush, insert orange leg, press gently, and place flat to secure. Repeat for all shoes attached to legs. Let dry overnight until firm.
- Preheat Oven and Prepare Tin: Preheat oven to 170℃. Grease and flour one 9-inch square cake tin.
- Cream Butter and Sugar: Beat butter and sugar on medium speed for about 2 minutes until light and fluffy, scraping bowl sides midway.
- Add Eggs: Add eggs two at a time, beating well after each addition.
- Mix Dry Ingredients: In separate bowl, whisk flour, baking powder, cocoa powder, and salt. Sift into creamed mixture in three batches, alternating with milk, folding gently. Fold in vanilla extract.
- Bake Cake: Pour batter into prepared tin and bake for 50 minutes. Test doneness with skewer; cake is done if it comes out clean and surface springs back. Cool in tin 2-3 minutes, then invert onto rack and cool completely.
- Make Buttercream Frosting: Beat butter until soft, then mix in powdered sugar with spatula to moisten before whipping with mixer. Add vanilla and beat until smooth. Add milk if too stiff, then mix in green food coloring thoroughly. Transfer to piping bag with large star tip.
- Prepare Cake Layers: Level cake top, slice horizontally into two layers. Use round cutter to cut nine circles from each layer.
- Assemble Cake Jars: Place sprinkles at bottom sides of each jar for decoration. Insert first cake circle, pipe buttercream layer from sides to center, add more sprinkles on sides. Top with second cake circle, then pipe final buttercream swirl. Add sprinkles all over top.
- Add Witch Legs Decoration: Use wooden skewer to make two holes in top buttercream layer, insert witch legs into holes to complete decoration.
Notes
- Make fondant legs a day ahead to ensure they set firm and avoid bending after assembly.
- Use a fondant smoother instead of hands to roll orange fondant strips for smoother finish.
- In humid environments, add CMC powder and work in air-conditioned room or insert lollipop sticks into legs to prevent sagging.
- Dampen brush lightly to apply water as glue; too much water causes sogginess and color bleeding.
- Keep black fondant balls covered while shaping shoes; knead if they feel dry.
- Shoes take longer initially but speed up with practice.
- Add food coloring gradually for desired buttercream color; gel coloring is highly concentrated.
- Plan cutting layout on cake layers before cutting to fit nine circles per layer.
- Adding sprinkles at jar bottoms is optional, used to fill space if jar bottoms are uneven.
Nutrition
- Serving Size: 1 jar
- Calories: 650 kcal
- Sugar: 70 g
- Sodium: 150 mg
- Fat: 35 g
- Saturated Fat: 20 g
- Unsaturated Fat: 12 g
- Trans Fat: 0 g
- Carbohydrates: 80 g
- Fiber: 3 g
- Protein: 6 g
- Cholesterol: 140 mg

